When a bike chain keeps falling off, the temptation is to blame the chain and order a new one. That is often the wrong first move. A chain can drop because of derailleur limits, poor shifting technique, worn teeth, a bent hanger, excessive chain movement, or a problem with chain length.
The useful clue is not just that the chain came off. You need to know where it fell, what gear you were using, and what the bike was doing at the time. A chain dropping from the front chainring during a shift points to a different problem from one falling into the spokes while climbing.
The scope is troubleshooting a recurring chain drop for riders who can already balance and pedal – not a full rear-derailleur indexing tutorial or a deep chain-wear measurement guide.
First, work out where and when the chain falls off
Start by separating front and rear chain drops.
- Off the outside of the big chainring: the chain has overshifted toward the crank. The front derailleur outer limit, alignment, cable tension, or a damaged chainring is suspect.
- Off the inside of the small chainring: the chain has fallen toward the frame. Check the inner limit, derailleur position, chainline, and chainring condition.
- Into the spokes from the rear cassette: stop riding until you inspect it. The rear derailleur low-limit setting, hanger alignment, cassette, or wheel installation may be involved.
- Outward from the cassette toward the smallest sprocket: look at the rear derailleur high limit, hanger alignment, and derailleur position.
Now note when it happens. Does it occur while shifting at the front, shifting at the rear, climbing under load, sprinting, riding over bumps, or simply while coasting? Timing matters. A drop only during a front shift usually points toward setup or shifting technique. A drop while pedaling hard can expose chainline problems, worn teeth, drivetrain flex, or a chain that is not being controlled properly.
Write down the gear combination too. Small chainring to the smallest rear sprocket and big chainring to the largest rear sprocket create extreme chain angles. They are not automatically dangerous, but routinely using those combinations adds noise, friction, and sideways chain movement.
The most common reasons a bike chain keeps falling off
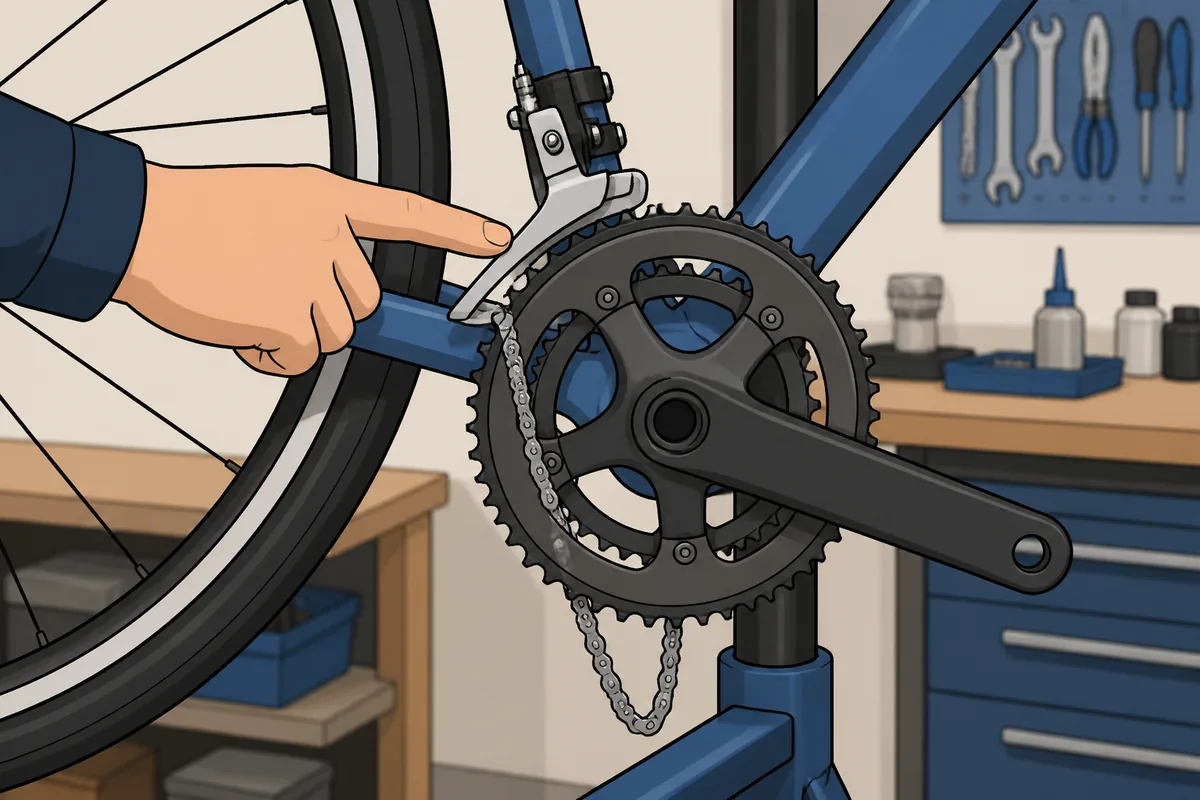
Front derailleur limit screws are a common culprit. These screws control how far the derailleur can move. If the outer limit is set too far out, the chain can overshift off the big ring. If the inner limit is set incorrectly, the chain may drop from the small ring. Limit screws are small, but they have a large opinion about where your chain is allowed to go.
Cable tension and derailleur alignment can create a similar symptom. A front derailleur cage that is not parallel with the chainrings, or one mounted too high or low, may not guide the chain cleanly. A loose cable, poor cable routing, or a derailleur knocked in transport can also leave the shift incomplete or excessive. If the gears are generally reluctant to shift, see our guide to Microshift vs Shimano rather than treating every problem as a limit-screw adjustment. The link is not a full indexing tutorial, so keep the diagnosis focused on the chain drop itself.
Heavy pedal pressure makes front shifts much less forgiving. If you force a shift while standing on a steep climb, the chain is under high tension while the derailleur is trying to move it sideways. Ease the pressure briefly and shift before the climb becomes steep. Most riders should change gear early rather than trying to bully the drivetrain through the shift.
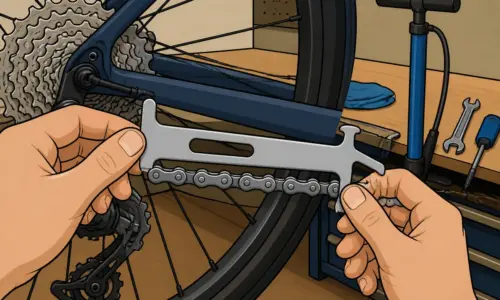
Worn or damaged drivetrain parts are another possibility. A worn chain can accelerate wear on the chainrings and cassette. Look for hooked or shark-fin-shaped teeth, damaged teeth, a stiff chain link, or a chain that has been neglected until it is visibly slack. A chain checker is a sensible, inexpensive diagnostic tool, but replacing the chain alone will not cure badly worn chainrings or cassette sprockets.
Other causes include a bent derailleur hanger, a loose chainring bolt, an incorrectly sized chain, or a loose cassette lockring. On rough ground, a rear derailleur clutch helps control chain movement and reduces chain slap. If the clutch is switched off, weak, or not fitted, the chain may bounce enough to drop. A clutch cannot compensate for incorrect chain length, severe wear, or poor derailleur limits, however.
What you can check at home before adjusting anything
Clean enough of the drivetrain to see what is happening. You do not need a showroom finish, but compacted grease and grit can hide a bent tooth, stiff link, or loose fastener.
- Check the chain routing. Make sure it passes correctly around the rear derailleur jockey wheels. A wrongly routed chain can shift badly and create excessive slack.
- Inspect the chain. Pedal the bike slowly and look for a stiff link that makes the chain jump. Keep fingers clear of the chain and chainrings while the cranks are moving.
- Look at the teeth. Hooked, pointed, bent, or missing teeth can throw the chain off, especially under power.
- Check for loose parts. Inspect chainring bolts, the cassette lockring, the rear wheel seating, and the derailleur mounting bolt.
- View the derailleurs from above. The front derailleur cage should sit sensibly parallel to the chainrings. A rear derailleur that visibly leans inward may indicate hanger damage.
- Check chain wear. Use a chain checker or ask a bike shop to measure it. If you also need a replacement, see our guide to the best bike chains.
A basic workstand makes inspection easier, but it is not compulsory. A chain tool is useful for chain repairs and replacement, while a chain checker is the more relevant purchase for this particular diagnosis. Do not buy a new derailleur before you have established that the derailleur is actually the problem.
Stop riding hard if the chain repeatedly jams between the chainring and frame, locks the crank, or drops between the cassette and spokes. A chain that is merely inconvenient can become a damaged wheel, frame, or derailleur if you keep applying full power.
Bike chain drop symptoms and the first thing to inspect
| What happens | First checks |
|---|---|
| Drops outside the big chainring | Front derailleur outer limit, alignment, cable tension, and big-ring teeth |
| Drops inside the small chainring | Inner limit, derailleur position, chainline, and small-ring teeth |
| Drops into the spokes | Rear low limit, hanger alignment, cassette lockring, and rear wheel seating; stop riding first |
| Drops outward from the cassette | Rear high limit, hanger alignment, derailleur position, and cable setup |
| Drops over bumps | Rear derailleur clutch, chain slack, chain length, and drivetrain wear |
Fixes that match the symptom
If the chain falls outside the big chainring, inspect the front derailleur outer limit and check that the cage is aligned with the chainrings. Look for a bent big-ring tooth and confirm that the chainring bolts are tight. Cable tension may also need attention, but do not use cable adjustment to disguise a derailleur that is mounted incorrectly.
If it falls inside the small chainring, check the inner limit, cage position, and chainline. This is especially likely when shifting to the small ring under heavy load. Back off the pedal force during the shift and make the change before the climb gets steep.
If it drops from the cassette into the spokes, stop. Check that the rear wheel is properly seated and that the cassette is not loose, but expect the rear derailleur low-limit setting or a bent hanger to be involved. A limit-screw adjustment may prevent another drop, but it will not straighten a damaged hanger.
If it drops outward from the cassette toward the smallest sprocket, inspect the rear derailleur high-limit setting, hanger alignment, and derailleur position. Incorrect cable tension or routing can also prevent the derailleur from reaching the correct position. This is a job where random screw-turning can make matters worse, so make small changes and check the result carefully.
If drops happen over bumps, check whether the rear derailleur clutch is switched on and functioning. Also inspect chain length, chain wear, and the overall condition of the drivetrain. A clutch controls chain movement; it does not repair a bent tooth or compensate for a chain that is several links too long.
If drops happen only during hard climbing shifts, change technique first. Shift earlier, reduce pedal force for a moment, and avoid forcing the front derailleur while standing on the pedals. This costs less than a replacement drivetrain and usually works better than pretending every climb is a strength test.
The safest default order is: identify the direction and trigger, inspect for damage and wear, check alignment and limits, then replace only the parts that are actually worn. Limit-screw problems and setup issues are more likely than exotic component failure.
When the problem needs a bike shop
Get a shop to assess the bike if the derailleur hanger looks bent, the chainring is visibly warped, the frame or spokes have been damaged, or the chain repeatedly jams. The same applies if basic inspection and careful setup do not stop the drops.
A limit-screw adjustment is not a substitute for hanger alignment, correct cable routing, or a properly mounted derailleur. Shops can also check whether the chain, cassette, and chainrings have worn together. Replacing only the chain may leave you with skipping or further drops if the other parts are already damaged.
Treat any drop toward the spokes, chain suck that locks the crank, or unpredictable shifting as a stop-riding symptom before your next hard ride. The cost of a diagnosis is usually much lower than the cost of a derailleur in the spokes.
How to reduce chain drops on future rides
- Shift before a climb becomes steep, then ease pedal pressure briefly during the front shift.
- Avoid routinely using extreme cross-chain combinations.
- Keep the chain clean and lubricated, and replace it before wear accelerates damage elsewhere.
- Check the drivetrain after a crash, transport incident, wheel removal, or impact to the derailleur.
- Use a chain checker when wear is in doubt – see how to check bike chain wear – but remember that wear is not automatically the whole diagnosis.
Work through the problem in order: identify where the chain lands, note what triggered the drop, inspect for damage and wear, then check limits and alignment. Only after those checks should you replace a chain, chainring, cassette, or derailleur. If the main complaint is poor shifting rather than the chain leaving the bike, use the separate bike gears won’t shift diagnosis.
Common questions about dropped chains
Can hard pedaling make a bike chain fall off?
Yes. Heavy pedal pressure can make a front shift overshoot, and a worn or poorly adjusted drivetrain is more likely to drop the chain under load. Ease pressure briefly and shift before the climb gets steep.
Is a dropped chain always caused by a worn chain?
No. Limit settings, derailleur alignment, cross-chaining, damaged teeth, incorrect chain length, and a bent hanger are also common causes. Check the symptom and direction before replacing parts.
Can I keep riding if my chain falls off toward the spokes?
It is safer to stop and inspect it. A chain repeatedly dropping between the cassette and spokes can damage the wheel, derailleur, or frame, particularly if the derailleur limit is wrong.

I’ve spent way more time in the bike trade than anyone should reasonably want to. In that time I’ve wanted to make cycling jargon and marketing easier to cut through to help people get the bike of their dreams.
When I’m not writing about bikes, I can be seen out bikepacking on single speed bikes or teaching kids how to ride.