On our mountain bikes, our brakes are arguably one of the most important parts and need to be kept well maintained for a safe, fun ride.
Brakes come in lots of sizes and styles but for today we’ll be talking about Shimano hydraulic disc brakes. Hydraulic disc brakes are the standard today for most cyclists and are easy to tune to your liking with the right knowledge.
Brake Pads
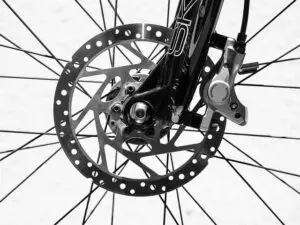 The first step to servicing your brakes is to make sure that your pads still have good wear on them.
Firstly, you want to remove your wheel (being extra careful not to compress your brakes when there’s nothing between the pads.) With the wheel off, you then need to remove the split pin, by compressing the ends together and sliding it out. You can then drop your pads out and take a look.
If they still have a good layer of pad left, then they’re good to go but if you can see metal through them (or if they are really thin) then you should get new pads. When buying new pads, there are different sizes, so visit a bike shop with your old pads if you aren’t sure what they are.
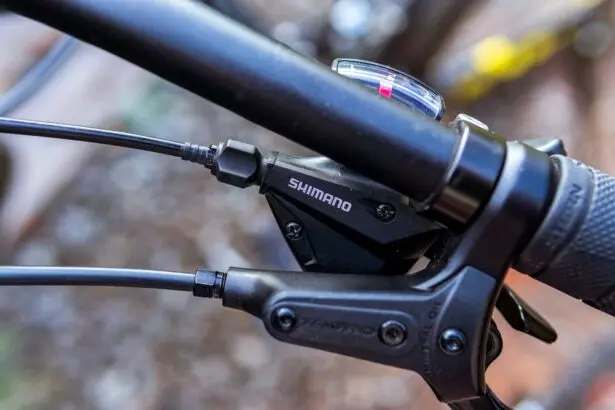
Bleeding
Now that you have checked your pads, it’s a good idea to bleed your brakes. It’s good practice to insert a block between the pistons so that they don’t compress while you bleed. In your bleed kit, there will be a syringe and a reservoir.
You also need the correct kind of oil for your brakes and for Shimano this usually means their mineral oil, but other brands may use DOT fluid.
On the caliper of your brakes, there is a small bolt with a rubber cap for the syringe to go onto. Remove the rubber cap and after filling your syringe with oil, push the hose on. At the lever, there will be a flat bolt, likely on top of your main lever body.
Angle the lever so that the bolt is flat and then remove it and replace it with the reservoir (adding some oil here doesn’t hurt!) Now, back at the caliper, loosen the bolt until you can push oil into the system.
You should start to see air bubbles and old, black oil coming out into the reservoir. It’s a good idea to flick and shake the cables, just to release any bubble trapped in pockets or kinks.
You can also tap and pull the lever to get any bubbles out that could be trapped there too. Once you are satisfied that no more air is coming out, you can stop and tighten the bolt once again.
You can now remove the syringe and replace the rubber cap. At the lever, you can push in the bung and unscrew the reservoir, being careful not to spill oil or let any air back in and then tighten down the bolt again.
Now that the brakes are bled, clean any excess oil off the bike, especially on the calipers as any oil that gets on the brakes can lubricate them and cause them to squeal or become ineffective.
If you’re using old pads, it’s a good idea to clean both them and the rotor with brake cleaner and a shop towel or cloth. If you’re using new pads, clean the rotor thoroughly and then replace the pads and re-attach your wheels.
Bedding in new pads
Now that you have a set of fresh pads, you need to bed them in. I find this easiest to do on a slight hill. When you bed in your brakes, you want to be very gentle as over-use before bedding them in can cause them to glaze, which will mean they no longer work as well. I like to repeat this for around 5-10 minutes as I find that this guarantees that the brakes are bedded nicely.
Lever adjustment
Ok, so you have fresh oil, and you’ve bedded in your brakes to perfection, ready to hit the trails right? Not so fast, a lot of performance can be gained by adjusting your levers to your preference.
The first step to adjusting your levers is to loosen them and slide them in, away from your grips. Get into a comfortable riding position and slide them back until your single index finger can sit comfortably on the lever. You shouldn’t have to pull with more than one finger as this can reduce your grip on the bars.
Now, you need to angle your levers. Still loosened, tip them back and forth until you find a comfortable position for your hands and wrists to sit in.
I like to have my levers straight out in front of my bars, parallel to the ground as I find this transfers weight off my hands and more through my wrists, which helps with arm-pump as well as making it easier to keep your hands on the bars over rougher terrain.
I recommend that you choose a position that is comfortable for you however, since everyone’s hands work differently.
The final step is to adjust how far out your lever sits from the bar, which is usually adjustable by a small screw on the lever or sticking out of the end of the lever.
The further away your lever sits, the more leverage you can get and the harder you can break, but if you’re hands aren’t as big, it can be useful to reduce this gap, so that your finger is in a position where it isn’t strained and is comfortable.
Ready to ride!
Now you have fresh oil, fresh pads, and perfectly placed levers to get the maximum efficiency and comfort out of your brakes, so it’s time to hit the trails and enjoy them. Just be careful as now that you have new brakes, they might stop a bit harder than your old ones!
Photos: Pixabay, Depositphotos

Tim Hunt is an amateur mountain biker from the Surrey Hills area of England. He has been riding and building for many years in and around the Surrey Hills and loves fast and techy descents!

