Getting your saddle fore aft position right is usually a matter of millimeters, not dramatic saddle shuffling. Moving the saddle along its rails changes where your hips sit in relation to the bottom bracket, pedals, handlebars and the bike’s contact points.
This guide assumes your saddle height is already broadly correct and that you can pedal and balance normally. It covers fore-aft position, also called saddle setback, only. For height methods and adjustments, see our guide to how to set bike saddle height.
What saddle fore-aft position changes
Fore-aft position means sliding the saddle forwards or backwards in the seatpost clamp. It is different from raising or lowering the saddle. Moving it changes several relationships at once, even when the saddle height measurement itself has not changed.
Moving the saddle forwards generally brings your hips closer to the handlebars and shifts more of your weight towards the front wheel. Moving it backwards can make the reach feel longer, place your hips behind the bottom bracket and alter the bike’s front-to-rear weight balance.
These changes affect how your knees track over the pedals, how stable your hips feel and how much room you have to rotate your pelvis. They can also alter your perceived pedaling leverage. That does not mean there is one magic setback number waiting to be discovered with a plumb line. Riders, saddles, crank lengths and frames all differ.
Set the saddle height and tilt broadly first. If you change height, tilt and setback together, you will not know which adjustment helped. Fore-aft should also not be used to compensate for a frame whose basic reach or proportions are wrong. For that bigger picture, see bike stack and reach explained.
What you need before adjusting the saddle
You do not need a laboratory. Put the bike on level ground or in a stable workstand, and gather:
- The correct hex key or bit for the saddle-clamp bolts
- A torque wrench suitable for the manufacturer’s specified torque
- A tape measure
- Masking tape and a marker
- A phone for side-on video, if somebody can record safely
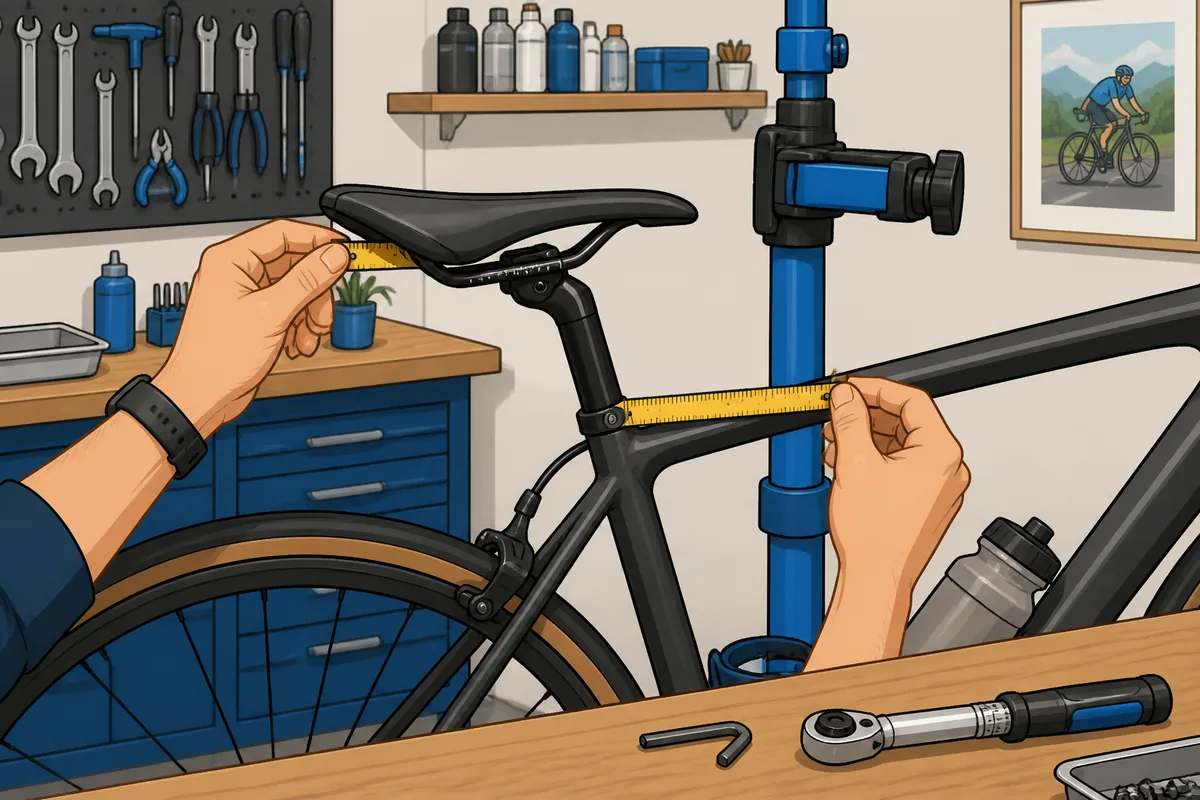
Before loosening anything, record the current setup. Mark the saddle rail near the clamp with masking tape, and note the rail markings or the distance from a fixed point on the bike to the saddle nose. Also record the current saddle height and tilt if you know them. The measurement does not need to be laboratory-perfect; it needs to let you return to the previous position.
Check how much usable rail remains in each direction. Saddle rails usually have marked limits, and those limits are not decorative suggestions. Confirm that the clamp is gripping the permitted section of the rails, and check the saddle and seatpost instructions for bolt torque. Rail designs and clamp requirements vary.
Keep saddle tilt unchanged while evaluating fore-aft. A nose-up or nose-down change can make the same setback feel completely different and muddy the result.
How to set saddle fore-aft position step by step
1. Establish a baseline
Secure the bike and write down why you are changing the saddle. Perhaps you feel too stretched, slide forwards during efforts or cannot keep your hips stable. This is more useful than deciding that the saddle simply looks a few millimeters wrong.
Record the rail-clamp position, saddle height, saddle tilt and any useful measurement from the saddle nose to a fixed point. If you use phone video, record a short side-on clip in your normal riding position before making the change.
2. Loosen the clamp carefully
Loosen the saddle-clamp bolts just enough for the saddle to slide. Do not remove the bolts or separate the clamp hardware unless the seatpost design requires it. On a two-bolt post, loosen each bolt evenly so you do not put unnecessary strain into the clamp.
If a bolt is seized or the clamp will not move normally, stop rather than applying heroic levels of force. Damaged threads and crushed carbon rails are expensive ways to learn that “one more turn” was not a maintenance strategy.
3. Move the saddle in a small increment
Start with about 3-5 mm in one direction. Marking the rail before moving it makes the change easier to see and repeat. Align the saddle straight, check that its tilt has not changed, and tighten the clamp evenly to the specified torque.
Do not make a large move because the first position feels imperfect. A 10 or 15 mm jump changes reach, weight distribution and leg position enough to make the result difficult to interpret. Small steps are slower, but they give you information rather than a new mystery.
4. Use a reference, not a rule
A side-on view can help you compare the new position with the old one. You can also use KOPS, short for knee-over-pedal-spindle, as an optional starting check. With the cranks level, KOPS looks at whether the front of the knee is roughly above the pedal axle.
That is a reference, not a law of cycling. KOPS does not account for every rider’s proportions, flexibility, crank length, riding discipline or frame geometry. Your knee does not know what a plumb line is, and a position that misses the line can still be stable and comfortable. Do not move the saddle solely to satisfy the measurement.
5. Ride and assess one change
Ride on familiar terrain at your normal intensity. A forward move may make the reach feel shorter and place more weight over the front wheel. A backward move may lengthen the reach and change how your hip and knee relationship feels through the pedal stroke. These are common effects, not diagnoses.
Pay attention to whether your hips remain stable, whether you keep sliding on the saddle and whether the position feels controlled when pedaling steadily and applying more force. Do not change another fit variable during the same test. If you alter saddle height, cleats, stem length and bars all at once, you have conducted an experiment with no control group and a very expensive conclusion.
Give the position more than ten minutes if possible. A setup that feels immediately good can become uncomfortable over a normal ride, while a small unfamiliar change may need time to assess fairly.
How to confirm the position on the bike
After each adjustment, use the same short checklist:
- Do your hips stay stable rather than rocking or searching for support?
- Is pedaling smooth at your usual cadence and effort?
- Do you remain comfortably supported without repeatedly sliding forwards or backwards?
- Does the reach feel manageable without changing your whole riding posture?
- Have you developed any new knee, hip or lower-back irritation?
- Is the saddle secure and within its marked rail limits?
A side-on phone video is useful for comparing two positions if the camera, gear and riding posture are similar. Treat it as a comparison tool, not a precision verdict. Camera perspective can distort what you think you are seeing.
| Check | What it tells you |
|---|---|
| Rail position | Shows how far you moved and whether you remain within the safe adjustment range. |
| Reach and weight balance | Highlights whether the front end feels too loaded or the bars too far away. |
| Pedaling feel | Shows whether the new relationship to the pedals feels smooth and controlled. |
| Hip stability | Helps identify whether you are staying supported or constantly repositioning yourself. |
| Symptoms | New or worsening pain, numbness or irritation is a reason to stop and reassess. |
| Clamp security | Confirms that the saddle has not slipped after repeated adjustments. |
Confirm the position over several ordinary rides before making another change. If the saddle is at the front or rear rail limit and the setup still feels wrong, stop moving the saddle. The problem may be saddle shape, frame size, seatpost offset, stem length or another fit variable. Buying a longer seatpost and hoping for geometry by optimism is not a reliable fit system.
Common mistakes and when to get help
The most common mistake is using fore-aft to solve a different problem. It should not substitute for correcting saddle height, handlebar reach or cleat position. Those adjustments interact with setback, but they are not interchangeable.
Do not copy another rider’s setback measurement. Two saddles with different lengths or shapes can put your actual sitting position in different places even when the clamp measurement is identical. Body proportions, crank length, frame geometry and riding style also change the useful position.
Avoid large changes because one knee looks slightly ahead of the other, or because a single KOPS check disagrees with your preferred setup. Small left-right differences are not automatically a reason to redesign the entire bike. Look for repeatable comfort and control instead.
Stop experimenting if you have persistent or worsening pain, numbness, instability or a sudden loss of control. A qualified bike fitter is especially useful when symptoms remain after small, controlled changes, when you have a history of injury, or when the saddle cannot be positioned safely within its rail limits. Medical advice may also be appropriate for ongoing or significant symptoms.
FAQs
How much should I move my saddle fore or aft at a time?
Start with about 3-5 mm, record the change and test it before moving again. Large jumps make it difficult to tell which position actually helped.
Should my knee be directly over the pedal axle?
That can be a useful starting reference known as KOPS, but it is not a universal fit rule. Comfort, control, pedaling stability and the rest of the bike’s fit matter more than hitting one line.
What if the saddle is already at the end of its rails?
Do not exceed the rail markings. A rail-limit position can indicate that the saddle, seatpost, frame size or another fit variable needs attention rather than more saddle adjustment.
Once you have found a position that remains comfortable and controlled over normal rides, leave it alone long enough to judge it properly. Constantly chasing a theoretical number is how a useful fit turns into a moving target.

I’ve spent way more time in the bike trade than anyone should reasonably want to. In that time I’ve wanted to make cycling jargon and marketing easier to cut through to help people get the bike of their dreams.
When I’m not writing about bikes, I can be seen out bikepacking on single speed bikes or teaching kids how to ride.