If you run tubeless tires, how often to replace sealant is not a question with one magic number. A useful starting point is to check the sealant every 2-3 months and refresh it roughly every 3-6 months when you ride regularly.
That interval moves faster in hot, dry conditions, with heavy use, porous new tires or a bike stored in direct sunlight. It can move slower in mild conditions, but waiting for a puncture to expose dried sealant is poor maintenance. A calendar reminder is more reliable than hoping the tire will complain politely.
Assumes the tire is already set up tubeless. Covers sealant maintenance – not measuring exact quantities, seating beads or plugging punctures.
The short answer: refresh tubeless sealant every few months
There are two jobs here: checking the sealant and replacing it. A check may show that liquid sealant is still moving around inside the tire. Replacement is needed when the sealant has mostly dried, formed rubbery clumps or stopped doing its job.
For a regularly ridden road, gravel or mountain bike, check every 2-3 months and plan on refreshing the sealant around every 3-6 months. That is a starting point, not a warranty printed on the sidewall. Different formulas dry at different rates, and the tire itself affects how quickly sealant disappears.
A tire holding air does not prove the sealant is fresh. It may simply mean you have not had a puncture recently. On the other hand, stable pressure is a reason to check calmly, not to empty perfectly usable sealant every few weeks. That would be maintenance by superstition, and sealant is already messy enough.
| Riding or storage conditions | Practical maintenance default |
|---|---|
| Regular riding in mild conditions | Check every 2-3 months; refresh around every 3-6 months. |
| Hot, dry conditions or direct sun | Check monthly and expect to refresh sooner if liquid is disappearing. |
| Heavy use, frequent punctures or porous new tires | Check monthly during busy riding periods; inspect after repeated sealant use. |
| Bike stored for several months | Check before storage and again before the first serious ride. |
How climate and use change the replacement interval
Heat and dry air shorten sealant life. The liquid portion evaporates more quickly, especially when the bike sits in direct sunlight or a hot shed. If you live somewhere warm, a monthly check is a sensible default rather than an overcautious one.
Cold weather can slow drying, but winter storage still deserves attention. A bike left unused for months may come back with a layer of dried latex inside the tire and very little usable liquid. Check it before the first long ride instead of discovering the problem halfway through a remote route.
Frequent riding also changes the schedule. Every small puncture can consume some sealant, even if you never notice a complete flat. A tire that has dealt with repeated thorn holes, sharp gravel or rough trail debris may need attention sooner than the calendar suggests.
New tires can be more porous than established ones. Their casing may absorb sealant while the system settles, which can make the tire lose air and consume liquid faster during the first weeks. That is not automatically a fault, but it is a reason to inspect the sealant rather than simply adding air and moving on.
High-volume mountain-bike tires hold more sealant overall, but their larger volume does not make the sealant immune to drying. Road tires can need equally regular checks because a small pressure loss is more noticeable at their higher operating pressures. Tire volume changes the amount of sealant involved; it does not remove the need for maintenance.
Use a longer interval only when the bike is used lightly, stored well and holding pressure consistently in mild conditions. Even then, check at the start and end of a long storage period. The safest habit is short and boring: inspect the system before you need it to seal a puncture.
Signs your tubeless sealant needs replacing
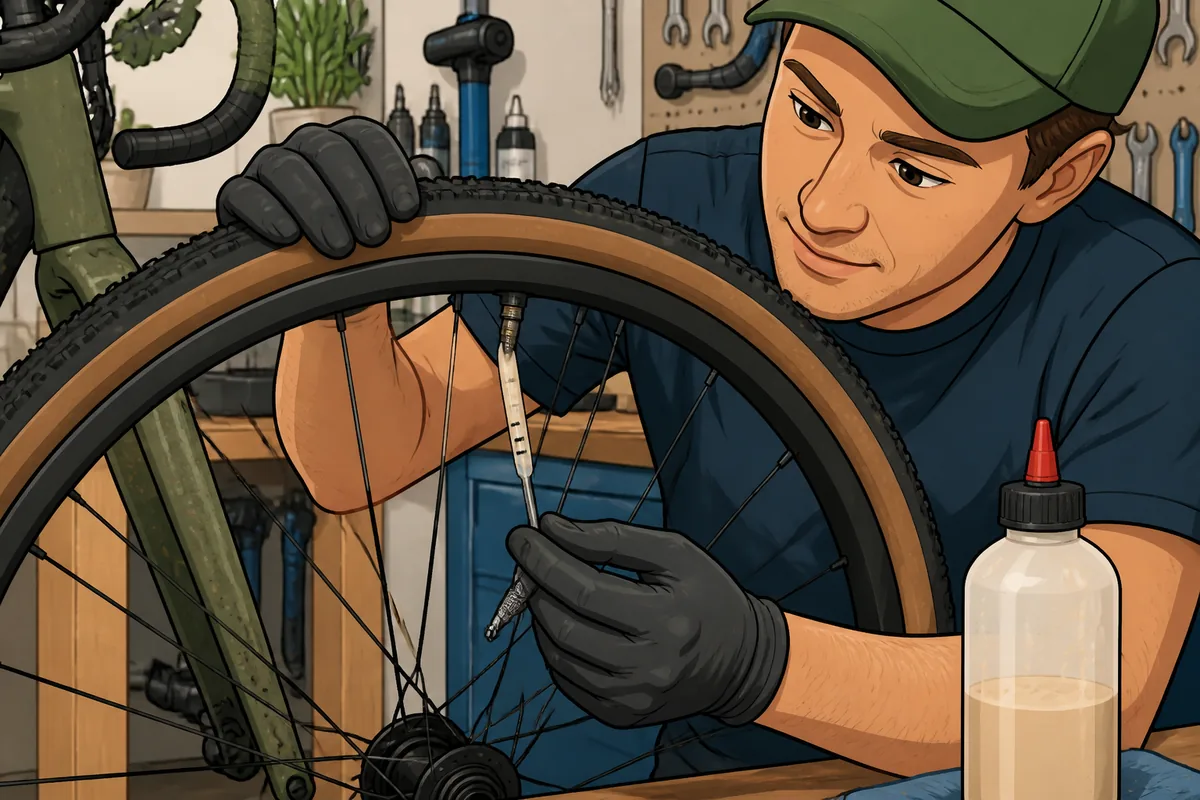
The clearest sign is what you find through the valve. Remove the valve core and check for liquid sealant with a suitable dipstick or another method recommended by the sealant manufacturer. If you find little or no liquid, only thick blobs or a rubbery residue, the tire needs fresh sealant rather than another optimistic spin.
Other warning signs include:
- The tire is losing air faster than it used to without an obvious new puncture.
- Small fresh punctures no longer seal reliably.
- You can hear a persistent hiss or see wet sealant spots after a minor impact.
- The tire contains dried flakes, a latex skin or clumps instead of liquid that can move around the casing.
- The system has been stored for months and has not been checked before use.
Low pressure alone is not proof that the sealant has failed. A loose valve core, damaged rim tape, bead leak, sidewall cut or ordinary puncture can produce the same symptom. If your tubeless bike tire is losing air, inspect the whole system before blaming the bottle.
A practical sealant maintenance routine
Put a quick check on your calendar every 2-3 months. Add another check before a major event, a remote gravel ride or the first ride after a long period off the bike. You do not need a ceremonial workshop afternoon; a few minutes can prevent a predictable nuisance.
- Remove the valve cap and, with the valve positioned appropriately, remove the valve core using a valve-core tool.
- Use a sealant dipstick or a manufacturer-approved visual check to confirm that usable liquid is present.
- If the sealant is mostly dry, contaminated or heavily clumped, remove the old residue as far as practical rather than repeatedly burying it under new liquid.
- Add compatible fresh sealant according to the tire and sealant manufacturer’s guidance.
- Spin and gently shake the wheel so the liquid coats the inside of the casing.
- Inflate to a sensible operating pressure and check for leaks before setting off.
Do not treat a valve check as a complete inspection. It tells you whether usable liquid is present, but it will not diagnose damaged rim tape or a leaking valve. If the tire is already losing air, you still need to check the wider system.
For the correct quantity, use our guide to how much tubeless sealant to use rather than guessing from a generic chart. Tire volume and the sealant manufacturer’s instructions matter more than a universal number.
Gloves are sensible, and ventilation helps when you are cleaning old residue. Dried latex is messy, but it is not mechanically mysterious. Give it time to soften where appropriate and avoid turning the rim bed into a chemistry experiment.
When adding more sealant is not the answer
Repeatedly topping up mostly dried sealant is usually poor value. You can build a heavy layer of dried latex inside the tire while still leaving too little usable liquid to seal the next puncture. When the old material is spent, clean out what you reasonably can and start again with fresh, compatible sealant.
If fresh sealant does not solve the air loss, stop blaming the bottle. Inspect the rim tape, valve, bead, sidewall and casing for the actual leak. Our guide to why your tubeless bike tire is losing air is the better next step.
Before a long event, remote route or trip, refresh neglected sealant rather than gambling on it. A valve-core tool, sealant dipstick and a compatible product such as Stan’s NoTubes Sealant or Orange Seal Endurance are useful maintenance items, but no brand makes an ignored tire immune to time.
If you are choosing a formula, compare options in our guide to the best tubeless sealant. Compatibility matters more than collecting half-used bottles.
Frequently asked questions
Can tubeless sealant last a year?
It can in some mild, low-use setups, but you should not assume it has. Check for usable liquid before relying on the tire, especially after storage or in a hot climate.
Do I need to replace sealant if my tubeless tires are holding air?
Not necessarily, but stable pressure does not prove the sealant is still fresh. Check for liquid periodically rather than waiting for the first failed puncture.
Can I mix different tubeless sealants?
Avoid mixing formulas unless the manufacturers say they are compatible. Different latex, ammonia and additive combinations may separate or perform poorly.
For most riders, the sensible default is simple: check every 2-3 months, refresh every 3-6 months, and shorten that schedule in heat, heavy use or long storage. If the sealant has dried, replace it. If fresh sealant does not stop the leak, investigate the tire system instead of pouring in more of the same.

I’ve spent way more time in the bike trade than anyone should reasonably want to. In that time I’ve wanted to make cycling jargon and marketing easier to cut through to help people get the bike of their dreams.
When I’m not writing about bikes, I can be seen out bikepacking on single speed bikes or teaching kids how to ride.