Use the chart below as a starting point for common stem, seatpost, brake and other fasteners (Nm and in-lb) – then confirm the manufacturer’s printed value. One extra turn can damage carbon, strip alloy or crush a clamp; “tight by feel” is a poor method on lightweight parts.
The exact torque value printed on the component, frame, clamp, or service manual overrides every generic chart, including this one. Figures below are reference ranges only.
This reference is for routine bicycle assembly and maintenance – not damaged carbon, suspect threads or proprietary fittings where adding torque is not a repair.
How to use this bike bolt torque chart
Torque is the rotational force applied to a fastener. Bicycle specifications are normally given in newton metres (Nm). Your torque wrench may use Nm, inch-pounds (in-lb), or both, so check the scale before you start. Inch-pounds means inch-pounds, not foot-pounds; confusing the two can apply dramatically more force than intended.
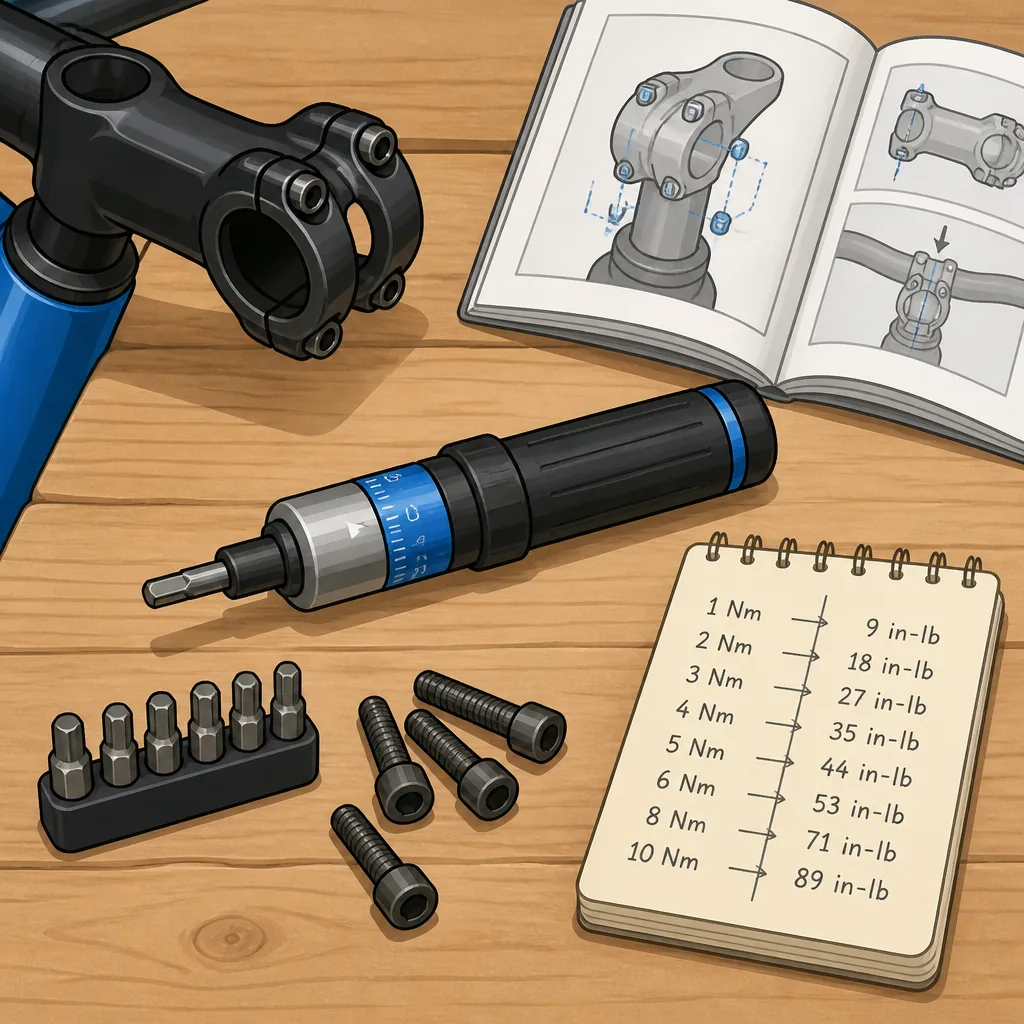
As a quick conversion, 1 Nm is approximately 8.85 in-lb. To convert the other way, divide inch-pounds by 8.85. Keep the Nm figure as your primary reference and treat converted in-lb values as rounded guidance. For example, 5 Nm is about 44.3 in-lb.
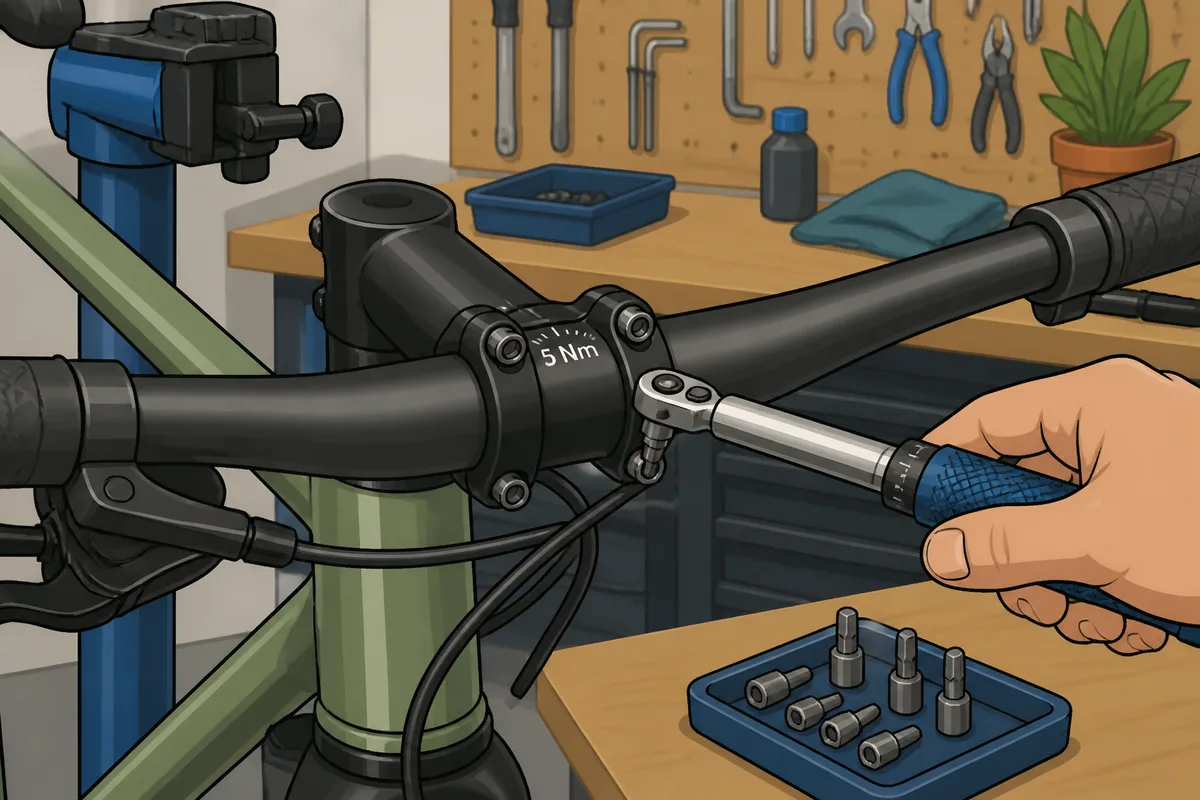
Look for a torque marking on the part first. Stem faceplates, seatpost clamps, brake components, bottle-cage bosses, and some handlebars have the value molded, printed, or engraved near the fastener. If you cannot find it, check the owner’s manual or the manufacturer’s technical documentation. Shimano dealer manuals, SRAM service documents, and general torque guidance from Park Tool all reinforce the same point: apparently similar components can have different specifications.
A generic chart can only provide typical ranges. The correct setting depends on bolt diameter, material, thread pitch, the strength of the frame or component, clamp shape, and friction at the threads and contact surfaces. Grease, threadlocker, washers, corrosion, and contamination can all change how much clamp load a given torque produces.
When a component gives a range, stay within that range and do not automatically choose the top number. If the specification says 4-6 Nm, use a suitable setting within that range after the component is correctly aligned and seated. On carbon contact points and lightweight alloy parts, “tight enough by feel” is a poor method because damage can occur before the bolt feels obviously over-tight.
Bike bolt torque chart for common components
The table covers common external fasteners found on road, gravel, hybrid, mountain, and commuter bikes. Treat every entry as a general starting point only. The manufacturer’s specification for your exact component and frame always takes priority. Some rows, especially brakes, pedals, saddle clamps, and pinch bolts, vary considerably between brands and generations.
How to read this table: find the fastener type, use the Nm column as primary, treat in-lb as approximate conversion, and stop if your part lists a lower maximum.
| Component or fastener | Typical guidance in Nm | Approximate in-lb |
|---|---|---|
| Stem faceplate bolts | 4-6 Nm, often 5 Nm | 35-53 in-lb |
| Stem steerer clamp bolts | 4-6 Nm | 35-53 in-lb |
| Handlebar control clamps | 2-4 Nm | 18-35 in-lb |
| Seatpost clamp bolt | 4-7 Nm | 35-62 in-lb |
| Saddle rail clamp bolts | 8-12 Nm, where specified | 71-106 in-lb |
| Bottle-cage bolts | 3-5 Nm | 27-44 in-lb |
| Rear derailleur mounting bolt | 8-10 Nm, where specified | 71-89 in-lb |
| Derailleur cable pinch bolt | 5-7 Nm, where specified | 44-62 in-lb |
| Brake caliper or adapter bolts | 6-8 Nm, only as a general reference | 53-71 in-lb |
| Brake lever clamp | 4-6 Nm | 35-53 in-lb |
| Rack and fender mounts | 3-6 Nm | 27-53 in-lb |
| Pedal threads | 35-55 Nm, where specified | 310-487 in-lb |
Manufacturer specification overrides this table. Confirm the current value for the exact component, frame, bolt, and installation condition before working on the bike. If the manufacturer gives a single value rather than a range, use that value. If the documentation gives a lower maximum than this table, the lower maximum wins.
Five Nm is common for some small clamps, but it is not a standard bicycle-bolt setting. A bottle cage and a pedal use very different fasteners and interfaces, so applying one favorite number everywhere is guesswork with a hex key.
Clamping bolts need a different approach from pinch bolts
Stem faceplate, seatpost, and brake clamp bolts secure a component by creating controlled clamping force around another part. The right torque depends heavily on the contact surfaces and clamp design. Small derailleur cable pinch bolts grip a cable directly and can be damaged by surprisingly little torque. Do not assume that a physically larger-looking bolt is automatically more tolerant of over-tightening.
Stem faceplate bolts deserve particular care. Bring each bolt up gradually and evenly in a cross pattern rather than tightening one bolt fully before touching the others. Maintain the faceplate gap specified by the stem manufacturer; on many stems, the gap should be even rather than closed hard at one edge. Torque does not correct a misaligned bar or poorly seated faceplate.
What this chart does not cover
Bottom brackets, cassette lockrings, crank bolts, suspension pivots, internal headset parts, and proprietary linkage hardware should be set using the component or frame manufacturer’s documentation. Brake mounts and pedal threads also deserve an exact check because thread size, washer use, mounting design, and installation method vary.
Carbon, alloy, steel, and titanium need different judgment
Material is only part of the torque equation. Bolt diameter, thread pitch, clamp design, inserts, washers, and interface friction all affect the resulting clamping force. Two similar-looking parts may require different settings.
Carbon handlebars, stems, seatposts, frames, and seat clamps deserve particular care. Carbon can be damaged by excessive clamp load even when the bolt still feels normal as you tighten it. Use the value printed on the component or specified by the frame maker, not a familiar number from another bike.
Carbon assembly paste may help a component grip at a lower torque, but use it only where the component manufacturer permits it. It is not a universal cure and should not replace proper fit or alignment. Keep it away from threaded interfaces unless the instructions specifically call for it.
Titanium and stainless-steel fasteners can be prone to galling. Grease or anti-seize changes friction and therefore changes the clamp load produced at a given torque. Threadlocker changes the situation too. Follow the component maker’s instructions rather than automatically lubricating every bolt.
The practical judgment is straightforward: a torque wrench is most valuable at carbon contact points and on small fasteners, not merely on expensive bikes. If a part is cracked, stripped, cross-threaded, visibly damaged, or creaking, find the cause first instead of tightening harder.
Torque conversions: Nm to in-lb and in-lb to Nm
The main chart should be read in Nm. If your tool uses inch-pounds, the conversions are:
in-lb = Nm x 8.8507
Nm = in-lb x 0.1130
| Torque in Nm | Approximate torque in in-lb |
|---|---|
| 2 Nm | 17.7 in-lb |
| 3 Nm | 26.6 in-lb |
| 4 Nm | 35.4 in-lb |
| 5 Nm | 44.3 in-lb |
| 6 Nm | 53.1 in-lb |
| 7 Nm | 62.0 in-lb |
| 8 Nm | 70.8 in-lb |
| 10 Nm | 88.5 in-lb |
| 12 Nm | 106.2 in-lb |
| 15 Nm | 132.8 in-lb |
| 20 Nm | 177.0 in-lb |
| 30 Nm | 265.5 in-lb |
| 40 Nm | 354.0 in-lb |
The figures are rounded for practical use. If your tool cannot be set to the exact converted value, do not round upward past a stated component maximum. When in doubt, use the manufacturer’s primary unit or a tool that reads it directly. Check the abbreviation carefully: in-lb means inch-pounds, not foot-pounds.
How to tighten a bicycle bolt correctly
- Clean and inspect. Look for damaged threads, distorted washers, cracked clamps, or the wrong bolt length.
- Confirm the specification. Check the component marking and current service documentation.
- Seat the component correctly. A stem faceplate, saddle rail, seatpost, brake caliper, or rack mount must sit squarely.
- Use the instructed treatment. Apply grease, anti-seize, threadlocker, or carbon paste only where specified.
- Start the threads by hand. This helps prevent cross-threading.
- Use the correct bit and setting. A properly seated hex or Torx bit prevents slipping and rounding.
- Tighten gradually. Alternate multi-bolt clamps and increase torque in stages.
- Check the result. Verify alignment, brake operation, shifting, saddle security, and handlebar or control position before riding.
A click-type wrench signals when the selected torque is reached. A beam wrench shows the applied torque continuously and is mechanically simple. A preset driver, such as a 5 Nm driver, is quick for one common setting but less flexible.
Use and store adjustable click wrenches according to the tool maker’s instructions. Many should be returned to their lowest marked setting for storage, but follow the specific manual. Torque wrenches are precision tools, not breaker bars; use a normal wrench for loosening unless the torque tool is specifically rated for it.
Where generic torque numbers are most likely to mislead you
Treat these as documentation-first jobs:
- Carbon steerers, handlebars, stems, seatposts, and seat clamps
- Suspension pivots, shock hardware, and linkage fasteners
- Brake mounts, caliper adapters, and brake-system hardware
- Crank bolts, chainring bolts, pedals, and bottom-bracket interfaces
- Proprietary seatpost clamps, frame inserts, and linkage hardware
The grade or diameter stamped on a bolt is not enough to determine the correct bicycle torque. Dry or lubricated threads, threadlocker, washers, captive nuts, corrosion, and threaded inserts can all change the result. Torque cannot compensate for poor fit, a missing washer, incorrect bolt length, damaged threads, or contamination on a braking interface.
If the specification is missing and the part is safety-critical, use the official service manual or consult a qualified mechanic.
Common torque mistakes that damage bikes
- Tightening by feel. Feel is not a measurement on lightweight components.
- Using a long lever to “make sure.” More leverage damages small bolts and inserts.
- Confusing Nm, in-lb, and ft-lb. Check both scales before tightening.
- Adding grease automatically. Lubrication changes friction and clamp load.
- Using a wrench outside its useful range. A large automotive wrench is usually poor for 2-10 Nm fasteners.
- Taking one clamp bolt straight to maximum. Load the clamp evenly instead.
- Retightening a creak repeatedly. Inspect movement, contamination, damage, and fit first.
If a component has a printed torque value, use it. If it has no visible value, look up the documentation before reaching for the wrench.
When you need a torque wrench, and what to buy
For most home bicycle maintenance, the safest starting choice is a small torque driver covering roughly 2-10 Nm. That range handles many stem, seatpost, control, and bottle-cage fasteners. A preset 5 Nm driver is convenient for components that specify exactly 5 Nm, but it cannot replace an adjustable tool.
An adjustable 2-14 Nm bicycle torque wrench gives more flexibility. A calibrated beam-style wrench is another sensible option with a simple visible reading. A tool is generally most useful near the middle of its operating range, so a large automotive wrench is usually the wrong first purchase for delicate bicycle bolts.
A torque wrench does not make incorrect assembly safe. You still need the right fastener, clean interfaces, correct alignment, and the manufacturer’s instructions. For a buying comparison, see our guide to best torque wrenches.
FAQs
What torque should I use for bicycle bolts?
Use the torque printed on the component or specified in its manual. A generic chart is only a starting point because clamp design, materials, threads, and lubrication vary.
How do I convert Nm to inch-pounds for bike bolts?
Multiply Nm by 8.8507. For example, 5 Nm is approximately 44.3 in-lb.
Do carbon bike parts need a torque wrench?
A torque wrench is strongly advisable for carbon handlebars, stems, seatposts, and clamps because overtightening can damage the part. Follow the component maker’s value; carbon assembly paste is not automatically required.
Can I use a car torque wrench on a bicycle?
Only if its range and accuracy suit bicycle fasteners. Many automotive wrenches are too high-range for small 2-10 Nm bicycle bolts.
Should bicycle bolts be greased before tightening?
Only when the manufacturer allows it. Lubrication changes thread friction and can alter clamp load at the same torque. Some fasteners require threadlocker instead.
What should I do if a bolt keeps coming loose at the correct torque?
Stop tightening harder. Check alignment, bolt length, threads, washers, contamination, and the manufacturer’s instructions. If the cause is not obvious, ask a qualified mechanic.
Is 5 Nm the standard torque for bike bolts?
No. Five Nm is common on some small clamps, but bicycle fasteners vary widely. Use the specific component specification.
Use this chart to narrow down a sensible starting point, then let the component or frame manufacturer have the final word. The right torque protects the part; the right inspection tells you whether the part should be tightened at all.

I’ve spent way more time in the bike trade than anyone should reasonably want to. In that time I’ve wanted to make cycling jargon and marketing easier to cut through to help people get the bike of their dreams.
When I’m not writing about bikes, I can be seen out bikepacking on single speed bikes or teaching kids how to ride.