Buying plus-size cycling clothing is not just a matter of finding a larger number on a size chart. Cycling garments have to work while you are bent over the bars, pedaling repeatedly and putting pressure through the saddle. A jersey that feels fine while you are standing in front of a mirror can pull across your shoulders on the bike, ride up at the front or leave its pockets hanging awkwardly.
The safest starting point for most recreational riders is a relaxed or standard-cut top and a stable pair of well-fitting bib shorts or padded shorts. Race-cut clothing and heavy compression are specialist choices, not the default. Fit, fabric stretch, chamois position and sensible construction matter more than an aggressive logo or a long list of treatments.
Covers clothing selection rather than weight loss, body measurement as a judgment of fitness, or medical treatment for skin irritation.
What makes plus-size cycling clothing different?
Casual clothing is generally designed around standing or walking. Cycling clothing is shaped around a forward riding position, with your arms reaching ahead, your back angled down and your legs moving repeatedly during a ride. That changes where fabric needs to stretch and where hems, seams and waistbands sit.
A cycling jersey usually needs useful room through the back and shoulders, while the front hem may be cut shorter so it does not bunch when you lean forward. The rear hem is often longer to cover you in the riding position. Pockets also need to stay accessible and reasonably stable when they contain a phone, keys or food.
Extended sizing only becomes genuinely useful when the pattern changes as well as the label. A garment that is merely made wider can still have short sleeves, narrow shoulder room, a high front hem or an uncomfortable chamois position. Buying one size larger does not reliably fix those problems. It may instead give you loose shoulders, sagging pockets and sleeves that still feel tight around the upper arm.
This leads to the central buying rule: treat inclusive sizing as a starting point, not proof of a good fit. Look for proportions that suit your chest, waist, thighs, arms and torso. A mid-priced garment with the right pattern is usually a better buy than a premium garment that only offers a bigger label.
How to measure yourself for cycling clothing
Use a soft measuring tape and take measurements in light clothing or a base layer. Keep the tape level and comfortably close to your body, but do not pull it tight. You are recording your body, not trying to win an argument with the tape measure.
- Chest or bust: Measure around the fullest part, keeping the tape horizontal and your arms relaxed.
- Natural waist: Measure around the area where your torso bends naturally, rather than automatically using your jeans waistband.
- Hips or seat: Measure around the fullest part, especially when choosing shorts or bibs.
- Inseam: Follow the brand’s instructions, as shorts and trouser charts may use this measurement differently.
- Torso length: Use the start and end points specified by the chart. This can reveal why a jersey rides up even when its chest measurement looks suitable.
- Thigh and upper arm: Take these when provided, or when standard garments commonly feel tight in those areas.
A second person can make back, shoulder and torso measurements more consistent. Stand naturally rather than holding your stomach in, lifting your chest or flexing your arms. Compare the results with the chart for the specific garment, not with a generic brand chart or your usual jeans size.
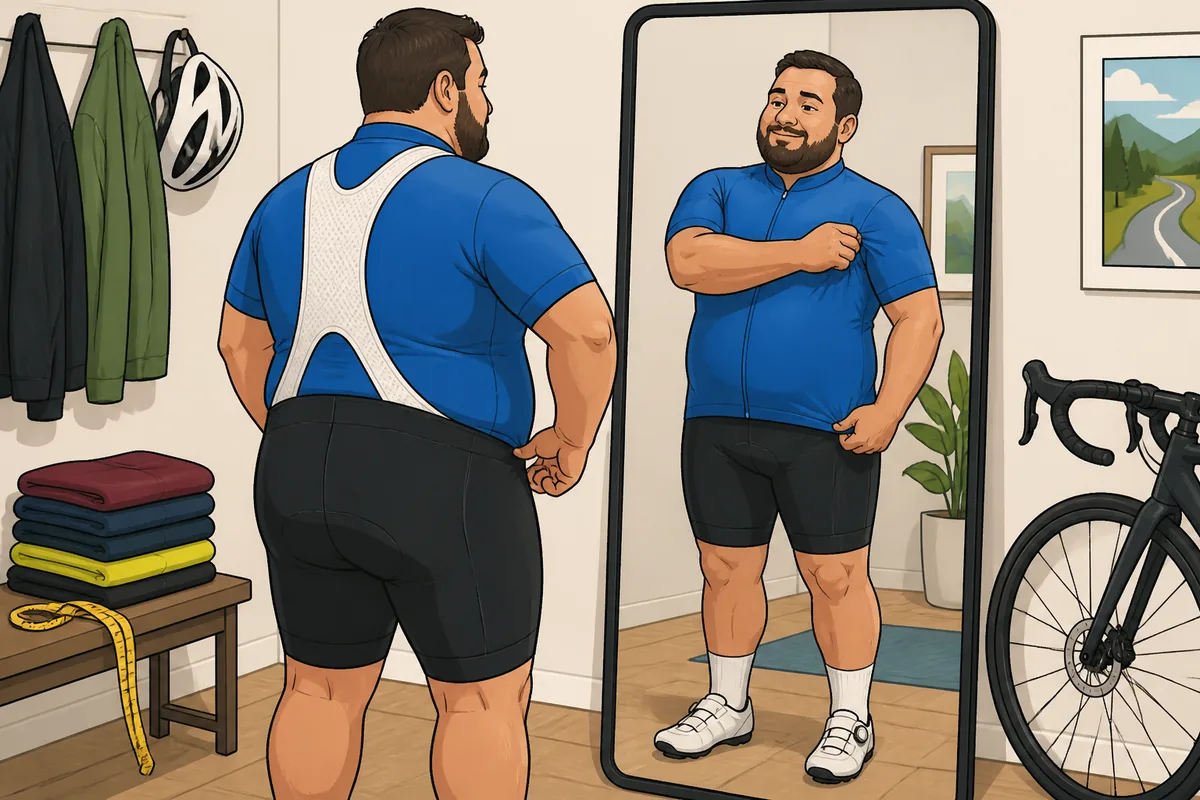
If you fall between sizes, prioritize the area that must not restrict breathing, pedaling or movement. Then account for the garment’s intended stretch and cut. A stretchy jersey may accommodate a small difference; a woven waterproof jacket needs room for the layers underneath.
Body measurements and garment measurements are not the same thing. A chart may list finished chest width, hem width or inseam rather than the body it is designed to fit. Check the notes before comparing figures. Online photographs cannot show whether a waistband, sleeve opening or bib strap will sit correctly on you.
Choose the right fit for jerseys, tops and base layers
For most recreational riding, relaxed or standard cuts are the safest starting point. They provide movement and layering room without the flapping of an oversized casual shirt. A close performance cut can work if the fabric has enough stretch and you prefer a secure fit, but race-cut clothing is not the default.
Check a jersey in the position you will actually use. The shoulders should not pull when you reach for the bars, the front should not ride excessively high, and the rear hem should stay below the waistband. Load the pockets lightly and see whether they remain usable without dragging the jersey down. A pocket that sags when carrying a phone is a fit or construction warning.
Pay attention to sleeve length and cuff pressure, particularly around larger upper arms. A sleeve that leaves deep marks, rides up or restricts movement is not providing useful performance. If sizing up fixes torso tightness but creates loose shoulders or excessive sleeve length, try another cut or brand instead.
A full-length zip is useful for ventilation and makes changing easier. A half-zip is often lighter and simpler. Neck comfort, pocket placement and reflective details matter according to how and when you ride; none is essential for every cyclist. Do not pay for features you will not use.
Base layers should sit close enough to manage sweat without feeling like compression wear. Excessive tightness can feel restrictive and trap heat. Choose a size and fabric that remain comfortable beneath your jersey and leave enough room for the intended outer layer.
Bib shorts, waist shorts and padded liners
The chamois is intended to provide a stable interface between you and the saddle while managing friction and moisture. It is not a replacement for correct saddle setup and cannot guarantee that every discomfort will disappear. Judge it by position and stability, not thickness alone.
Bib shorts usually keep the pad and waistband more stable because the straps support the garment from the shoulders. Waist shorts are easier for bathroom breaks and may suit riders who dislike shoulder straps. For longer rides, well-fitting bibs are generally the better default when the straps and torso fit comfortably.
Check the pad in the riding position. It should sit beneath the sit bones without bunching, shifting or exposing seams and edges that rub. Leg grippers should hold the shorts in place without biting into the thighs or rolling over. A tight gripper is not automatically a good gripper.
Liner shorts make sense for mountain, hybrid and casual cycling, particularly beneath ordinary-looking baggy shorts. They are convenient but generally provide less of the stable, dedicated fit many riders prefer for longer road rides. If you want to compare liner designs with baggy outer shorts, see our guide to baggy mountain bike shorts.
Do not assume the most expensive pad is automatically best. A cheaper pair with the correct shape and stable fit will usually beat a premium pair that shifts as you pedal.
Jackets, gilets and winter layers in extended sizes
Outer layers need to fit in the riding position, with the layers underneath them. A jacket that feels roomy while standing can pull across your shoulders once you reach for the bars. An oversized shell can flap noisily and catch wind like an unwilling sail.
A waterproof shell prioritizes rain protection and packability. A windproof jacket or gilet is usually lighter and more breathable but offers less protection in sustained rain. Softshells provide warmth and stretch, while insulated layers suit colder conditions but can become too warm quickly. The right choice depends on local weather and how hard you ride, not on the length of the feature list.
Check shoulder movement, sleeve length and rear hem coverage while leaning forward. Cuffs should close around your wrists without cutting in, and pockets should remain accessible over a jersey. Ventilation zips, reflective panels and a two-way zip can be useful. Extreme waterproof ratings and oversized logos are common places to overpay.
Build a cold-weather system from a base layer, insulating layer and shell rather than buying one oversized jacket and hoping it covers every condition. Our guide to cycling clothing and UPF layers is useful when deciding how much coverage and layering you actually need.
Fabrics and construction: what is worth paying for?
Polyester dries quickly and handles repeated washing well. Nylon can add durability, while elastane provides stretch in close-fitting panels, cuffs and bib straps. Merino can be comfortable across changing temperatures and may resist odors better, but usually costs more and needs more careful washing.
Waterproof membranes limit water entry while allowing some moisture vapor to escape. They are useful in wet conditions, but no membrane makes a jacket perfectly breathable during a hard effort. A lighter windproof layer is often more comfortable for cool, dry rides.
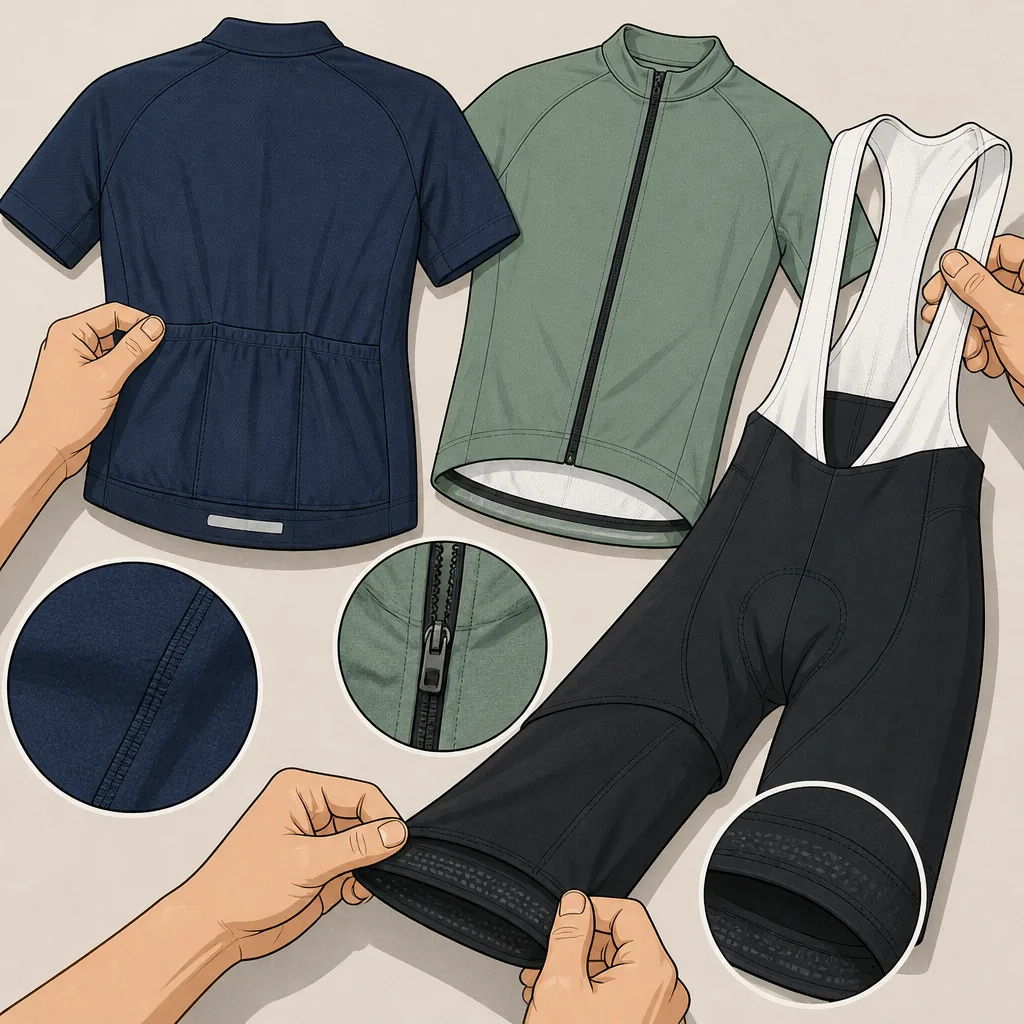
Fabric weight and construction usually matter more than a long list of treatments. Look for flatlocked or low-profile seams, secure pocket stitching, dependable zipper operation and elastic that returns to shape after stretching.
For padded shorts, check that the fabric is not see-through when stretched and that pad edges do not create obvious ridges. For jerseys, inspect whether loaded pockets pull the hem down. Very light fabrics can feel cooler and pack smaller but may be less resistant to abrasion, rough washing and repeated pocket loading.
UPF claims need sensible interpretation. Coverage, fit and exposed skin still matter, and stretched fabric may not behave exactly like the laboratory sample. Treat the rating as useful information, not permission to ignore sun protection elsewhere.
For most riders, flat seams, elastic recovery, a stable pad, secure pockets, reflective details for low light and a reliable full-length zip are worth paying for. Compression, exotic treatments and race-level fabric weights are not automatic upgrades.
Buying plus-size cycling clothing online
Use the same order every time: take your measurements, read the specific garment chart, check the stated cut, inspect the return policy, and only then compare price and features. Reviews can help identify repeated comments about short sleeves, tight thigh openings, high front hems or weak pocket support, but they cannot replace the manufacturer’s measurements.
Check whether the retailer accepts returns of tried-on padded clothing and how hygiene seals are handled. Where permitted, try garments indoors over clean underwear. Sit in your riding position, reach forward and check the fit before removing tags or washing anything.
Look at actual size availability for the colour and model you want. A brand may offer extended sizing in one jersey but not every seasonal version or matching short. Sale pricing is not a reason to accept a bad fit. A discounted garment that stays in the drawer is expensive drawer decoration.
A practical buying checklist by riding type
| Clothing type | What to prioritize |
|---|---|
| Jersey | Relaxed or standard cut, usable pockets and a hem that stays put. |
| Bib shorts | Stable chamois, comfortable straps and leg openings that do not bite. |
| Waist shorts | Secure waistband and easy bathroom access. |
| Liner shorts | Comfort beneath casual or baggy outer shorts. |
| Base layer | Close but unrestricted fit and easy washing. |
| Waterproof jacket | Layering room, rear coverage, useful cuffs and weather protection. |
| Windproof layer or gilet | Low bulk, ventilation and resistance to wind. |
For short leisure rides, prioritize comfort, easy layering and secure storage over race-oriented compression. For commuting, visibility, weather protection, durability and easy washing matter more. Longer road rides reward stable padded shorts or bibs, usable pockets and sweat management.
For gravel and mountain biking, consider abrasion resistance, liner compatibility, relaxed movement and cargo pockets that stay secure on rough surfaces. Indoor training needs breathable fabric, a stable chamois and easy washing; weatherproof features add little. In cold or wet conditions, use layers rather than one oversized jacket.
Build from the items that affect contact with the bike first: shorts or bibs, then a comfortable top, then a weather layer suited to your routes. Add specialist clothing only when your riding creates a real need.
| Check before buying | Why it matters |
|---|---|
| Specific garment measurements | Extended sizing varies between brands and product lines. |
| Riding-position fit | Shoulders, hems and sleeves behave differently when you lean over the bars. |
| Stretch and elastic recovery | The garment should move with you rather than sagging. |
| Chamois placement | The pad must stay under the sit bones without bunching. |
| Pocket security | Loaded pockets should not pull the jersey out of position. |
| Return policy | Useful insurance against inconsistent sizing, especially with padded clothing. |
| Fabric durability | Very light materials may not tolerate abrasion or heavy pockets. |
| Intended layering | Outerwear needs room for the layers you will actually wear. |
Common fit problems and when to return the garment
Return or exchange clothing if the fabric pulls across your chest, bust or hips, the shoulder seams migrate, or the jersey hem rides up continuously. Pockets that sag when lightly loaded are another sign that the cut is not working.
With bib shorts, watch for straps digging into your shoulders, a waistband that rolls, leg grippers that bite or roll, and a chamois that moves as you pedal. For jackets, sleeves ending too high, restricted shoulder movement and a hem that exposes your back when bent forward are clear warning signs.
Try the garment indoors where the return policy permits. Sit as you would on the bike, reach forward, bend your elbows, move through a pedaling motion, fill the pockets and operate the zips. Clothing should not restrict breathing, arm movement, pedaling or circulation. If it fails this check, washing or hoping for future body changes will not fix a pattern problem.
Persistent pain, numbness or significant skin breakdown should not be diagnosed through clothing advice. Review the garment and bike setup, and seek appropriate healthcare advice for ongoing symptoms. For related friction questions, use a properly matched resource such as the ShockStop suspension stem guide only if that link is confirmed as the intended destination; otherwise remove this link rather than publishing a misleading anchor.
Frequently asked questions
Should you size up in plus-size cycling clothing?
Not automatically. Start with your measurements and the garment chart, then choose the cut that matches your riding position. Sizing up can fix torso tightness while creating loose shoulders, long sleeves or sagging pockets. If only one area fits, another cut or brand is usually the better solution.
Are plus-size bib shorts better than padded cycling shorts?
Usually, bib shorts stay more stable on longer rides because the straps support the waistband and pad. Waist shorts remain sensible if easier bathroom access or avoiding shoulder straps matters more to you. The best choice is the one that stays positioned without restricting movement.
How tight should cycling clothing feel?
It should sit securely without restricting breathing, pedaling, arm movement or circulation. Close-fitting fabric can reduce flapping and work well when it is genuinely stretchy, but tightness alone is not performance. Any garment that leaves painful marks or causes numbness is too tight or poorly shaped.
The safest purchase is usually not the largest size or the most expensive fabric. Choose a brand that publishes useful measurements, select a cut suited to your riding position, and use the return policy when the garment fails an indoor fit check. Start with stable shorts, a comfortable top and weather protection suited to your routes; specialist features can wait until you have a real reason to need them.

I’ve spent way more time in the bike trade than anyone should reasonably want to. In that time I’ve wanted to make cycling jargon and marketing easier to cut through to help people get the bike of their dreams.
When I’m not writing about bikes, I can be seen out bikepacking on single speed bikes or teaching kids how to ride.