If your saddle starts feeling like the least friendly part of the bike after an hour, padded cycling shorts are one of the more sensible upgrades you can make. The right pair reduces friction, manages sweat and helps spread pressure where you contact the saddle. The wrong pair can bunch up, hold moisture and make an expensive ride feel like a negotiation.
Covers cycling shorts with padding for road riding, commuting, indoor training, gravel and longer recreational rides. The safest starting choice for most regular road riders is a mid-priced bib short with a moderate-density chamois, a useful size chart and a reasonable return policy. You do not need the thickest pad or the biggest logo.
Padding is not a replacement for a suitable saddle, sensible saddle setup or a position that fits you. If you have persistent pain, numbness, sores or a rash, adding more foam is not a diagnosis. Check your setup and seek appropriate professional or medical advice if the problem does not improve. Read our cycling clothing guide if you are still building a complete riding wardrobe.
What padded cycling shorts are meant to do
The pad inside cycling shorts is usually called a chamois, although modern versions are made from layers of synthetic foam and fabric rather than leather. Its job is practical: reduce rubbing, move moisture away from your skin and spread pressure between your body and the saddle.
You do not sit on a cycling saddle in quite the same way as you sit on a chair. As you lean forward and pedal, your contact points change. A good chamois supports the sit-bone area without forming a bulky ridge or folding into the soft tissue at the front. It should stay aligned while you move rather than becoming a separate passenger.
The key buying principle is simple: the best pair stays in place, lies flat and suits the amount of time you spend riding. A thin, well-shaped pad that remains stable is usually more comfortable than a huge slab of foam that shifts with every pedal stroke. More padding is not automatically more comfort; it can bunch, retain moisture and interfere with consistent saddle contact.
Wear padded shorts directly against clean skin in most cases. Ordinary underwear adds seams, moves independently of the shorts and can hold sweat against the skin. That defeats much of the point of the chamois. If you want more coverage under loose clothing, use a purpose-made liner rather than everyday underwear beneath padded shorts.
Padded shorts can reduce irritation, but they cannot guarantee that you will avoid saddle soreness. An unsuitable saddle, incorrect saddle height, excessive reach or a sudden jump in ride duration can still cause trouble. Persistent pain, numbness, skin damage or discomfort that does not settle deserves attention rather than a thicker pad.
Padded cycling shorts types compared
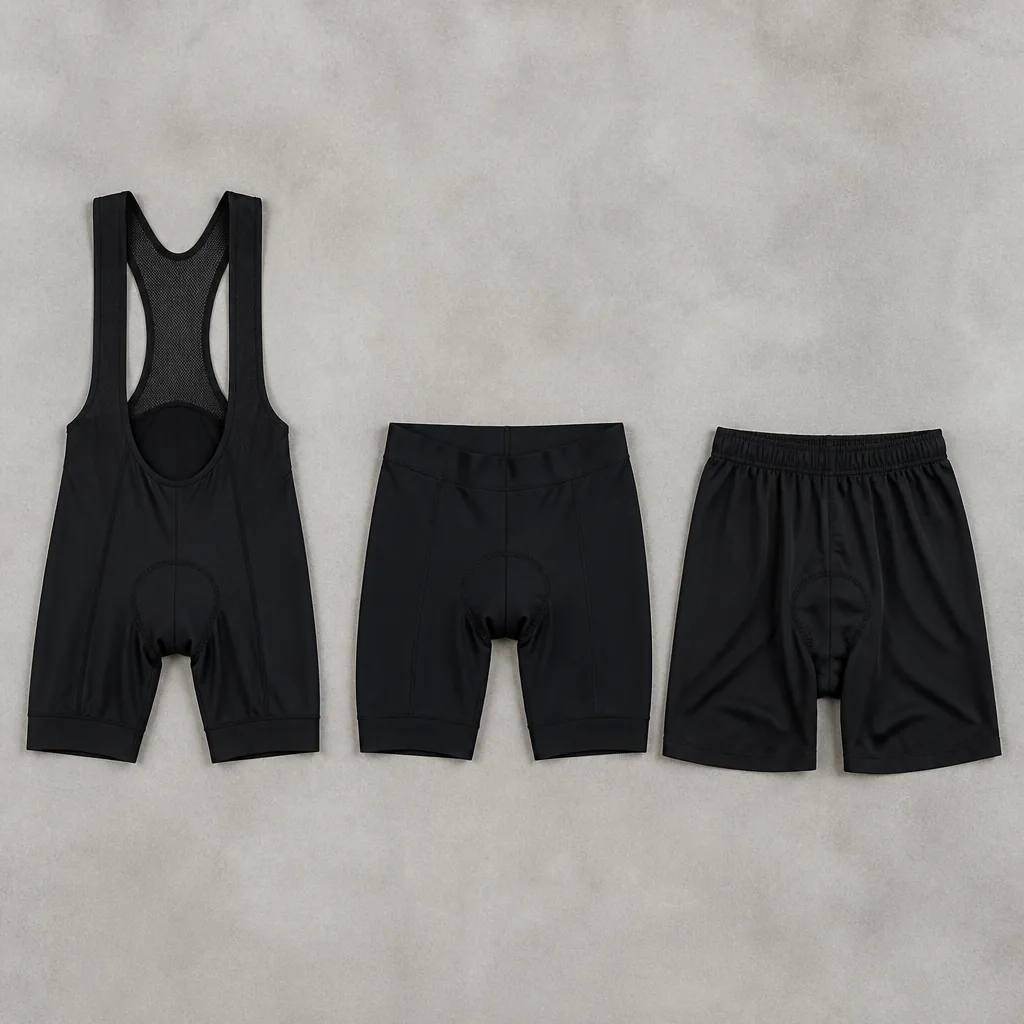
There are four formats you will commonly encounter: bib shorts, waist shorts, liner shorts and padded underwear. They all put a chamois between you and the saddle, but they behave differently once you start pedaling.
| Type | Best use and main tradeoff |
|---|---|
| Bib shorts | Usually the best default for frequent or longer road rides. Straps hold the shorts up without a tight waistband, but toilet stops are less convenient and the price is usually higher. |
| Waist shorts | Practical for short rides, casual cycling and riders who dislike straps. They cost less and are easy to remove, but the waistband can roll and the chamois may move. |
| Liner shorts | Useful for mountain biking, gravel, commuting and casual riding with loose outer shorts. The liner must stay fixed and the outer shorts must not drag it out of position. |
| Padded underwear | A limited-use option under casual clothing. Trouser seams, tight waistbands and poor pad alignment can make it less effective than proper cycling shorts. |
Bib shorts are usually the safest choice for longer or regular road rides. The straps keep the chamois positioned as you bend over the bars, and removing the waistband eliminates one common pressure point. A good bib should feel secure rather than constricting.
Waist shorts make more sense when simplicity matters. They are cheaper, quicker for toilet breaks and adequate for many short rides. They are not better simply because they are easier to wear: if the pad is loose, it can wrinkle and rub.
Liner shorts are the practical answer when you want padding without wearing a close-fitting road silhouette. They work under baggy mountain-bike or commuting shorts, provided the waistband and leg openings hold them securely. On rough ground, a shifting liner becomes noticeable very quickly.
Padded underwear is best treated as a compromise, not a universal solution. It may suit a short commute, but the pad can move under trousers and surrounding seams can create friction. Regular riders are usually better served by waist shorts or a liner.
Men’s-specific and women’s-specific shorts generally use different rises, pad shapes and pressure-relief layouts, but bodies are not produced from two flawless templates. Waist, hip, thigh and torso proportions vary. Choose the cut that keeps the pad aligned rather than assuming a gender label settles the fit.
Chamois design: thickness, density and shape
Chamois construction varies more than product photography suggests. Some pads use several foam layers, with denser foam under the sit bones and softer material around the edges. Others add perforations to improve flexibility and airflow. Anatomical shaping is intended to keep the pad supportive in a riding position rather than flat and bulky when standing.
Thickness is only one part of the equation. A dense but flexible pad can support pressure without needing much bulk. A very thick, soft pad may feel luxurious in your hand yet compress, fold or retain sweat on the bike. That is why buying the thickest option is a poor default.
Thinner, firmer pads often suit shorter or faster road rides, especially when you spend much of the ride in a forward position. A more substantial pad can make sense for upright commuting, touring or long recreational rides where you spend many hours seated. These are useful starting points, not rules carved into a cassette.
The pad should support the sit-bone area and taper cleanly toward its edges. It should not extend so far forward that it creates pressure, and it should not leave a ridge where the foam ends. Male and female chamois shapes may differ in width, length and pressure-relief features, but individual fit matters more than a simplistic claim that one shape is automatically comfortable.
It is difficult to judge foam quality from a product photograph. Look for a clear description of the pad’s construction, credible measurements, useful sizing information and a retailer return policy. A premium name does not guarantee a better result, particularly if the shorts do not fit your body or riding position.
How padded cycling shorts should fit
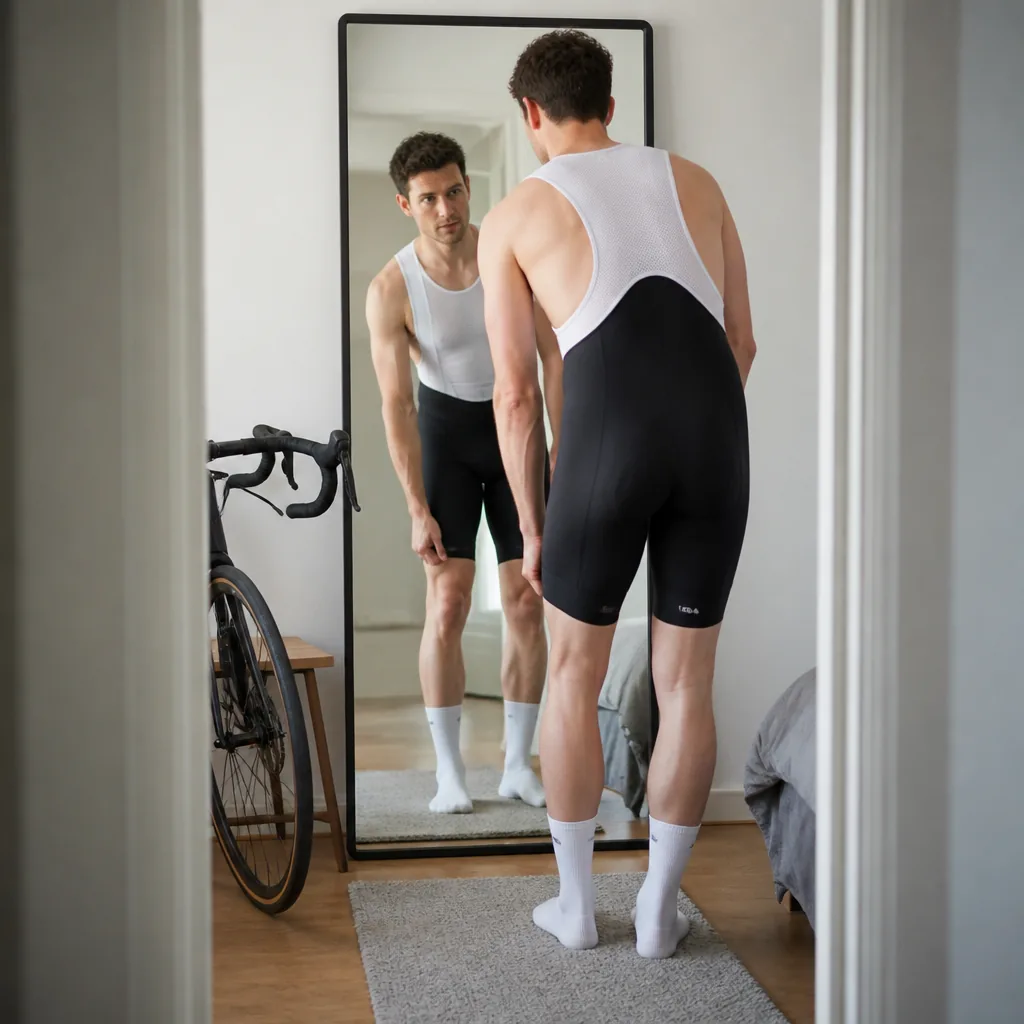
Padded shorts should sit close to your skin without restricting breathing or leg movement. When standing, the fabric may feel snug; when you bend into your riding position, the chamois should remain flat and centered over the contact area. A loose pad is more likely to wrinkle and rub than a firm one.
Check the fit in a riding position, not just in front of a mirror. The waistband should not roll, the leg openings should not expose skin as the shorts ride up, and the seams should not press into sensitive areas. Transparent fabric when stretched is a durability and modesty warning, not a sign that you have discovered an aerodynamic advantage.
Leg grippers should prevent the shorts from riding up without digging into your skin. Deep marks, tingling or numbness indicate a problem with the gripper, the size or the cut. A wider, softer gripper is usually preferable to a narrow strip that feels like an elastic tourniquet.
Bib straps should lift the shorts into place without pulling hard on your shoulders or restricting your breathing. Check the torso length as well as the waist and hip measurements. If the straps cut in when you bend forward, the bib may be too short even if the leg fit looks correct.
Do not size up solely because the shorts feel snug while standing. Compare brands and cuts instead. Sizing up can leave the chamois loose, while sizing down to chase a race fit can cause pressure and reduce comfort. Use the manufacturer’s waist, hip, thigh and torso chart, then confirm the retailer’s policy for garments worn next to the skin.
Choosing padded shorts for your type of riding
Road and sportive riding: prioritize a stable fit, a pad that disappears while pedaling, flat seams and low-friction fabric. Bib shorts are usually worth considering once rides become regular or several hours long.
Commuting: choose liner or waist shorts if you need to change into normal clothing. Quick-drying fabric and easy washing matter more than race-level compression or marginal aerodynamic claims at urban speeds.
Indoor training: prioritize moisture management, a secure fit and easy washing. Indoor riding often produces a high sweat load with little airflow, so a complicated, slow-drying pad is a poor choice.
Gravel and mountain biking: liners under loose outer shorts are often the most practical arrangement. Check that the liner stays fixed and that the pad does not shift when the terrain becomes rough.
Long-distance and touring: prioritize reliable fit, durable fabric, comfort over many hours and the ability to wash and dry the shorts regularly. A slightly less glamorous pair that remains comfortable is better value than a fragile premium pair.
Hot weather: breathable fabric and a pad that does not retain excessive moisture are useful. Cold weather: padded shorts can sit under tights or bib tights, but avoid stacking two padded garments. Two chamois pads usually create twice the opportunity for bunching, not twice the comfort.
Features worth paying for – and features you can ignore
Accurate sizing, flexible foam, flatlock seams, durable fabric, effective grippers and a reliable return policy are worth paying for. These features affect comfort, maintenance and lifespan directly.
Usually not worth prioritizing are excessive pad thickness, decorative panels, elaborate marketing names and marginal aerodynamic claims for commuting or relaxed riding. Compression can help keep fabric stable, but it should never compromise comfort or circulation.
UV protection, antibacterial treatments and odor-control finishes are secondary features. They do not replace washing. A well-made, washable pair with ordinary fabric is generally a better buy than a fragile garment covered in premium-sounding treatments.
How many pairs you need and how to care for them
One pair is enough for an occasional rider if you wash it after each ride. Two or three pairs suit regular riders and reduce the temptation to put damp kit back on. Daily commuters and frequent trainers need enough pairs to match their washing and drying routine.
Wash padded shorts promptly after use according to the care label. Turn them inside out, avoid fabric softener where advised and use a suitable detergent. High heat and harsh chemicals can shorten the life of elastic, grippers and technical fabrics. Air dry when possible, and do not leave damp kit sealed in a bag.
Replace shorts when the grippers lose their hold, seams are damaged, the fabric becomes transparent, the foam is compressed or the chamois shifts. Persistent odor after proper washing is another practical sign that the garment is past its best. Persistent rash, sores, numbness or pain should not be solved by buying thicker padding; address the fit and saddle setup and seek medical advice if symptoms do not improve.
A practical padded cycling shorts buying checklist
- Choose the format: bibs for frequent or longer road rides, waist shorts for simplicity, or liners for loose outer clothing.
- Measure yourself: use the brand’s waist, hip, thigh and torso measurements.
- Match the ride: prioritize moisture management for indoor training and commuting, and durability for touring or high mileage.
- Check the chamois: it should support the sit bones, stay flat and avoid a bulky ridge.
- Inspect construction: look for flat seams, comfortable grippers, opaque fabric and flexible foam.
- Confirm returns: check the policy before removing tags or riding in garments worn next to the skin.
- Assess the riding fit: bend forward and check that nothing rolls, pulls, cuts in or shifts.
For most regular road riders, a mid-priced bib short with a moderate-density chamois, sensible construction and a dependable size chart is the safest starting choice. Put fit ahead of thickness and construction ahead of branding. Do not upgrade if the real problem is saddle position, underwear, poor washing or a sudden jump in ride duration. Expensive UPF and cycling clothing can help you compare construction, but no chamois compensates for a fundamentally poor position. For saddle-related problems, start with our saddle setup guide.
FAQs about padded cycling shorts
Are padded cycling shorts worth it for beginners?
Yes, if your rides are long enough to create pressure or friction. Start with a comfortable mid-priced pair rather than the thickest or most expensive option. Fit matters more than a large amount of foam.
Should you wear underwear under padded cycling shorts?
Usually no. Wear them directly against clean skin. Underwear adds seams, can move against the chamois and holds moisture where you want the fabric to manage it.
Can padded cycling shorts prevent saddle sores?
They can reduce friction and help manage moisture, but they cannot guarantee prevention. Saddle position, clean kit, suitable clothing and sensible increases in riding time also matter.
How tight should padded bike shorts be?
They should sit firmly against your skin without restricting breathing, digging into your legs or causing numbness. The chamois should remain flat and aligned while you pedal.

I’ve spent way more time in the bike trade than anyone should reasonably want to. In that time I’ve wanted to make cycling jargon and marketing easier to cut through to help people get the bike of their dreams.
When I’m not writing about bikes, I can be seen out bikepacking on single speed bikes or teaching kids how to ride.