Choosing the right kids’ bike size is less about guessing a birthday and more about making sure the child can control the bike. This kids bike size chart gives you a useful starting point, but height, inseam, reach and confidence matter more than age on the label.
This guide assumes your child can already balance and pedal, or is moving on from a balance bike. It is not a learn-to-ride lesson. Very young beginners may need a balance bike or a properly fitted bike with training support first.
Kids’ bike size chart
Kids’ bikes are usually described by wheel diameter: 12-inch, 16-inch, 20-inch and so on. That number refers to the approximate diameter of the wheel, not the total height of the bike or a standard frame size. Two bikes with the same wheel size can still have noticeably different standover heights, saddle ranges and reaches.
Use the chart to narrow your search. The age ranges are approximate, and the height and inseam figures deliberately overlap. Children of the same age can be several wheel sizes apart without anything being unusual.
| Wheel size | Typical age | Approximate child height | Approximate inseam |
|---|---|---|---|
| 12-inch | 2-4 years | 85-100 cm | 30-40 cm |
| 14-inch | 3-5 years | 95-110 cm | 36-45 cm |
| 16-inch | 4-6 years | 100-120 cm | 40-50 cm |
| 18-inch | 5-7 years | 110-125 cm | 45-55 cm |
| 20-inch | 6-9 years | 115-135 cm | 50-60 cm |
| 24-inch | 8-12 years | 125-150 cm | 58-70 cm |
| 26-inch | 10 years and up | 140-165 cm | 65-78 cm |
These are starting figures, not guarantees. Manufacturer geometry varies, particularly around the top tube, crank length and minimum saddle height. A child at the upper end of a 16-inch bike’s range may fit one model but not another. Check the specific bike rather than treating the wheel number as a complete answer.
How to measure your child for a bike
Height is useful for finding the likely wheel-size range. Inseam is often more useful when checking whether the actual bike is safe and manageable.
Measure height
Have your child stand barefoot against a wall with their heels and upper back gently touching it. Keep their head level and place a flat book against the wall at the top of their head. Mark the wall and measure from the floor to the mark.
Measuring barefoot makes the result repeatable. When you check the final bike, your child can wear the shoes they normally ride in, but do not add several centimeters to the measurement just to make a larger bike appear to fit.
Measure inseam
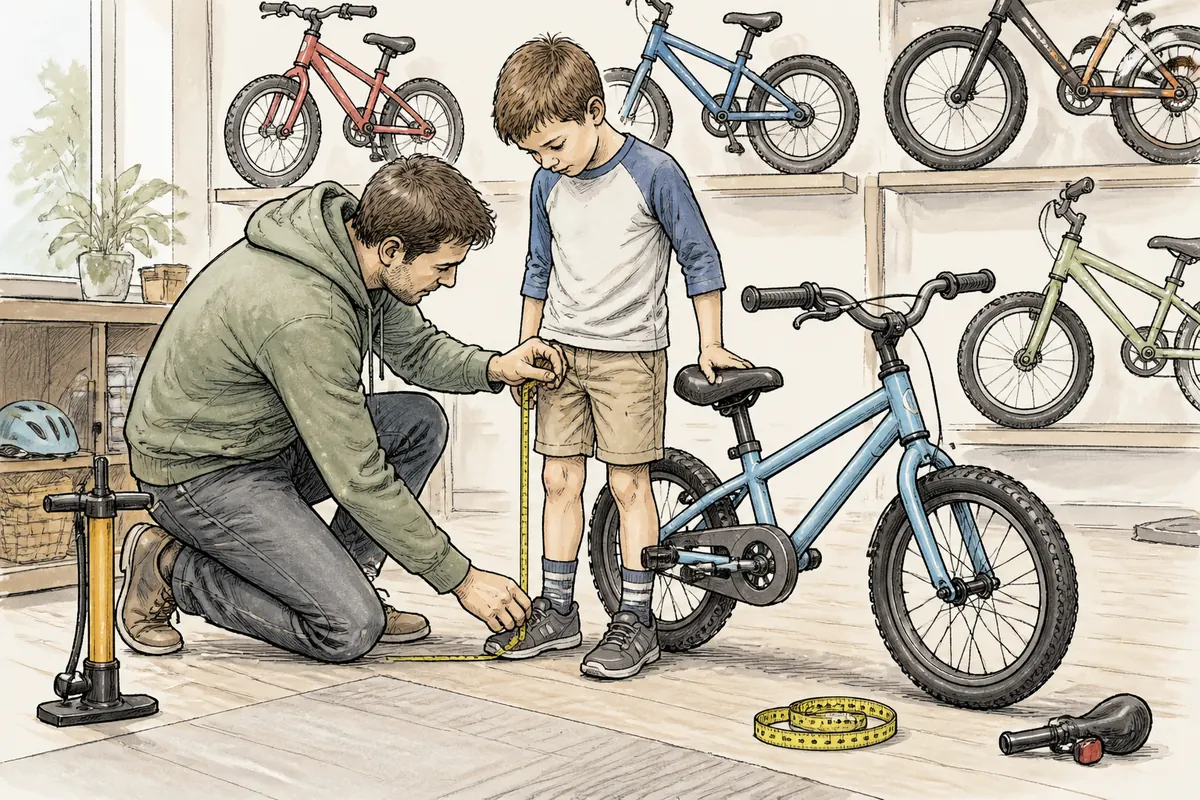
Ask the child to stand with their feet slightly apart, roughly as they would stand over a bike. Place a book firmly between their legs, with its upper edge touching the body, then measure from the top of the book to the floor.
Inseam helps you judge whether the child can stand over the frame with both feet flat. That matters especially on a first pedal bike, when a confident foot-down position can make starting, stopping and recovering from a wobble much less intimidating.
Do not confuse this with an adult road-bike fit, where maximum leg extension is often the priority. For a learning child, control and confidence come first. The saddle may need to be low enough for the child to get a foot down securely, even if that is not the most efficient pedaling position.
Reach matters too. Your child should comfortably reach the grips without leaning heavily on the bars, and should be able to operate both brake levers without stretching their fingers or using more hand strength than they can manage. Check the bike’s minimum saddle height as well as its maximum. Wheel size alone cannot tell you that.
Choose the wheel size by fit, not age
Age is a reasonable search filter, but it is a poor final decision-maker. Start with height and inseam, then look at how the child handles the actual bike.
If your child falls between two sizes, the smaller bike is usually the safer starting choice when they are inexperienced, nervous or still developing balance and braking control. A smaller bike is not automatically better, but it is generally easier to mount, steer, stop and recover on.
| Situation | Better starting choice |
|---|---|
| The child is learning, uncertain or cannot reliably reach the brake levers | Choose the smaller wheel size, provided the child is not cramped |
| The child can stand over both bikes but the larger one feels tall or heavy | Choose the smaller bike for better control |
| The child can stand over the larger bike, reach the controls and steer confidently | The larger wheel size may be suitable |
| The child barely fits the smaller bike and the larger bike has safe clearance and a suitable minimum saddle height | Consider the larger bike after an in-person control check |
A larger bike may last longer, but that does not make it better value if your child struggles to control it. Oversized bikes are heavier relative to a small rider, their bars can feel too far away, and the longer wheelbase may make slow turns awkward. Buying several sizes too large to avoid a future purchase is usually false economy. The unused bike in the garage is not saving money; it is just occupying garage space with confidence.
For a child moving from a balance bike, a properly sized 12-, 14- or 16-inch pedal bike is generally a more sensible step than jumping straight to a bike they will supposedly grow into. A 20-inch geared bike or 24-inch kids’ bike can be the next stage, but only when the fit and riding ability support it.
The fit and safety checks that matter in the shop
A shop-floor fit check is preferable to ordering from age alone. Take the child’s measurements with you, but also let them sit on the specific bike. Geometry varies too much for a chart to replace this check.
- Check standover clearance. With the bike held upright, your child should stand over the top tube with both feet flat and comfortable clearance between their body and the frame. They should not have to tiptoe or lean the bike dramatically to one side.
- Check the saddle range. The saddle should be able to go low enough for a confident foot-down position. It should also have enough room to rise as the child grows. A saddle already near its maximum height is a sign that the bike may be too small.
- Check the reach. Your child should sit upright enough to see ahead and reach the grips without stretching. Excessive reach makes steering and braking harder, especially at low speed.
- Check the brake levers. Ask the child to squeeze the brakes repeatedly. They need to reach the levers and operate them with their available hand strength. Child-specific adjustable levers can help, but adjustment cannot fix a fundamentally oversized bike.
- Check the weight. A very heavy bike can be difficult to start, lift, steer and catch during a wobble. A modest difference in bike weight may matter more than moving up one wheel size for the sake of future growth.
- Try basic movements. When possible, have the child sit, start, stop and make a slow turn in a safe area. A bike that looks suitable on a stand may feel unwieldy once it is moving.
Training wheels do not make an oversized bike safe or easy to control. They may provide temporary stability, but they do not shorten the reach, lower the top tube or make the brakes easier to operate. Fit the bike first; treat training support as a separate learning choice.
When to move up to the next wheel size
Use fit and riding ability rather than a birthday as the upgrade trigger. A child may need a larger bike earlier or later than the chart suggests.
Signs that it is time to look at the next wheel size include:
- The saddle is already close to its maximum height.
- The child’s knees or cockpit area look cramped while riding.
- The child can start, stop and make slow turns confidently.
- The current bike feels twitchy or restrictive rather than reassuring.
- The child can reach and operate the brakes consistently.
Do not upgrade simply because the child has reached a particular age if they are still struggling to balance, reach the brakes or control the current bike. A bigger bike will not solve those problems and may make them worse.
Moving from a 16-inch pedal bike to a 20-inch bike, or from a 20-inch bike to a 24-inch bike, can involve more than a larger wheel. The next model may have different gearing, longer cranks, stronger brakes and a heavier frame. On paper, that may look like progress. In practice, check that your child can manage every control without help.
Before buying the next bike, check its standover height and minimum saddle height. If those figures work and your child can handle the bike in a slow test, moving up makes sense. If not, keep the current bike and let control improve before spending again.
FAQs
Should you choose a kids’ bike by age or height?
Choose primarily by height, inseam and control. Age is only a rough guide because children of the same age can need different wheel sizes.
Is it okay to buy a kids’ bike one size too big?
Usually not for a first or learning bike. A bike that is too large can be harder to balance, stop and steer, even if the child will eventually grow into it. Choose the larger size only when standover clearance, reach, brake control and handling are all clearly suitable.
How much standover clearance does a child need?
Your child should be able to stand over the bike with both feet flat and some comfortable clearance from the top tube. Check the actual bike because frame shapes vary. The child should not need to tiptoe or lean the bike sharply to create space.
The safest starting point is simple: use the chart to identify likely wheel sizes, then choose the bike your child can stand over, reach, brake and control today. Growth matters, but a bike that inspires confidence is more useful than one that merely promises a longer service life.

I’ve spent way more time in the bike trade than anyone should reasonably want to. In that time I’ve wanted to make cycling jargon and marketing easier to cut through to help people get the bike of their dreams.
When I’m not writing about bikes, I can be seen out bikepacking on single speed bikes or teaching kids how to ride.