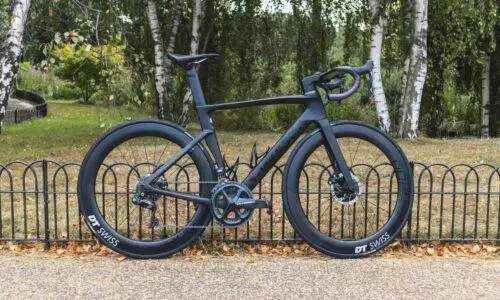
Getting bike handlebar height right is mostly about avoiding two common mistakes: copying a professional racer’s low position or raising the bars until the steering feels vague. Start with a position that lets you ride with relaxed shoulders, lightly bent elbows and a stable grip without putting excessive weight through your hands.
This guide covers handlebar height, stem rise and spacer stack. It does not cover saddle height or a full bike-fit assessment. If you are comparing cockpit dimensions more broadly, see our guide to bike stack and reach. Handlebar width is a separate setup decision; see our bike handlebar width guide rather than using height advice as a width chart.
There Is No Single Correct Bike Handlebar Height
Handlebar height depends on your bike, proportions, flexibility, route and priorities. A fast road rider may accept a lower position for aerodynamic efficiency. A commuter usually benefits more from visibility and easy control. A mountain biker has to balance comfort with front-wheel loading on climbs and descents.
The practical default is to set the bars high enough that you can hold your normal position without shrugging your shoulders, locking your elbows or supporting too much of your body through your palms. Your wrists should be reasonably neutral, and you should be able to reach the brake levers without stretching.
Lower is not automatically faster. If a low position makes you tense or causes hand and neck discomfort, its theoretical aerodynamic benefit is not buying much. Higher is not automatically more comfortable either: excessive rise can make the steering feel vague and reduce front-wheel control.
Watch for numb hands, persistent neck or shoulder tension, locked elbows, heavy pressure on the heels of your hands, a feeling of being pitched forward, or difficulty reaching the brake levers. These symptoms can also come from reach, saddle position, bar rotation, gloves or tire pressure, but height is a sensible first adjustment because it is usually easy to change and reverse.
Starting Points by Bike Type
Use these as practical starting points, not measurements carved into a carbon steerer. Rider proportions matter: a tall rider with a long torso and a shorter rider on the same frame may need different spacer or stem choices.
| Bike type | Useful starting position |
|---|---|
| Road bike | Recreational riders often start with the bars close to level with the saddle rather than copying a professional race setup with a large drop. |
| Gravel bike | A slightly less aggressive position than a race road bike usually suits long rides, rough surfaces and frequent changes in hand position. |
| Hybrid or commuter | A more upright position improves visibility and makes starts and stops easier. Avoid going so high that steering loses precision. |
| Mountain bike | Choose height around terrain and control. A modest rise can improve confidence, but excessive rise can reduce front-wheel weighting on steep climbs. |
On a road bike, a small drop from saddle to bars can be perfectly sensible, especially if you ride quickly and spend long periods on the hoods. There is no prize for making that drop dramatic. Many recreational riders are better served by keeping some spacers below the stem and lowering the bars only if their back, neck and hands remain comfortable.
Gravel bikes benefit from a little restraint. Rough ground rewards control, and a slightly higher position can make it easier to shift your weight and absorb bumps. That does not mean the bars should be dramatically high; it means an aggressive road-bike setup is not automatically right once the pavement ends.
Hybrids and commuters generally work best with the bars higher than the saddle or near that level, depending on the frame and cockpit. You want a clear view through traffic and easy control at low speed. Too much height, however, can lighten the front wheel when cornering quickly.
Mountain-bike height is particularly terrain-dependent. A higher bar can improve confidence, but too much rise may make it harder to keep the front tire weighted on steep ascents. On a bike used for technical descents, control matters more than matching a road-bike saddle-to-bar relationship.
How to Adjust Handlebar Height Safely
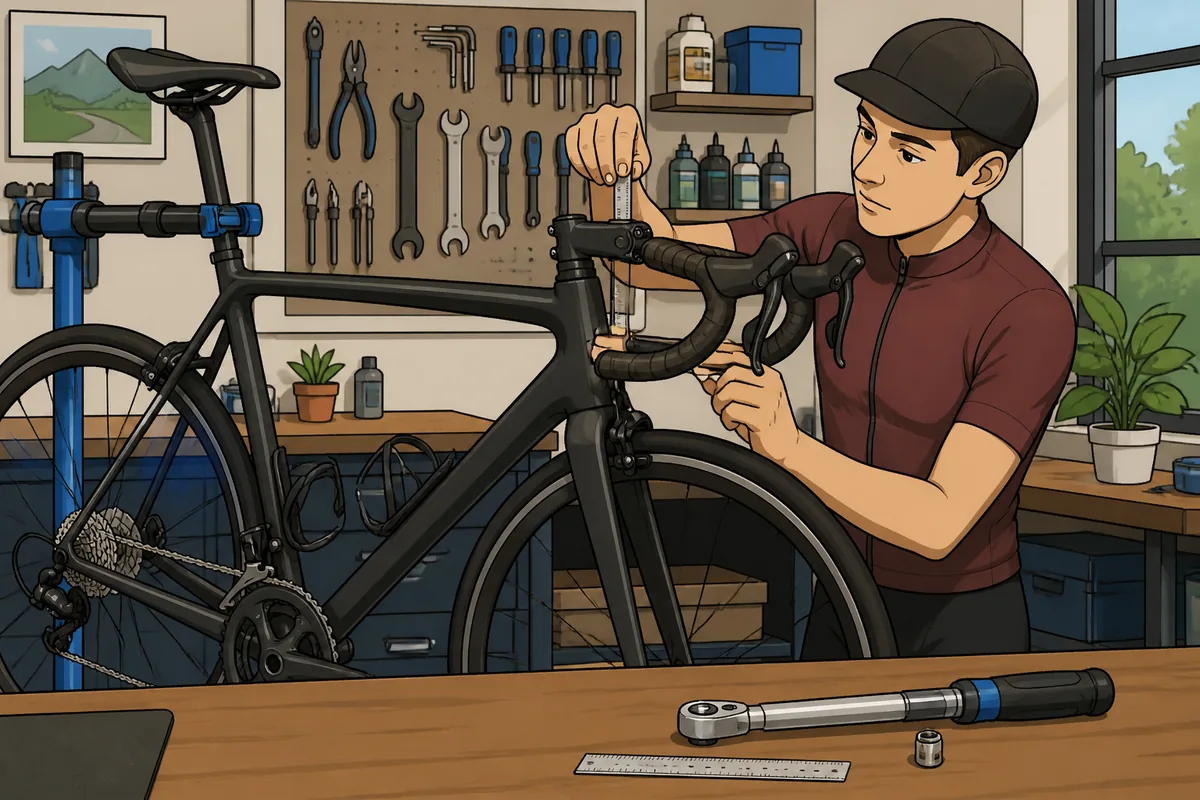
Most modern bikes use a threadless headset. The stem clamps around the fork steerer, with spacers above or below it. Moving spacers below the stem raises it only if there is enough usable steerer length. Moving them above the stem lowers it.
The basic process is:
- Support the bike securely and note the current stem and spacer arrangement.
- Loosen the stem’s steerer-clamp bolts. You normally do not need to remove the faceplate unless removing the stem from the steerer.
- Remove the top cap and move the appropriate spacers above or below the stem.
- Refit the top cap and adjust it until headset play is removed. The top cap sets bearing preload; it does not hold the stem in place during riding.
- Align the stem with the front wheel and tighten the steerer-clamp bolts to the manufacturer’s torque specification.
- Check the handlebars and brake levers before riding.
Use a torque wrench where possible, particularly with carbon parts. Follow the fork, steerer and stem instructions rather than relying on a universal spacer count. Preserve the manufacturer’s minimum insertion and clamping requirements.
A positive-rise stem raises the bars. Changing stem angle can also alter reach. A longer stem is not a simple height solution: it increases reach and changes steering response. If your hands already feel too far away, a longer stem is probably the wrong repair wearing a convincing disguise.
Older bikes and some city bikes use a quill stem. Loosen the expander bolt, adjust the stem only within its minimum-insertion mark, align it with the front wheel and retighten it to the specified torque. Do not raise it past the mark or treat it like a threadless stem.
Steerer extensions and stem risers can help on compatible bikes, but they are not universal adapters. Steerer type, diameter, material, clamping method and manufacturer limits all matter. Carbon steerers deserve particular caution: never guess at clamp position or torque.
Check the Position on a Short Ride
After changing height, ride on familiar, low-traffic ground rather than immediately heading into busy traffic or a fast descent. Check that your shoulders stay relaxed, your elbows remain soft and your hands share pressure reasonably evenly. You should reach the brake levers without stretching or rotating your wrists awkwardly.
Drop-bar riders should test the hoods, drops and tops. A position that feels fine on the tops may feel cramped in the drops, while one that feels fine in the drops may put too much weight on your hands during normal hood riding. The setup has to work across the positions you actually use.
Change one variable at a time and make small adjustments. After every change, check headset play, stem and handlebar security, cable or hydraulic-hose slack, free steering from lock to lock and normal brake-lever operation.
If hand pressure continues, look beyond height. Excessive reach, saddle position, bar rotation and tire pressure can all contribute. Handlebar height matters, but it is not a magic wand with a torque setting.
When to Change the Stem or Bike
Use the existing spacer range first when the steerer and manufacturer’s limits allow it. This is usually the safest and cheapest adjustment, and it changes height without changing reach.
If the spacer range is exhausted, a positive-rise stem can provide more height. Choose its length separately: a shorter stem may reduce reach and quicken steering, while a longer one stretches you out and can slow the steering response. Rise and length are different decisions, even when one replacement stem changes both.
A very tall spacer stack, an extreme riser arrangement or improvised adapters are warning signs. They may indicate that the frame size, frame geometry or original fork steerer is not a good match. More parts are not always more fit.
Stop adjusting if you would exceed a minimum-insertion mark, violate a steerer or stem limit, create cable tension or leave the stem poorly supported. Use a compatible component, have the setup assessed, or consider whether a different frame is the more sensible answer.
Frequently Asked Questions
Should bike handlebars be higher than the saddle?
Often on hybrids, commuters and comfort-focused gravel bikes; not necessarily on road bikes. Use hand, neck and shoulder comfort as the test rather than treating saddle height as a universal reference.
How many spacers can I put under my stem?
There is no universal safe number. Follow the fork, steerer and stem limits, keep the stem properly supported and never exceed the manufacturer’s insertion or clamping requirements.
Can raising the handlebars make a bike easier to ride?
Usually it makes the position more upright and can reduce reach and hand pressure. Too much height can affect front-wheel weighting, steering feel and cable length, so make small changes and check the bike after each one.
Start with the smallest reversible change: use the available spacers, check the cockpit and take a short ride. If the bike still demands tense shoulders or heavy hands, consider stem rise or a fit assessment rather than endlessly stacking parts.

I’ve spent way more time in the bike trade than anyone should reasonably want to. In that time I’ve wanted to make cycling jargon and marketing easier to cut through to help people get the bike of their dreams.
When I’m not writing about bikes, I can be seen out bikepacking on single speed bikes or teaching kids how to ride.