
EXTENDED GEARING FOR THE ROAD BIKE
PUTTING IT ALL TOGETHER
In Part II, we had just about convinced ourselves to build a 1X. We analyzed different gearing options and evaluated the pros & cons of each. We looked at different gearing solutions from both Shimano and SRAM. We also looked at potential rear derailleurs. Lots of data, lots of analysis, lots of decisions to be made.
Since posting Part II, I had several long discussions with Brendan at WolfTooth. A very 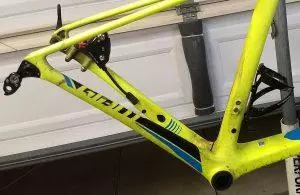 knowledgeable person when it comes to anything MTB, Cross, Gravel and especially running cross-platforms on a single bike. I also want to give a shout out to my mechanic Mark Strohman of R5ciclismo.
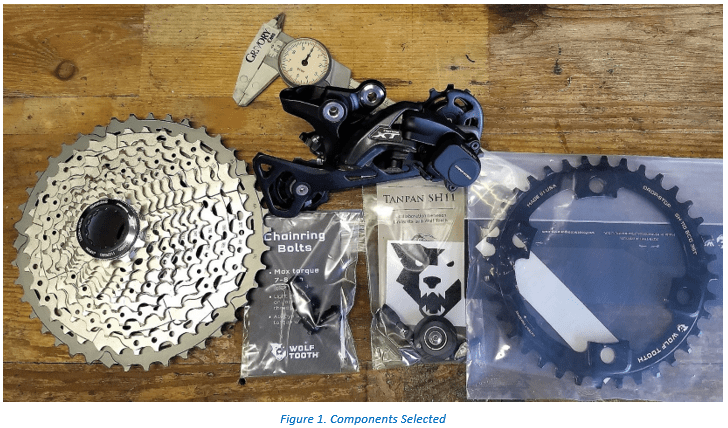
Summarizing our conversations, WolfTooth Components manufactures numerous rear derailleur optimizations so that it is possible to efficiently run the following;
a) Shimano 11-speed MTB shifters & derailleurs with a SRAM 11-speed 10-42T cassette (GoatLink11),
b) Larger cassette MTB gearing using a road ‘GS’ Rear Derailleur (RoadLink),
c) 11-49T (and larger) cassettes using an extended rear derailleur cage (WolfCage Derailleur Cage)
d) Shimano MTB rear derailleur (i.e., M8000) using road shifters (i.e., Ultegra 6800) (Tanpan)
In fact, WolfTooth manufactures numerous specialty parts, go check them out!
DISASSEMBLY
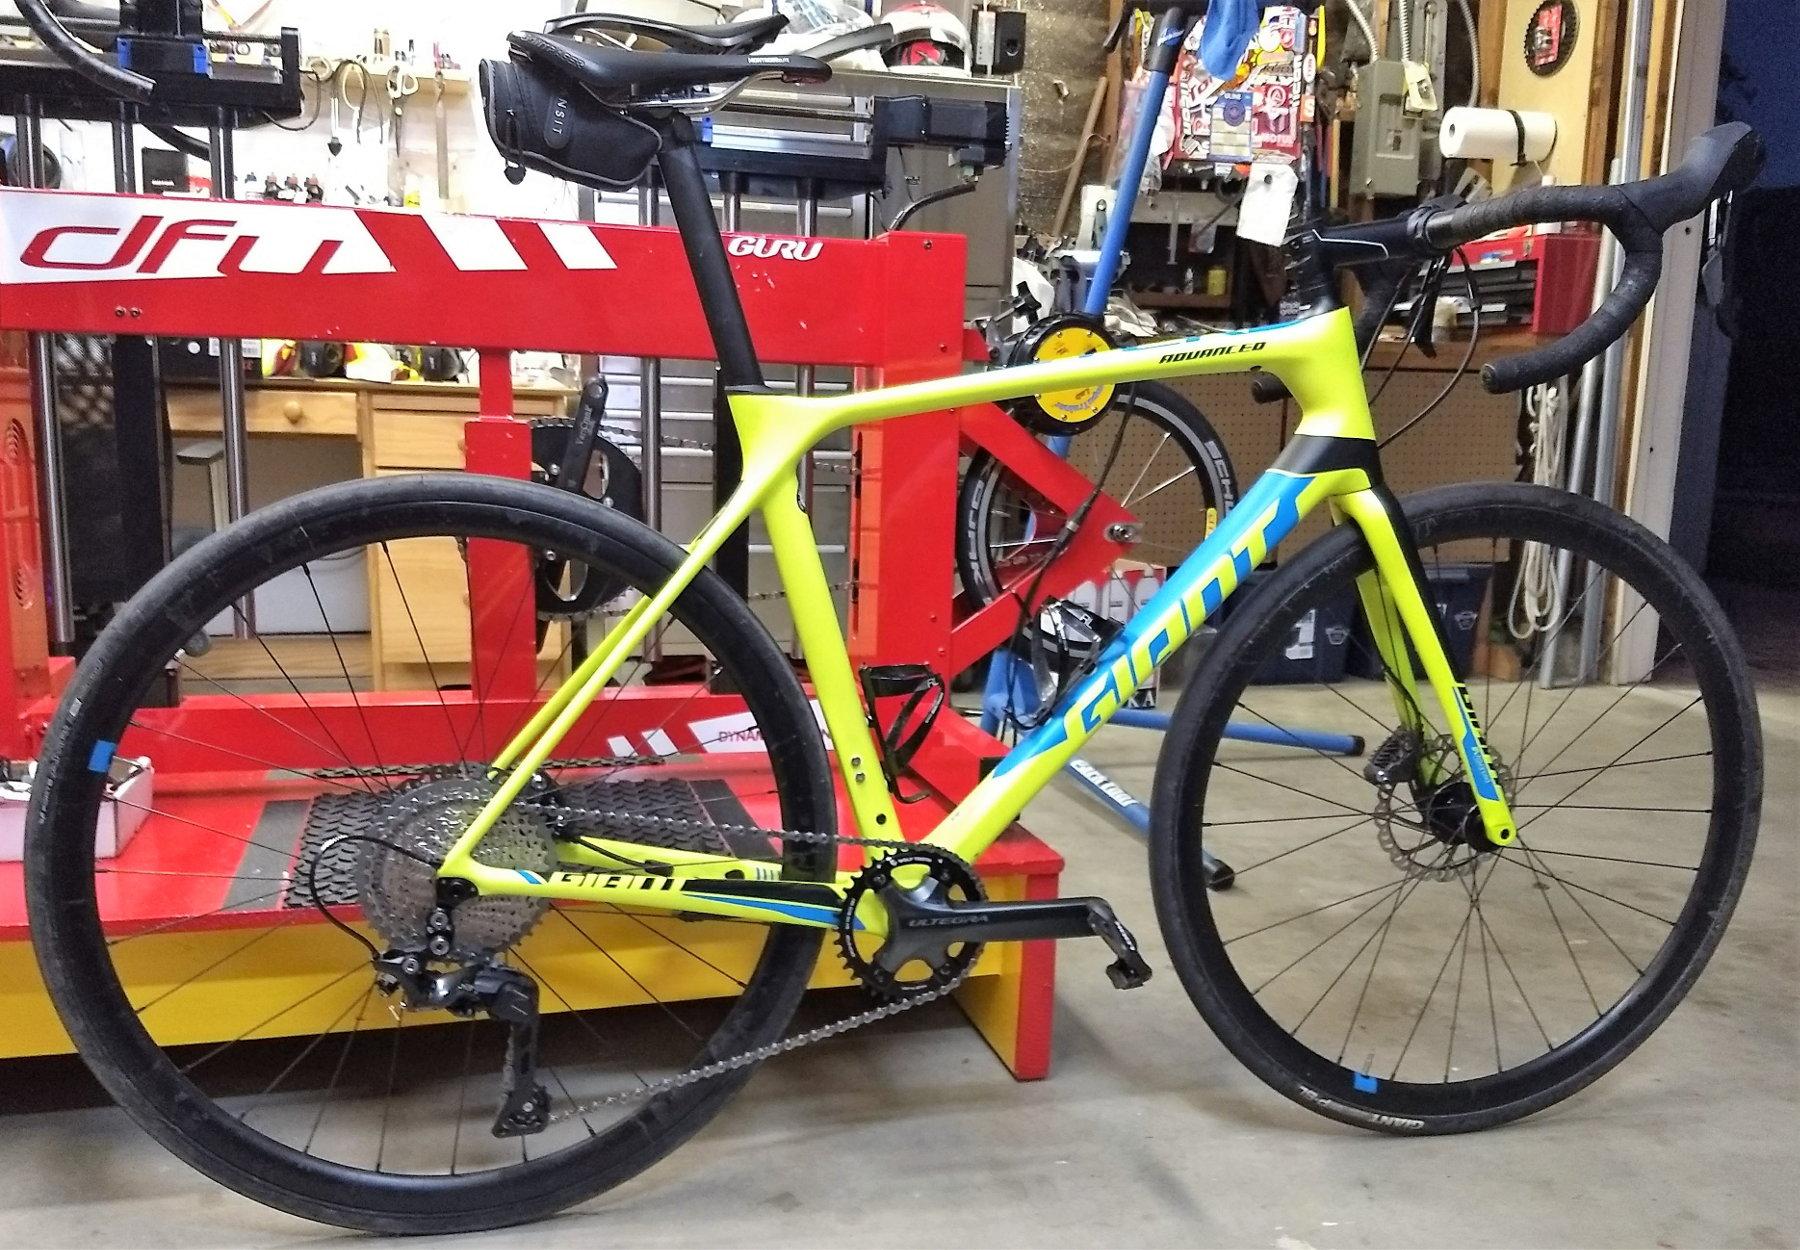
The first order of business was to remove the wheels and drivetrain from the bike. I also pulled the front derailleur cable and cleaned the frame. The picture to the right shows the stripped frame.
Next, it was time to make some decisions…
EQUIPMENT OPTIONS & WHAT WAS CHOSEN?
Decision #1 – to select a 1x or 2x. After several days of deliberation, I chose 1x. One of the main factors of a 1x is that there are many more cassette options. A second factor is that there is no cross-chaining possible. A third factor is no gear duplicati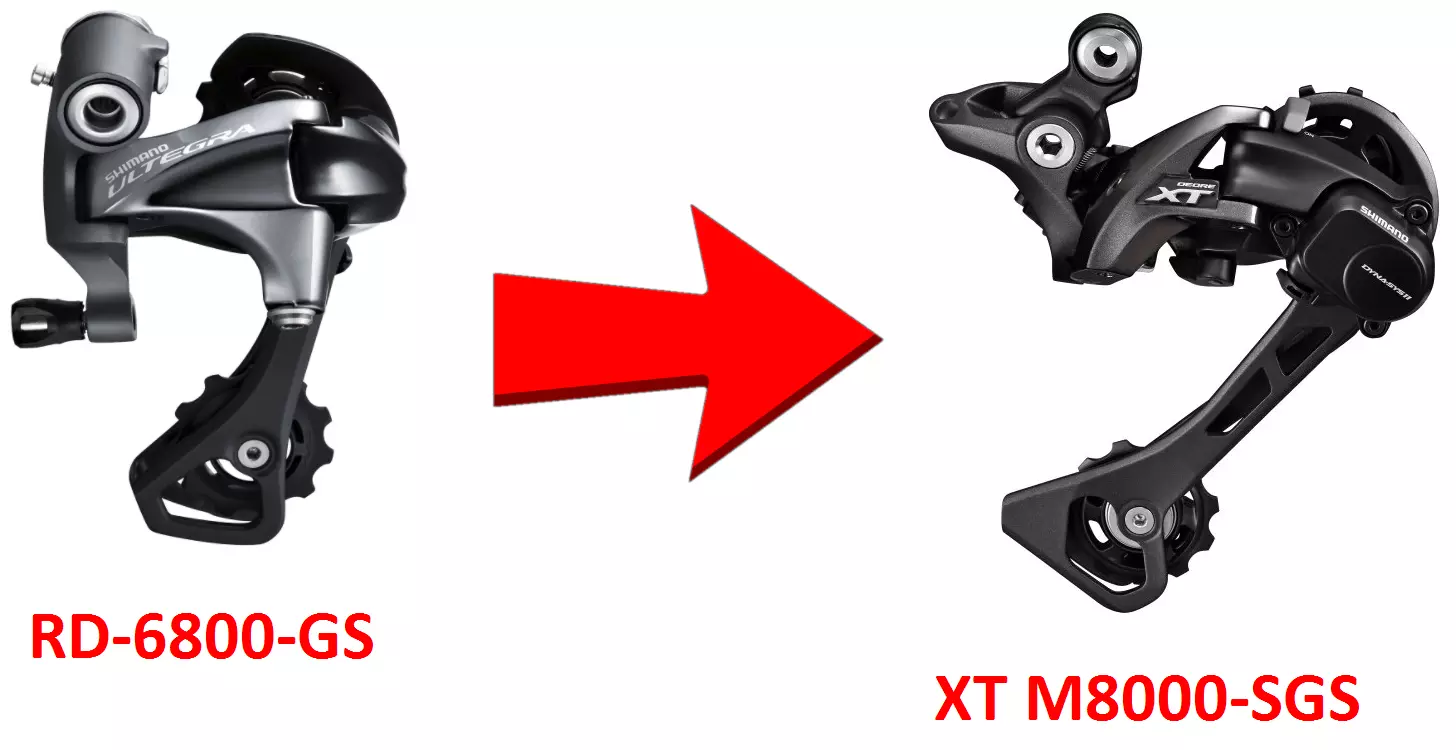 ons.
ons.
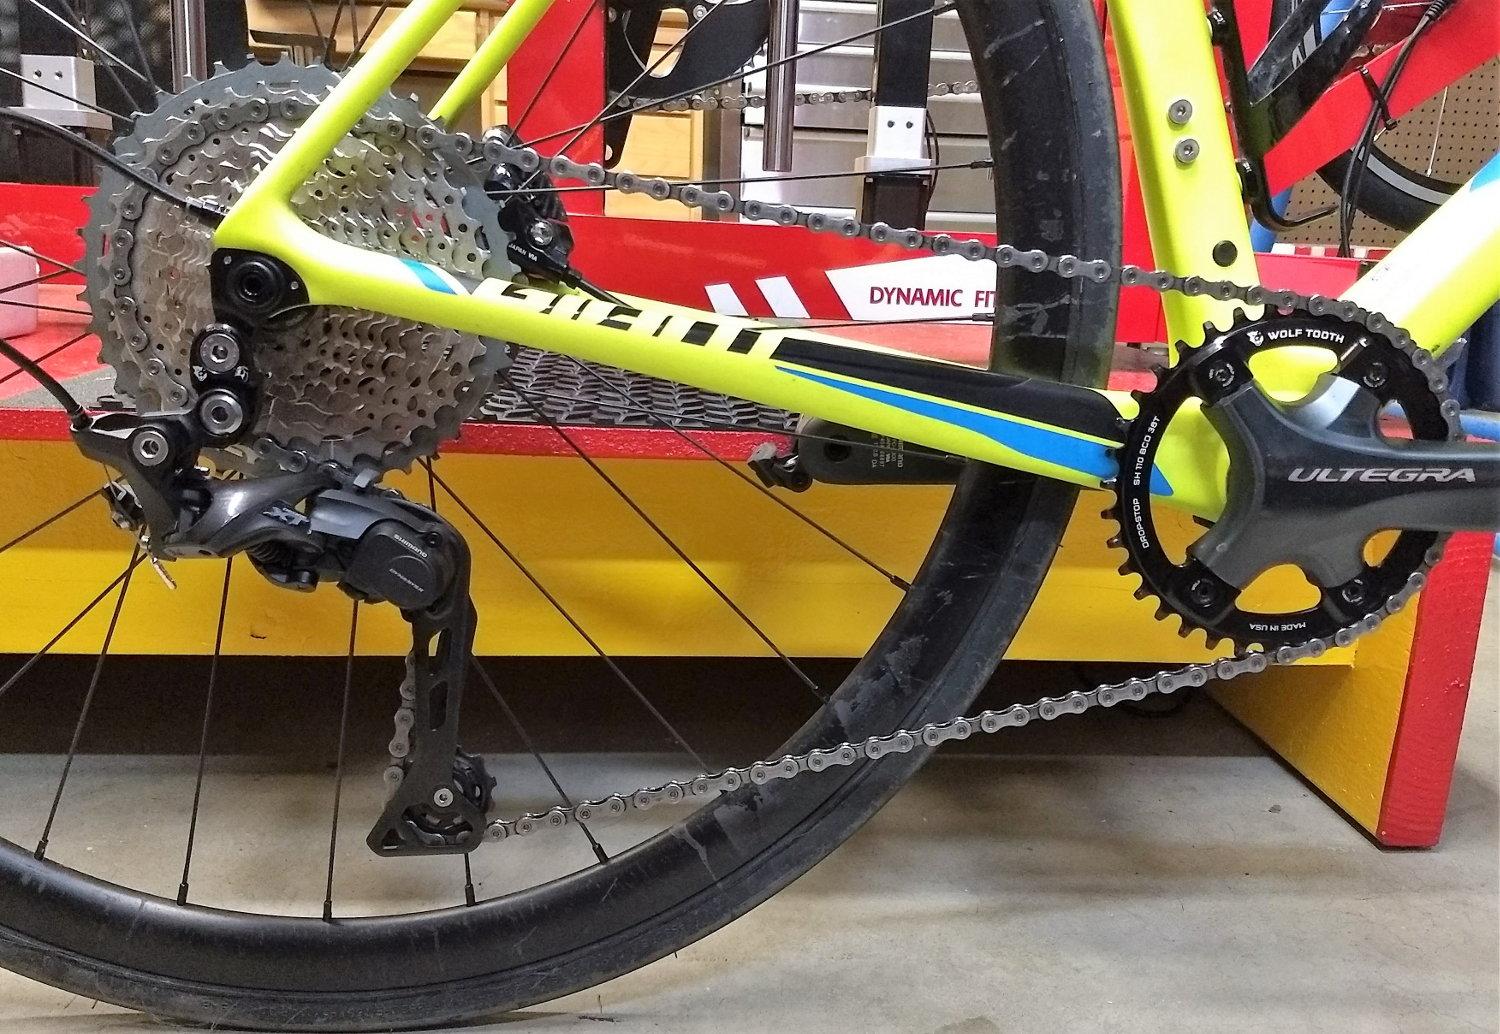
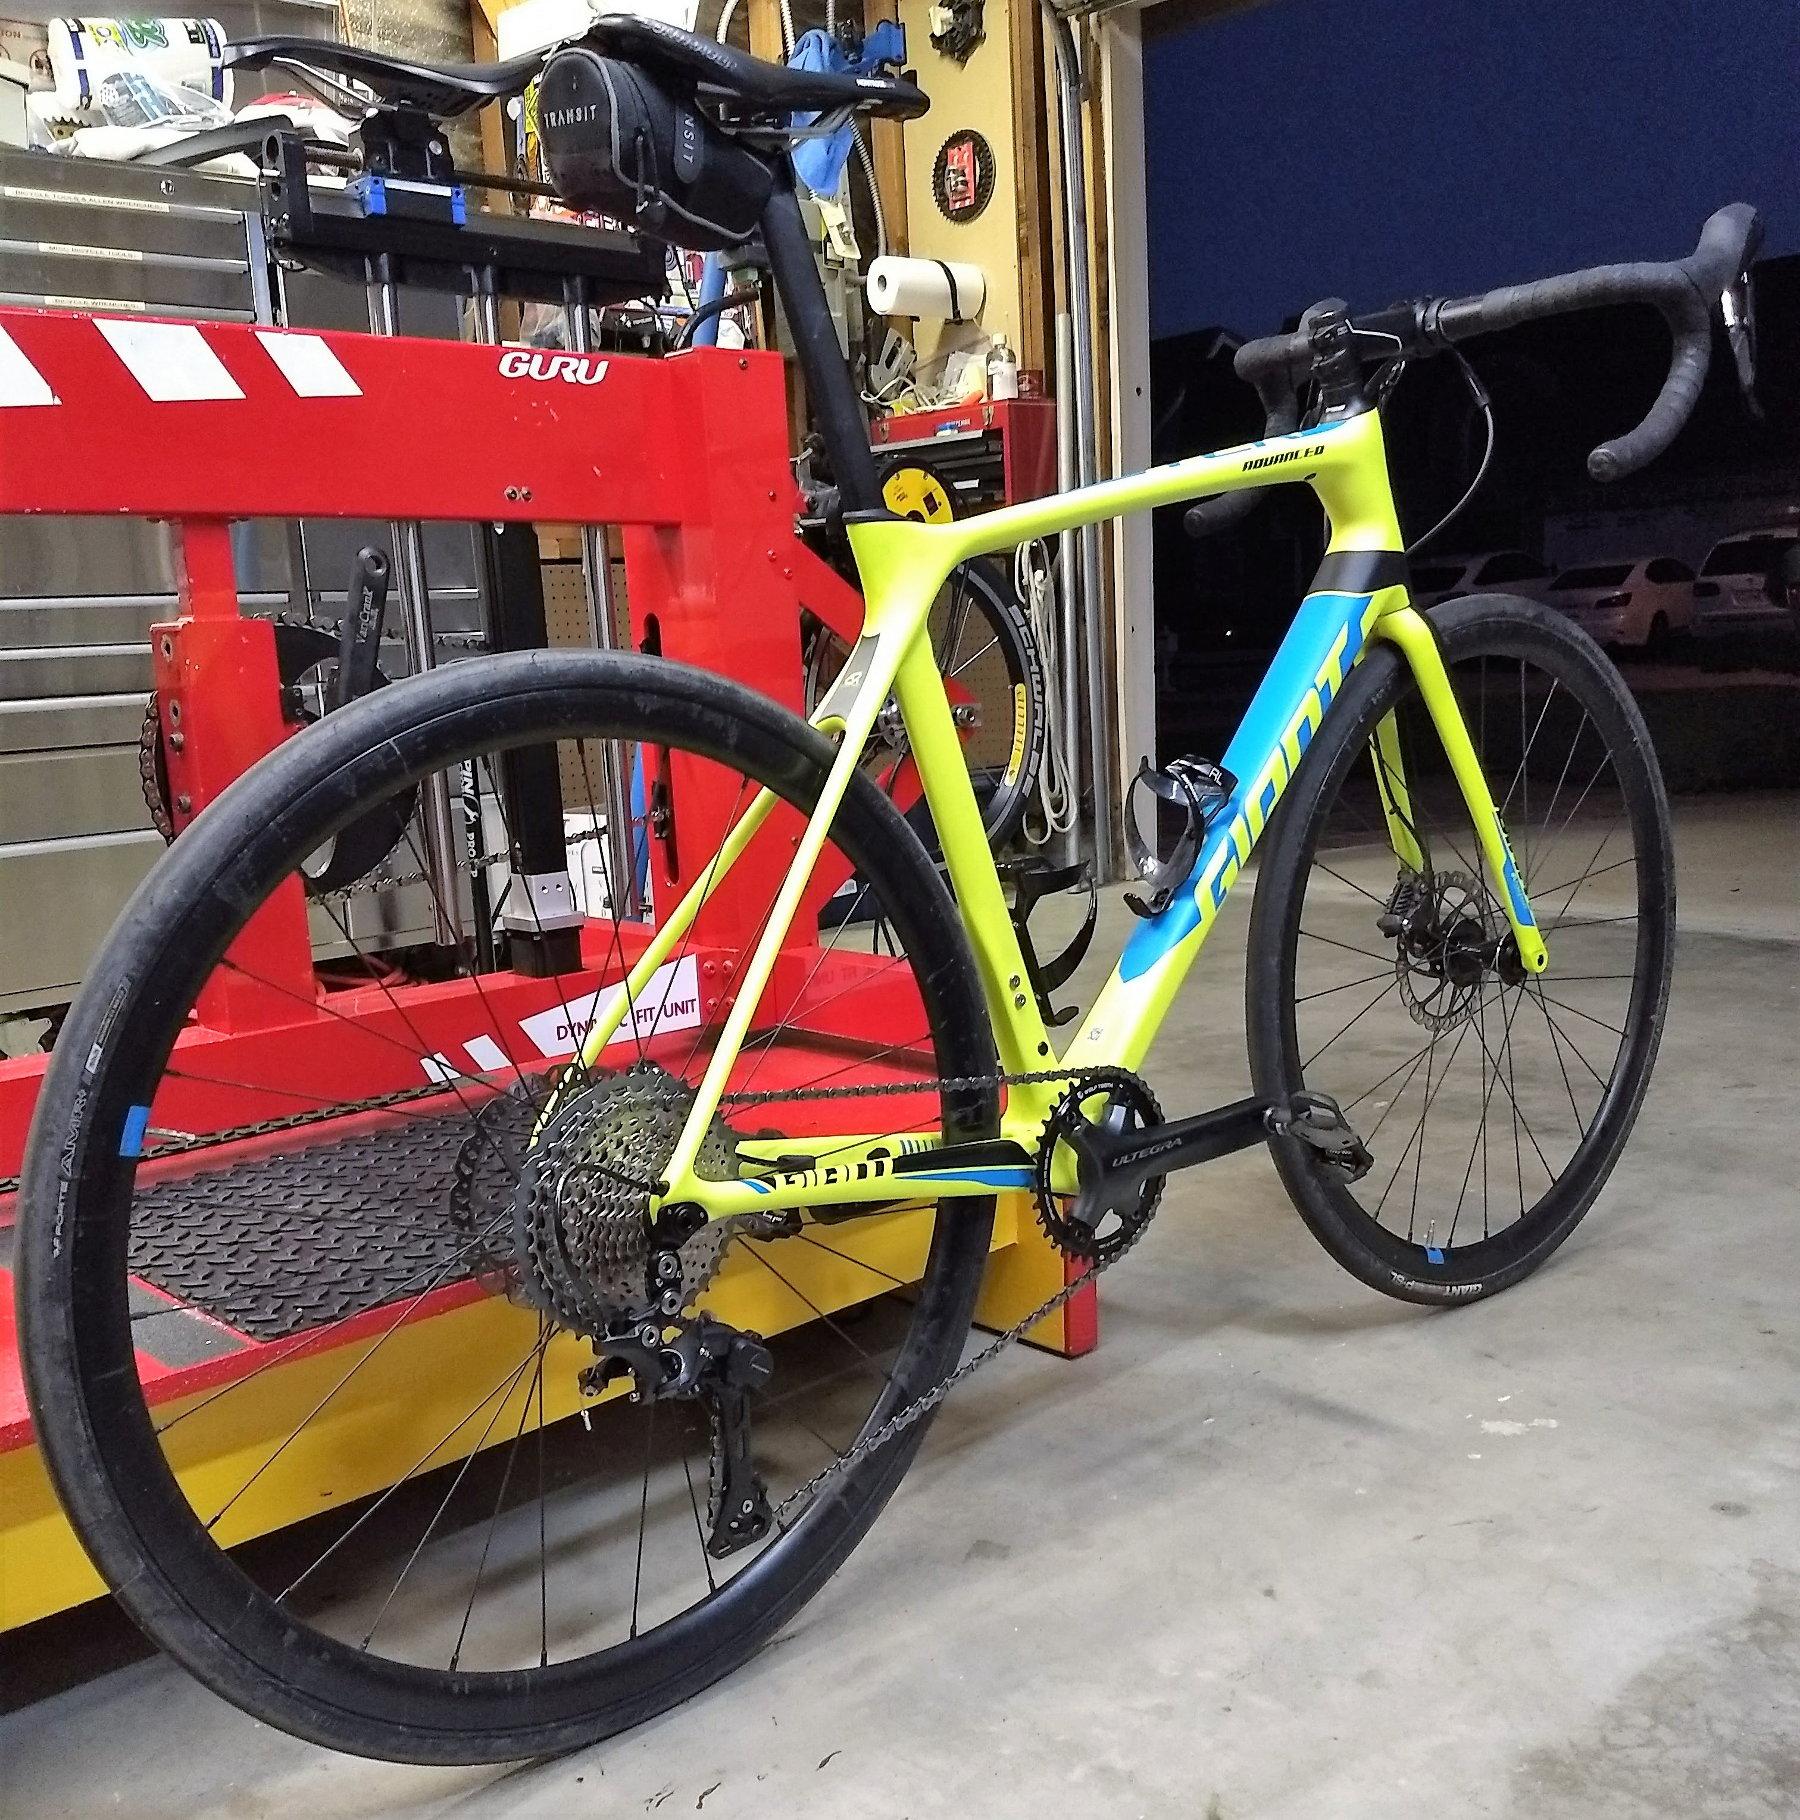
Decision #2 – which chainring? I had made up my mind with a 34t, but, turns out that the smallest Asymmetric 110 BCD x 4-bolt Shimano (the key word is Asymmetric) chainring is 36t. WolfTooth manufactures only a 36t, 38t, 40t, 42t, 44t, 46t, 48t, and 50t in this size and pattern. So, decision made. WolfTooth 36t round chainring (for Shimano 110×4). The picture to the right shows the 6800 Ultegra with road chainrings. The next picture shows chainrings removed. The third picture shows the WolfTooth 36T asymmetric chainring installed.
• Note1: WolfTooth also makes elliptical chainrings;
• Note2: You will also need shorter chainring bolts
Decision #3 – My third decision was which cassette? My XT CS-M8000 options were 11-40t, 11-42t or 11-46t. I chose the 11-42t. Looking through the gearing analysis charts in Part II, I thought there was enough gear for what type of events I want to ride.
Decision #4 – Which rear derailleur? I went with the Shimano XT M8000-SGS (Super Long GS). This should be long enough (plus I’m keeping the RoadLink installed as well) to handle this cassette’s 42t large gear. With this setup, I could easily go with an 11-46T .
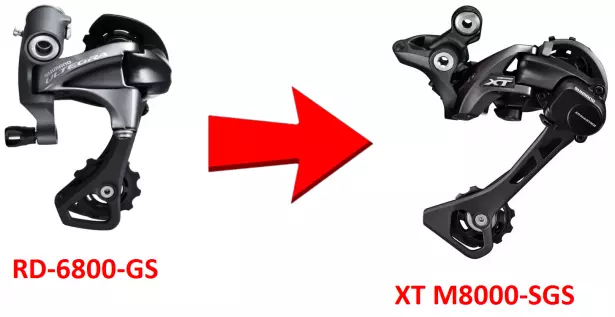
Decision #5 – Purchase the TanPan + INLINE adapter. Again, since Shimano road shifters and MTB shifters have different cable pull rates, the TanPan is used to change the pull ratio so that a M8000 rear derailleur works perfectly with “road” shifters (Ultegra 6800, Ultegra 8000, Dura Ace 9000, or Dura Ace 9100.)
By far, the most difficult part of this build was installing the TanPan.
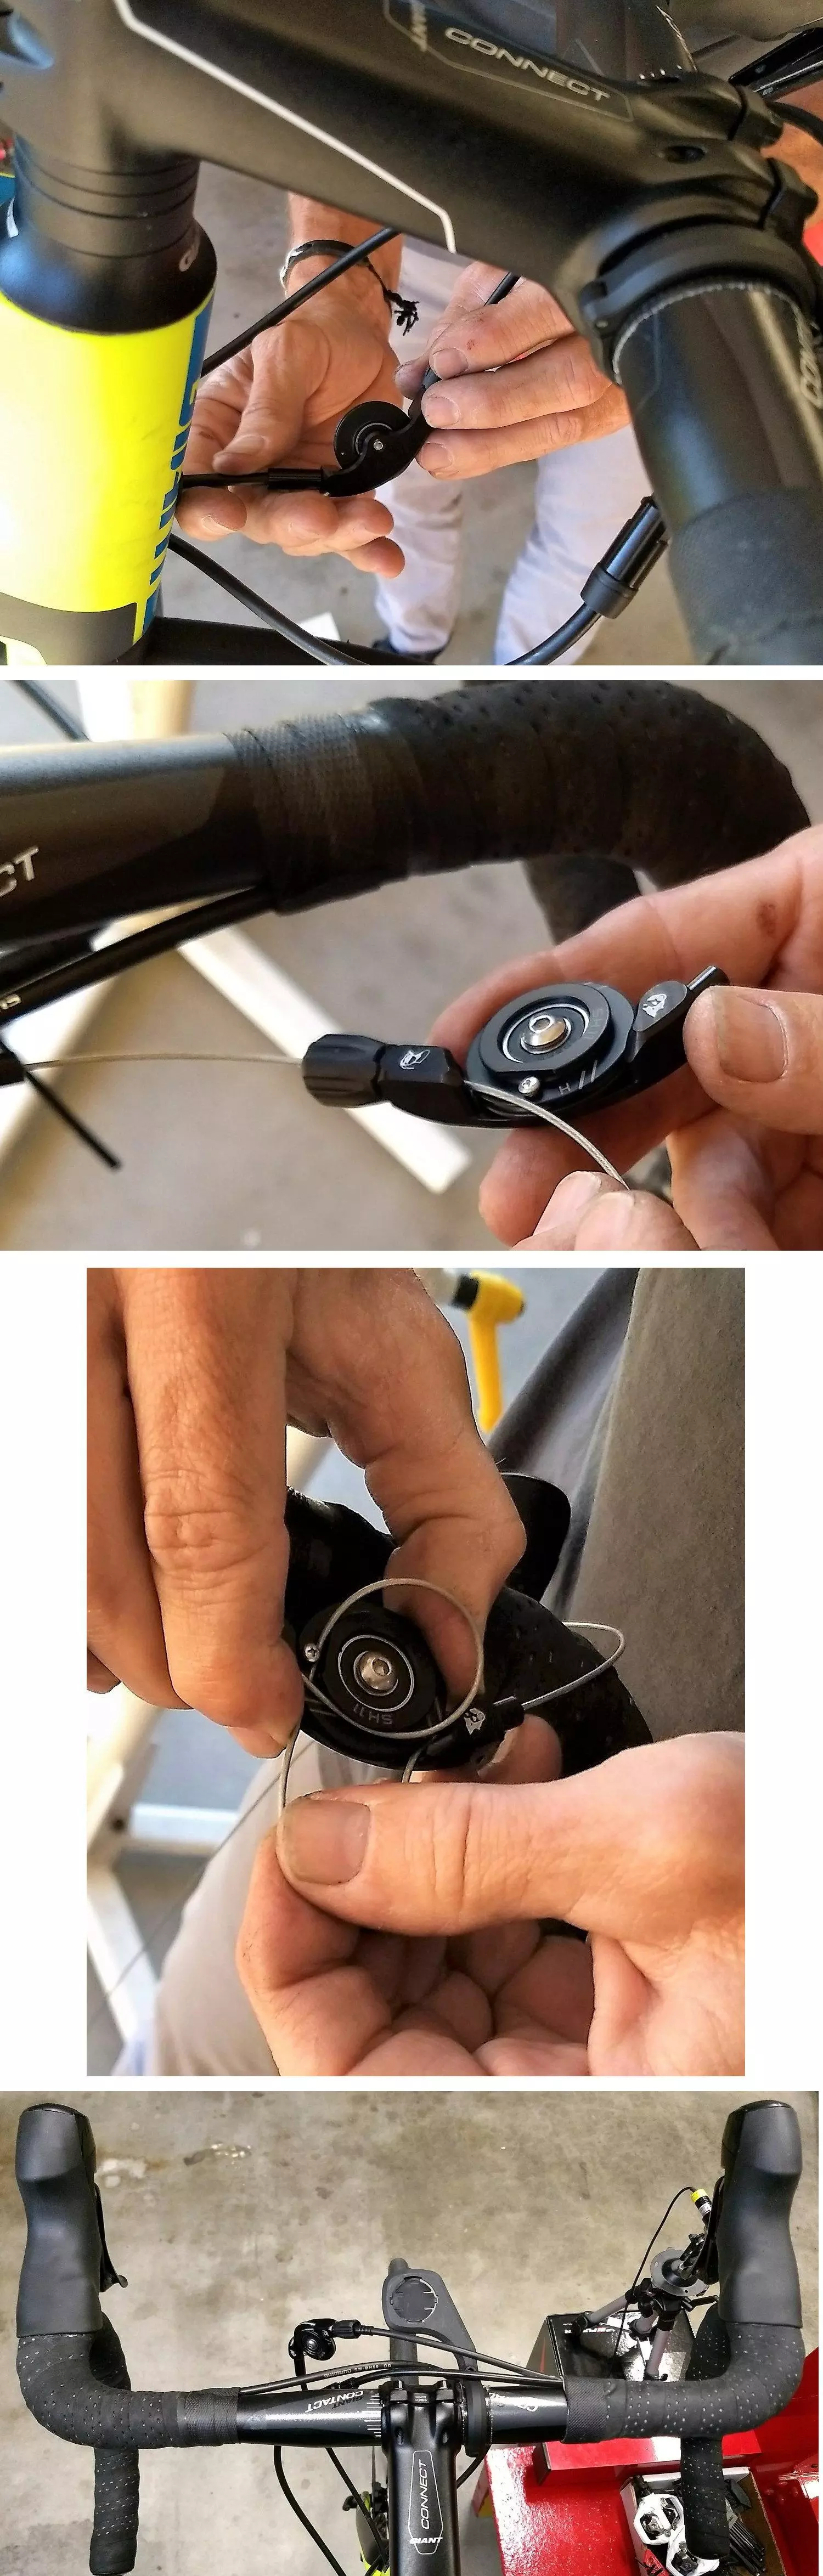
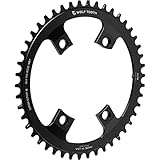
- Even though WolfTooth has instructions that you can download, you will still need to ‘dry fit’ the TanPan to see which will be a better fit – at the rear of the bike or at the front. For this build, we first tried to install the TanPan at the rear of the bike, between the rear derailleur and where the cable exits the chainstay. This was a no-go since the cable routing would have been too tight to work. I would have ended up with a large kink in the cable. It is important to note that there are numerous ways bicycle manufacturers route the rear derailleur cable out the frame. Each application is different and even though a TanPan mounted at the rear will not work for this bicycle, it should work for many others. We had no other choice but to install the TanPan between the shifter and where the cable enters at the front of the frame.
- The single most difficult part of this build was figuring out how to ‘thread’ the rear derailleur shift cable through and loop it around the TanPan. We found it better to look at the photos on the WolfTooth website instead of trying to follow their instructions…see below.
PUTTING IT ALL TOGETHER
I will divide this next section into 3 parts… things that are easy to complete, then those that are a little more involved, followed by the more difficult items.
IMPORTANT NOTE 1: USE A TORQUE WRENCH FOR EVERY BOLT!
IMPORTANT NOTE 2: KEEP ALL SMALL PIECES YOU REMOVED TOGETHER – I.E., DON’T THROW OUT ANYTHING OR LOSE ANYTHING!
First, the easy stuff
- remove the chain using a standard chain tool such as the PARK TOOL CHAIN TOOL or SHIMANO CHAIN TOOL – linked below
- loosen the front derailleurs’ cable fixing bolt clamp
- remove the front derailleur
- remove the front derailleur cable from the shifter end
- remove any front derailleur housing from the frame
- loosen rear derailleurs’ cable fixing bolt clamp
- remove the rear derailleur leaving RoadLink installed
- remove rear derailleur cable from the shifter since old one is probably too short
- purchase new ‘extra-long’ rear derailleur shifter cable
- leave rear derailleur housing installed for now
- with the rear derailleur removed, this is the perfect time to (re)align the rear derailleur hanger
- install new XT M8000 SGS rear derailleur onto RoadLink
- remove rear wheel from bicycle
Second, a little more involved
- remove old cassette from wheel and any spacers from the freehub body – tools linked below
- making sure you have the correct cassette spacers – this depends on which cassette and wheel combination you are/will be using
- Note, even though the literature says that I needed to add two spacers (both 1mm & 1.85mm), this was too much since there was no room for the 11T cog. I ended up with installing a single 1mm spacer, so, you might need to dry-fit this several times.
- slide on the M8000 cassette and tighten per spec
- replace rear wheel back onto bicycle frame and secure per spec
- remove the crank arms / crankset – leave pedals installed
- with the crankset out of the way, inspect the bottom bracket bearings. If required, and based on your bottom bracket application, remove and replace the bottom bracket/bearings/cups
- now, remove both chainrings from crankset
- next, install the single asymmetric chainring using shorter chainring bolts, tighten per spec
- grease crank spindle, reinstall crankset and tighten per spec
Third, the most difficult tasks
 The rear derailleur housing is installed in two main parts. The front part which is attached to the shifter and routes to t
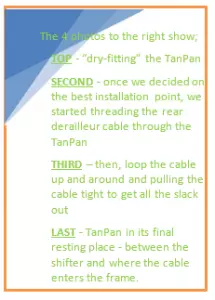 he front of the frame and the rear part which exits the right chainstay and routes to the top of the rear derailleur. Several ferrules are also in these cable runs.
Leave the rear part alone for now
-
- With the Rear Derailleur cable removed, unwrap handlebar tape and remove housing
- Dry-fit the TanPan;
- Decide if the TanPan needs to be installed at the front of the bicycle or at the back.
- Once decided, start running a new LONG shifter cable and new housing (if needed).
- Partially run new rear derailleur cable from shifter and install TanPan
- Install TanPan per WolfTooth instructions, note, depending on your application, the Inline Adapter might also be needed. The inline adapter can be purchased with the TanPan or separately.
- Since the rear derailleur cable on my Giant TCR Advanced exits at the rear of the chainstay, which could have caused the cable housing to have too tight of a bend, I needed;
- the Inline Adapter, and
- to install the TanPan under the handlebars
- With everything installed, lastly, Tune Rear Derailleur
- Ready to Ride!
PARTS & TOOL REQUIREMENTS LIST BELOW
| PARK CHAIN TOOL |
SHIMANO CHAIN TOOL |
RD SHIFT CABLE |
CASSETTE REMOVAL TOOL |
 |
 |
 |
 |
| BICYCLE TORQUE WRENCH |
BICYCLE TORQUE WRENCH |
BICYCLE TORQUE WRENCH |
 |
 |
 |
| M8000 CASSETTE (11-42T) |
XT M8000 SGS |
WOLFTOOTH 36T CHAINRING |
CHAINRING BOLTS |
 |
 |
 |
 |
| WOLFTOOTH TANPAN |
TANPAN ADAPTER |
ROADLINK |
 |
 |
 |
HOW DID IT WORK OUT? SHIFTING? RIDING?
Two questions have come up several times … “In General, How Did It Work?” and “Are You Happy with the Results?”
Since most of the rear derailleur shift cable is run internally, the best we could do was to stretch the cable by shifting up and down the entire range of the cassette about 50 times. After final tweaking of the cable adjuster and limit screws, the drivetrain shifted PERFECTLY. Next, my mechanic rode the bike around the block. I live on a hill and going counter-clockwise around the block, there is a long 6% grade followed by a short 10% grade. Going clockwise, you end up on a long 14% grade climb. That’s how we tested the bike.
Both of us were totally impressed with how smooth and positive the shifting was. We were both equally impressed as to how EASY a 14% grade climb is with a 36T chainring and a 42T cassette cog! The entire gear range was able to be tested in subsequent laps around the block.
The next day was my hill repeat day doing hill intervals. I’ve previously written about training in the hills of San Clemente, CA. This route is either UP or DOWN. Most hills average 11%-13%. This is a course where we can average 1,000 feet (305 meters) of climbing every 30 minutes. A typical 2-hour training ride yields 4,000 feet (1,219 meters) of climbing.
So, what did I notice doing this ride on this bike (36T x 11/42T) vs the other gearing I was running? (50/34T x 11/36T)?
Referring to the gear inches tables (right & below – click HERE for FULL SIZE TABLE),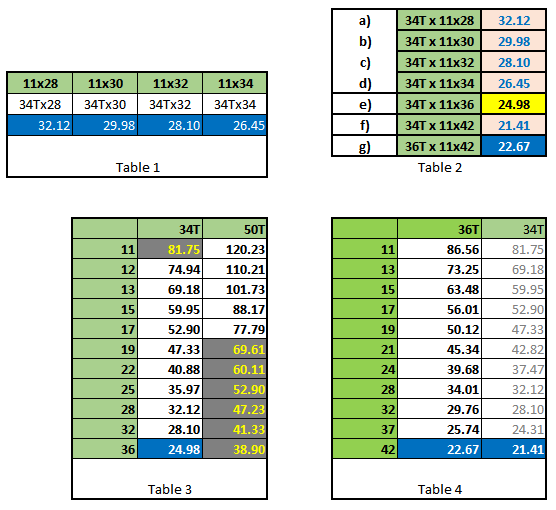
Table 1 includes 4 cassettes – 2 popular cassettes, 11×28 and 11×32 as well as two newer Ultegra 8000 cassettes in 11×30 and 11×34.
Table 2 summary table of Tables 1, 3, 4.
Table 3 shows my previous gearing on the Giant TCR Advanced.
Table 4 the new gearing 36T x 11×42 as well as a hypothetical slightly lower gearing of 34T x 11×42.
The text in the Blue boxes is the actual gear inches of the largest cassette cog with its corresponding small front chainring in each of the tables 1, 3, 4. Looking at the summary table 2, the salmon colored boxes represent these same gear inches. The yellow box is my previous lowest gear inch and the blue box is my current lowest gear inch.
Back to my hill ride. What I noticed was that I was climbing at the same rate (2,000ft./hour), the difference was that I was spinning at a slightly higher cadence. Where I felt the biggest difference was that I was not as tired after the ride nor the next morning as I would have been if I would have run an 11×28 cassette (which a couple riders did). They were mashing on the pedals while I was ‘dancing’ on the pedals. They were building up lactic acid in their legs, I was not.
SUMMARY
All-in-all, I’m extremely happy with the way this project turned out. I learned a lot about gearing and incompatibility between Road and MTB components – even from the same manufacturer. I also give Kudos to WolfTooth and their design, engineering and manufacturing teams to having solved these incompatibility issues. WolfTooth manufactures HIGH QUALITY products that WORK and WORK WELL! Even though I have only 4 hours of ride time on this project, all of it was hills at a high cadence and 140% FTP (60 seconds on, 60 seconds off intervals)! NOT A SINGLE MISSED SHIFT! I call that a SUCCESS!
And finally a shout out to my mechanic Mark Strohman for all of his help in putting this project together!

I have always enjoyed bicycling and, through a series of coincidences, became a Bicycle Industry Consultant and Product Tester. I test prototype products for companies and have published only off the shelf production products on biketestreviews.com.

