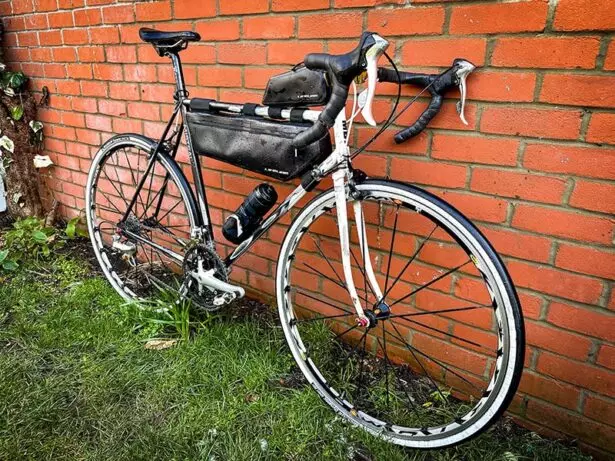
Bikes come in all shapes and sizes, and this is an aspect of cycling that is very exciting for many riders. There are no rules about what bike you ride or how it looks. You just have to like it.
Cycling is very personal, and the bike says a lot about the rider. We often come across a question from many cyclists asking if they can convert an old bike to run modern components. In short, the answer is yes.
It’s unfortunately not done very often, but when it is, it really turns heads. In this article, we’re going to be telling you everything you need to know and doing a conversion ourselves. Here’s what we will be discussing:
- What Is A Modern Component Conversion?
- The Benefits Of Converting An Old Bike To Modern Components
- What You Need To Know Before Converting An Old Bike To Modern Components
- What Are You Going To Need?
- Our Classic To Modern Guide On Converting Your Bike
What Is A Modern Component Conversion?
A modern component conversion is when you take an old classic bike, strip it down to a bare frame, and then build it back up with components that are designed for a modern bike.
It looks incredibly cool, and you bring life to an old bike. It’s the kind of bike you take to a cycling cafe, and people need to take a second glance at it.
Very few companies will do this professionally for people, but we recommend trying it yourself as it’s a huge amount of fun.
The Benefits Of Converting An Old Bike To Modern Components
There are many benefits when it comes to converting an old bike to using modern components. Here’s what you need to know:
Looks
The first benefit is the way these bikes look. There’s something really special about having a classic bike and converting it to modern components.
It has this retro style but with shiny modern components that make the bike look amazing and like a unique creation.
Cost
The next benefit is cost. It’s much cheaper to buy a second-hand groupset and put it on a classic bike than to buy a new bike altogether. It may not give the same experience as a new bike, but that is not always what it’s about.
Better Performance
Modern components offer much better performance than classic components. They are lighter and work much faster and more efficiently. If you want a quick performance upgrade for a classic bike, we go straight to components first.
Comfort
Next, we have comfort, and modern components do offer much more. The shifting on the gears is smoother, the brakes work better, and everything is much more defined and dialed in than classic components.
More Adaptability
Using new components on a classic bike gives you loads more options for different parts. There’s not a vast amount of companies making parts for classic components when modern components have more options for upgradable components.
Reliability
Modern components are much more reliable than classic components. Modern components with contained bearings are easier to service and can offer you many more miles.
Sustainability
Finally, we have sustainability. It takes a lot of manufacturing to create a new bike. Updating your old bike with modern components is much better for the environment.
What You Need To Know Before Converting An Old Bike To Modern Components
Before you start ripping that classic bike to pieces, it’s important that you fully understand the job you are about to take on and the considerations you need to make. Here are a few things you need to know before:
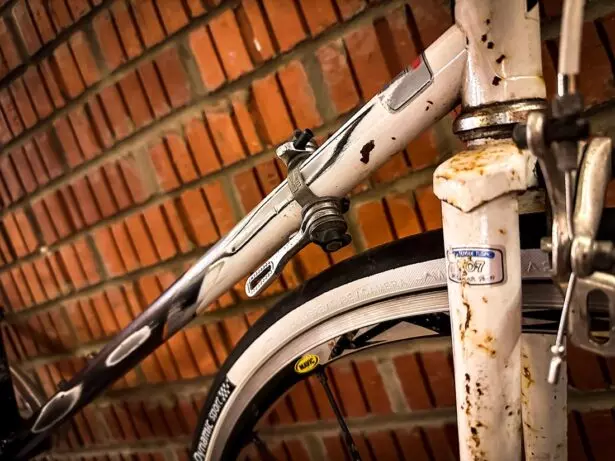
You Will Have To Modify The Frame
Not all components will go straight across. You will need to either have the frame fabricated or you will need to bend it outwards to suit your new components, and this isn’t something the bike can always come back from.
You Have To Research What Fits
Before you get into the conversion, it’s a good idea to research what fits. We highly recommend making a list of everything you think you need before jumping into the conversion and the stand it needs to be.
I personally always look for:
| Type Of Bike | What type of bike are you going to convert? | Road |
| Bottom Bracket | What type of bottom bracket thread is the original bike? | English Threaded |
| Brakes | Will the brakes go across properly? (Rim or Disc) | Rim |
| Wheel Size | Check the wheel size, has to be the same or very similar for example 28” and 700c. | 28” |
| Drop Or Flat | You will need the shifter to match the right bars | Drop Bar |
| Derailleurs | Will it fit the hanger and seat tube or do you need a custom one made | Has a hanger |
Donor Bike
The reason why we do this research is because now we can look for a donor bike which we can switch everything across. So for the conversion we’re doing, we want a road bike with an English threaded bottom bracket, rim brakes, 28” or 700c wheels, and drop-bar shifters.
There will be some parts you need to invest in. We highly recommend allowing a few days for conversion so you can order parts across.
When you do a conversion, you must fit new cables inner and outer, and don’t be scared to get creative.
The closer you can get your donor bike to the bike you’re converting, the easier this task will be!
Disclaimer! Safety Is Everything
When converting a bike to components it’s not designed to be used for, you do take a risk. Not only is modification required, but you often might be working out of the manufacturer’s guidelines.
We highly recommend only doing this if you feel confident and also plan to get it checked by a professional afterward. We are not liable for your actions, as each bike process differs slightly.
| We recommend having some basic bike maintenance skills and the ability to build a bike from scratch to complete this task. |
What Are You Going To Need?
It won’t be easy to know what you will need until you start doing the job. We recommend starting with the following:
- A Classic Bike To Convert
- A Donor Bike With Parts To Match
- New Cable Inner And Outers
- Bar Tape
You will also need some tools to keep you going as well. Here’s what we recommend starting with, even though, across the process, you might require more.
- Allen Key
- Spanner Set
- Screwdrivers
- Chain Breaker
- Bottom Bracket Removal Tool
- Cable Cutters
- Insulation Tape and Cables Ties
- Threaded Rod, Washers, and Bolts
- Bike Stand
Our Classic To Modern Guide On Converting Your Bike
Now for the exciting bit. Let’s start converting a bike across. We recommend taking your time and enjoying the process.
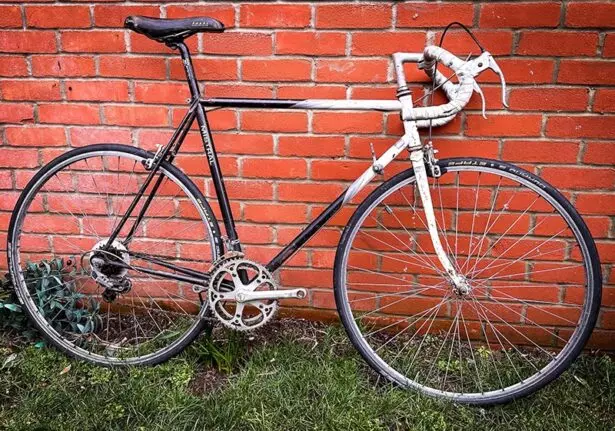
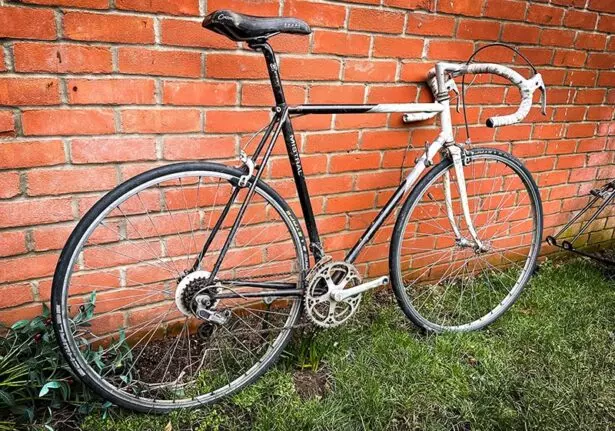
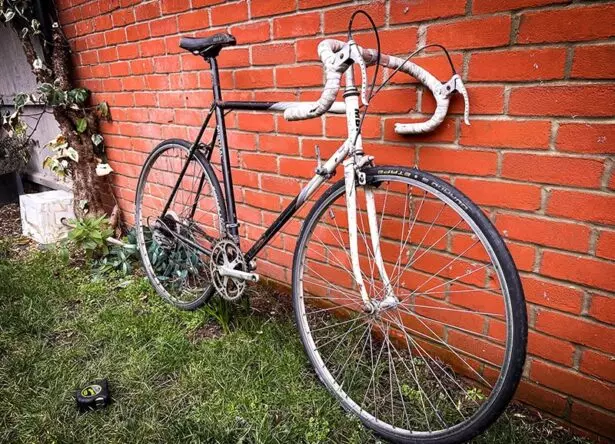
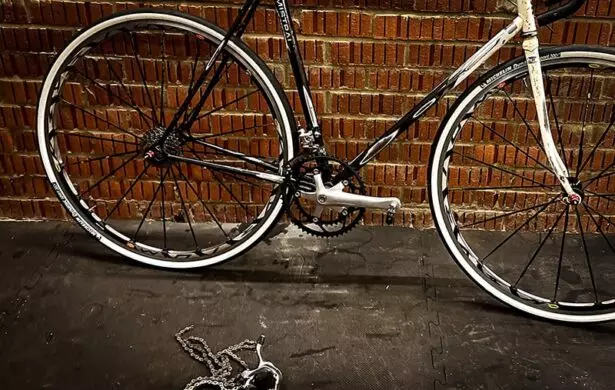
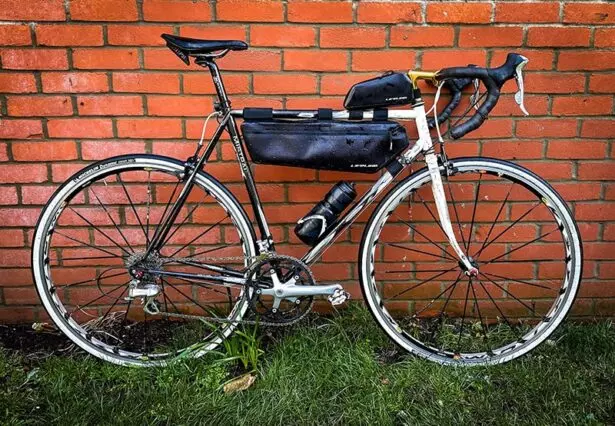
In this article, we take classic road racing and updating it with parts from a modern road racing bike. We have decided to leave the frame with its battle scars and not repaint it.
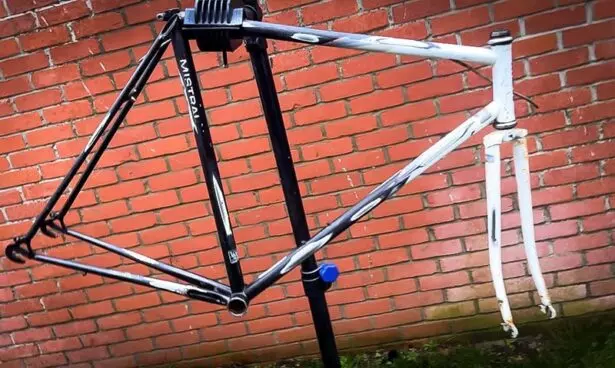
Step One: Strip The Classic Bike
The best place to start is with a completely stripped bike. We recommend taking everything you can off the frameset but leaving the forks in and handlebars on.
We do this so there’s nothing in the way, and we can completely clean the bike and assess any parts we might need.
The best way to go is to start by taking the wheels out first. You will either need to undo a quick-release skewer, or you will need to take a spanner and undo the axle bolts. Take the wheels out and put them somewhere safe.
Next, we will want to remove the old components, so remove both derailleurs and brakes. Don’t worry about saving the cables; these will get replaced, so just cut them if you have to.
Then the shifters and brake levers will need removing too.
Now you will be left with the frameset and handlebars. The last part that needs to go is the bottom bracket. It will likely be nice and stuck, so depending on the bottom bracket, you have to get some elbow grease ready and remove it.
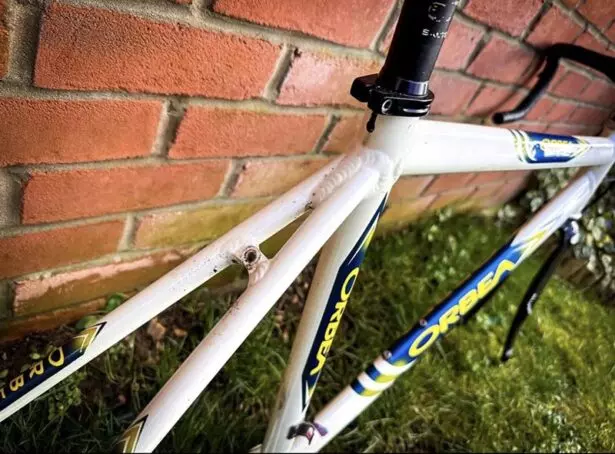
Step Two: Clean And Assess
Now we are going to want to give the frameset a big clean. Every bit of dirt and grease needs to be removed here. Make sure it’s sparkling and have a big focus on the internal parts, such as the bottom bracket shell. You will also want to remove any old bar tape or stickers.
Now you need to assess what parts you require for the bike. Measure the bottom bracket to see if it matches your donor bike bracket, and then start checking the derailleurs and everything else you need to go across.
Anything you can straight away see that isn’t going to work, we highly recommend getting in order while you start getting on with other jobs on the bike.
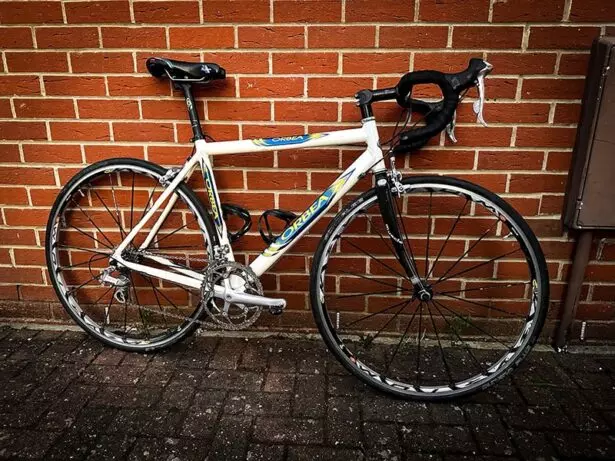
Step Three: Strip The Donor Bike
Next, we are going to need to strip down the donor bike. Unlike the other bike we are updating, we highly recommend not taking everything off. Take what you need for now, and you can sell the rest in one single job lot or split it further.
Before stripping it, we recommend checking that everything is working and seeing how worn it all is. You might need a new chain or cassette. Something could be broken. It’s better to find out now rather than later.
We are going to assume that you were able to take the wheels, gearing, brakes, and bottom bracket for this, as that’s what we got from our bike and what we would hope a donor bike would give us. Remove this starting with wheels, components, and finally, the bottom bracket.
Step Four: Frame Modification

Next, we need to start modifying the frame. One very large problem that a lot of people find is that the distance between the rear wheel stay is 126mm when modern wheels like what we’re going to put in are 130mm.
Although 4mm doesn’t sound like much, it makes a huge difference.
You have three options. You can either chuck it in and hope for the best, which we don’t recommend. You can bend it out with a threaded rod if it is steel, which you can do, but many don’t advise.
Finally, you can get a professional welder to cut and reweld it, which is very expensive.
The welder is going to give you the best result, but that’s going to get expensive. We personally are going to bend out the stays. I have done this with a few bikes and never had any issues, but it’s at your own risk.
With the threaded rod in the center, you will want to use washers and bolts to pull it out to each side slowly. We recommend using a measuring tape to go 150mm wide, and then when you remove the rod, it should sit around 130mm. If it doesn’t, try 155mm or 160mm and continue until it settles at 130mm.
Step Five: Add Drivetrain Components
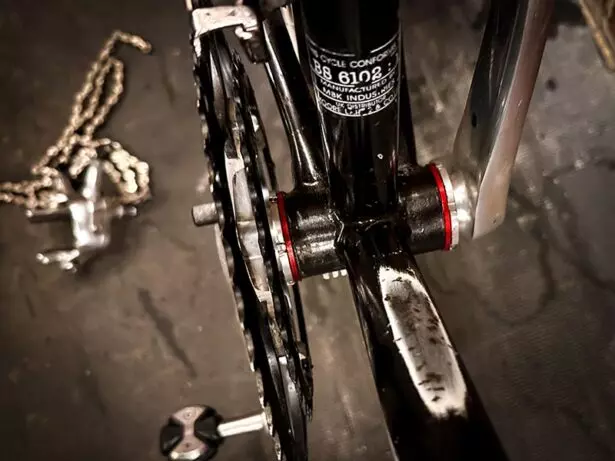
Now the bike is starting to take some shape. Here we recommend adding components. So get the bottom bracket in, torqued to specification, insert the cranks, and get that tightened in and ready.
Insert the wheels into the bike. If you use the wheels and groupset from the donor bike, you won’t need to do anything with the cassette as it will already be tightened, and the tires will be on the rims.
Then you will need to screw both the derailleurs on. The rear should go straight into the hanger, and the front will wrap around the seat tube. You might need to buy an adapter depending on your seat tube size, but these are readily available online.
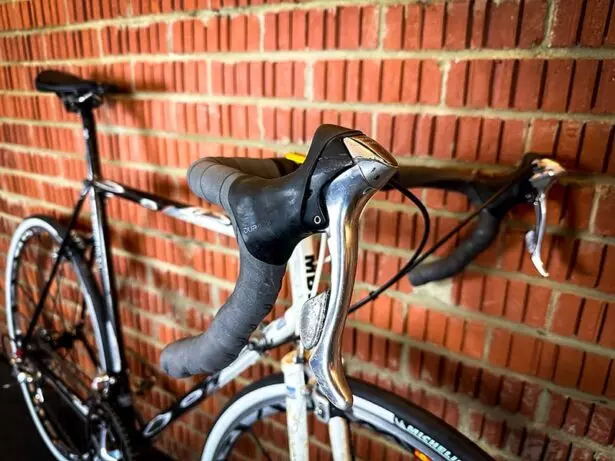
Now you are going to want to add the shifters but don’t worry too much about their position just yet. Just get them roughly right. Finally, you will want to put the chain on following the correct routing.
Step Six: Add Drivetrain Cables And Make Adjustments
Next, we are going to add the cables to the drivetrain. Get the outer cut as required, then insert a cable into the shifters and tighten everything up.
A common problem you might find is the cables might not have any stops. If this is the case, do one long cable run without stopping.
Once in, you will need to adjust the derailleurs. Start with the rear by adjusting the high-limit screw.
Then get the cable tension correct and then the low-limit screw. You will then need to repeat the process on the front derailleur.
Step Seven: Add Brakes
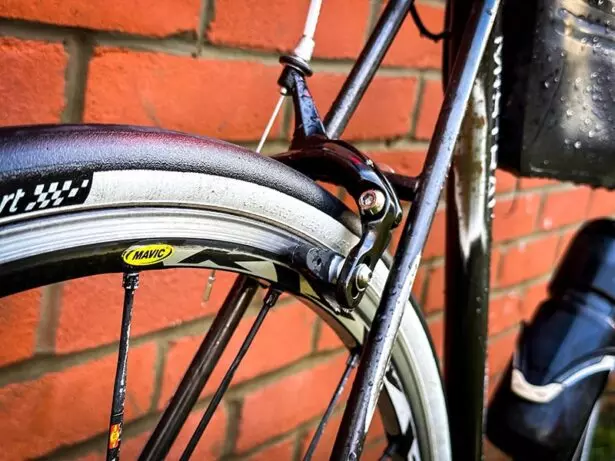
Now for the brakes, the most important part of the bike. You will need to attach the brakes on the rear and front. Once added, run cable inners and outers to both shifters. You can choose which side you want the front and which you want the rear.
Then you will need to adjust them to get them perfect. You will more than likely find the pads will be nowhere near even close to where they need to be.
If you find they don’t reach at all, you might need to swap them for what they call deep drop brakes, or you can use the original, which comes with the bike.
Now you are going to want to tie all the loose cables up against the frame. If there are not any cable stops, it’s not a bad idea to just use cable ties.
A nice way of doing it is by using metal cable ties. They give it a nice finish.
Step Eight: Testing
Next, it’s good practice to go around the bike and ensure everything is nice and tight and works as it should. We will be testing which will require the bike to be ridden, and we want to ensure it is safe.
So get the bike out of the stand, pump the tires up, and then go to a safe place to do some testing. You want to make sure the gears and brakes are working properly, and you’re not getting any funny noises.
This is a really good time to start getting a feel for the bike. You want to get the saddle at the right height and adjust the shifters on the handlebars so they sit perfectly ready for the bar tape.
Step Nine: The Finishing Touches
Now it’s time to add the finishing touches to the bike. You will want to get the bar tape on and wrapped perfectly. Go to another bike you might own and take the measurements to perfect your fit.
Now is also a good time to check that the bolts are nice and tight again. Although it goes without saying, it’s really easy to miss the odd one and end up having issues later in time. It would be best to use a torque wrench to ensure they are perfect.
A Final Note
Finally, you must pat yourself on the back as you have just converted an old classic bike to modern components. It’s not an easy job, and every build you do like this will be very different. We hope you enjoyed our article and now feel inspired to convert a classic bike.

Robbie Ferri has spent years working in a bike shop, has worked with industry leading brands on product creation, has been a semi pro athlete, and is a fully qualified strength and conditioning coach. He has broken World Records, bikepacked all over the World and raced ultra distance at a top-level.


can you add how to convert from a quill stem to a modern stem? and what do you do with defunct downtube shifter mounts? I think these additional paragraphs would make for a more useful article.
thanks for the feedback. we’ll address those in the updated version on the article