Haleakala Bike Ride How-To Guide… by Rick Schultz
Several years ago, my wife, daughter and I traveled to Maui for a fun-filled family vacation. My wife and daughter wanted to take one of Maui’s famous bicycle tours from the top of Haleakala volcano back down the road to the bicycle shop 37 miles away – yes, basically it’s a 37 mile downhill ride.
This sounded like a great outing with the family, but seemed a little too easy, so I opted to do the ride both ways – up the 10,023 foot volcano and back down! My wife and daughter would ride in the tour van and meet me at the top so I could ride down with them on their downhill excursion. Here’s the official Haleakala webcam – https://about.ifa.hawaii.edu/facility/haleakala-web-cams/
BACKGROUND: I have often been asked, “how would you rate this ride?” I always tell people that Haleakala is a good ride, but you need to be in shape. Several people I know have attempted it, but turned around at the park entrance which is still about 9 miles from the top. The road is good and steady; no part is over 8.5% grade (except for the final 1/3 mile which is up to 12%). The average is about 6.5%. But don’t be fooled, it is a TOUGH, tough ride.
It is best to rent a “performance” road bike from one of the local bike shops, and ask for a triple crank. We rented ours from Maui Cyclery. You will thank me for the gearing recommendations when you go above 8,000 feet. Not that the grade is hard, it’s just a constant strain on the legs for 4-5 hours. With a triple, you can shift down and rest a little. My ride from sea level to the top was 4 hours 15 minutes.
Going downhill is much more dangerous than going uphill. Over the years, several tourists have been killed by going too fast through the downhill turns and flying off the road into the lava fields. An article in the Honolulu Advertiser claims 70,000 cyclists take this downhill tour each year with more than 117 accidents per year (an accident every two-and-one-half days). On average, there are about 400 riders every day that take the downhill tour.
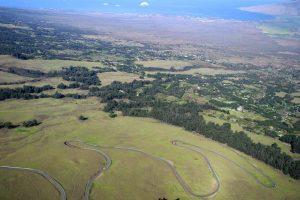
Photo courtesy of Maui Cyclery
These accidents are mainly due to the fact that some tourists have never ridden a bicycle, or haven’t ridden a bicycle in years. There are also young kids on these tours that hit the brakes too hard in the damp switchbacks and end up taking themselves out and other travelers as well… It is this lack of experience that makes it ripe for a domino effect if someone crashes. The best way to ride down is definitely by yourself, or at the front of one of these groups.
Currently, due to liability issues, the State of Hawaii will not allow any downhill tours to start on the upper sections of the volcano. Instead, they require these tours to start outside of the park entrance. But, the good news is that if you ride up the volcano, you can ride down the volcano.

Image courtesy of mapmyride.com
At 6am, it was already 80ºF in Paia. Four hours later, the top of the volcano could be anywhere from 38ºF to 50ºF (luckily, a beautiful day awaited as it was 50ºF at the top)! It’s definitely hard to dress appropriately for this dramatic of a temperature fluctuation. And since the humidity is often very high, this causes sweat to pour all the way up to the summit.
As I was leaving Maui Cyclery, Donnie Arnoult, the owner, told me to refill my water bottles often. He also gave me some energy bars and gels to take along. He said that to keep your energy up, it is very important to eat and drink plenty.
Never allow yourself to become dehydrated on this ride. The warm temperatures and strenuous exercise can easily cause you to dehydrate during the initial part of the ride so you won’t be able to continue with the rest of the climb.
Note: I started with 2 full bottles, drank them both in the first 17 miles and refilled them at the store about ½ miles from the turnoff from Haleakala Highway to Crater Rd. I drank these 2 bottles and again refilled them at mile 26 which is the Entrance to the park. I refilled at a spigot behind the Park Rangers booth and these two lasted me to mile 36.5 which is the upper visitor center. I refilled 1 bottle which lasted me the next mile to the summit. All told, I drank 7 water bottles in 37 miles.
THE ASCENT
From Baldwin Park, Paia, Maui, the trip to the top is a little over 37 miles, but, it is the most beautiful and scenic 37 miles that you could ever imagine!!! It is also one of the slowest 37 miles that I have ever ridden. It took me a little over 4 hours to get to the top, and since I rode round trip, I put in 74 miles that day.
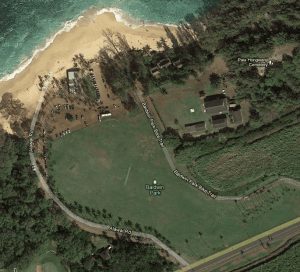
I left Baldwin Park, Paia at 6am. After ¼ mile, I turned right onto Baldwin Ave and the road started going up. The first five miles traversed through beautiful farmland and open pastures that were some of the greenest that I had ever seen.
Horses were grazing as the sunlight filtered through large trees that lined the road. This was the easiest part of the ride and you spend much of your time taking in all of the beautiful scenery while you are warming up for what looms in the distance.
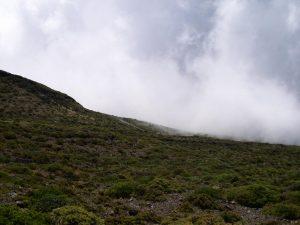
Tall grass, horses and cows line these lower pastures, and since the ride was always heading uphill, I was able to see Haleakala rising grandly in front of me [something that stayed in my thoughts over the next 4 hours.]
Leaving Paia, I continued up the road to Makawao, a beautiful quaint little farming town encompassing 4.7 square miles. I had finally spun the pedals enough to get warmed up and I still remember concentrating on not pushing too hard or too fast this early in the ride. After all, I still had several hours left and I certainly didn’t want to blow up or cramp up on the final push to the top of the volcano.
After leaving Makawao, I made several turns that pointed me in the direction of Highway 37 which would then transition to Highway 377 and eventually to Highway 378/Crater Rd. – the road that takes you to the top.
The gorgeous scenery along 377 is unsurpassed. Highway 377 continues upward, and travels along lush forest areas on one side and farmlands on the other. The road leveled out a little so I shifted up to the big chainring. Once I had shifted, I looked up the road to see in the distance what would later turn out to be the observatory at the top of Haleakala. I thought, “Man, that thing is WAY up THERE!!!”
Further up 377, thick forests lined each side of the road with just a hint of sunlight filtering through the overhanging canopy. I expected to see a mountain chalet any time. It reminded me of riding up to a ski resort. I had been riding for seven miles now and I was already at 2,500 feet.
As 377 continued, so did the ever increasing grade. I shifted into the small front chainring, which gave me a few less gear inches than I was currently using. Still spinning and still feeling good.
The temperature was now in the high 70’s – yes, a perfect day to ride, and not a cloud in the sky around Haleakala. Since rain usually appears just after noon at the middle altitudes, the earlier in the morning you ride the sooner you can descend and miss the rain and slippery roads.
As I traveled over the next four miles, I pulled out an energy bar, “half now, half when I start the real climb.” I took a look at the map I was carrying – about 2 more miles until highway 378/Crater Road. After the energy bar, I took a couple of large swigs of water… “Almost done with the second water bottle.”
At the junction of 377 & 378, there was a hard left turn that took me onto highway 378/Crater Rd. and the first of approximately 34 switchbacks that rival L’Alpe d’Huez. The L’Alpe d’Huez stage at the Tour de France starts at 2,428 feet and climbs to 6,070 feet, an altitude gain of 3,642 feet over 9.63 miles. Haleakala starts at sea level and climbs to over 10,000 feet in 37 miles, an altitude gain of over 4 times that on L’Alpe d’Huez.
Immediately after turning onto Crater Rd., I saw the first group of “downhillers” and they were coming towards me fast. First in line was the guide, and he was sitting on the top tube sideways showing off. Bad example as a role model since the next inline was a group of kids. I was hoping the kids were not going to emulate these knuckleheads. The thought occurred to me, “this is exactly why the State closed the park to the “downhillers.”
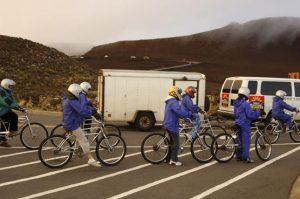
Photo courtesy of nps.gov
All of these “downhillers” were wearing heavy waterproof jackets and motorcycle-style helmets. The lead group was wearing green, the next group blue, the next yellow, the next red. There were hundreds of these tourists of all shapes, sizes and ages, coasting downhill way too fast…close to 40 mph on their 60 pound massively overbuilt bicycles with their specially fitted heavy-duty car sized drum brakes.
I was riding a sub-17 pound, full Shimano Ultegra equipped Carbon fiber Scott road racing bicycle with a fairly lightweight wheelset. The only thing that was modified was the addition of a triple front chainring for all of the climbing that would be in store for those who chose to ride up the volcano. It was also the only available top of the line rental available in my size J
Just to pass the time, I would yell at these tour groups, “Hey, you’re going the wrong way!” This would normally cause a chuckle from the dozen or so riders in each of these “downhiller” groups.
Note: 40 mph might not seem fast to some reading this story, but please remember, these are tourists that do not know the road, are kids that have only been on a bicycle a couple of times, retirees that haven’t been on a bicycle in 50 years, etc.
Approaching the second switchback, I take my last swig of water from my bottles. They are empty now. At the 4th switchback, Donnie told me that there is a store called Sunshine Market, where you can use their hose to refill your water bottles.
There is also a port-a-potty located in the back parking lot that they will also allow you to use. I topped off both bottles and added some energy mix I brought along. I also used the hose to spray the sweat off my sunglasses and to cool my head. One last swig from the hose and I was off and pedaling again. Once out on the road, I wouldn’t want to stop again until the park entrance, about 10 miles or so up the road.
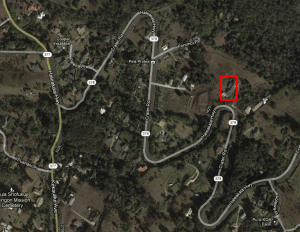
Photo courtesy of Google Maps
After a few more switchbacks, I was at 3,000 feet. I thought to myself, “this isn’t too bad, just keep it at a nice steady pace.” At this point, I clicked the right hand lever twice to get a few more RPM’s into the pedals. I reached for the second half of the energy bar and put the wrapper in my back jersey pocket. As I took another swig from my water bottle, I thought “You don’t want to litter the road, especially in such a beautiful place as this.”.
The temperature was slowly dropping. I had read that the temperature on Haleakala usually drops about 3ºF every 1,000 feet of elevation. Got to remember to keep drinking, something that is easily forgotten when it starts cooling off. Now that a few clouds had crept in, it was cooler, but the sun and UV radiation was just as intense as it would be even without the cloud cover.
Three more miles and I was now at 4,000 feet. Another 3ºF drop – it must be in the 60’s now. Still pedaling, I took my hands off the handlebars, sat up and reached for the vest in my jerseys back pocket. Zipping it up ½ way made for a comfortable transition from the 70’s to the 60’s. It is one of those vests that has the windbreaker material in front and the mesh in the back. It also has my cycling team’s logo and sponsor names… and matches my jersey and bib shorts.
Over the next few switchbacks, the tree-line disappeared and the scenery turned to fields of dried vegetation. It looked just like a barren wasteland. When I looked to the right, I could see the entire western part of the island and the Pacific Ocean. To my left were the dozen or so tour groups rocketing down the road.
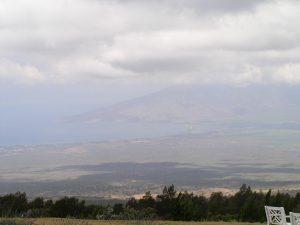
This was actually the safest time to be on the road. The tour groups and their bicycles were at the top or on their way down which meant that most of the tour vans were also on the other side of the road. The people driving their cars had seen the sunrise by now, and were also on their way down.
I had heard from a few of the locals that a metric motorcycle club [Kawasaki’s, Suzuki’s, Yamaha’s, Honda’s, and Ducati’s] literally rocket up and back down the road and should have already come and gone by now. I’ve been lucky so far, only seeing less than a half-dozen vehicles during the entire ride. My wife and daughter took the late tour group so I should be able to meet them in plenty of time.
Mile after mile, switchback after switchback, it seemed like I was making almost no headway. After 35 minutes or so since I filled my bottles, I was taking the last remaining swig from the front water bottle and switched it with the full one that was attached to the seat tube. I was now about half-way through the switchbacks and I was still feeling good. I could start to hear my legs a little; they were starting to ‘talk’.
Even though the road was not too steep, it was a constant grind constantly going uphill. I knew that if I had stopped pedaling, I would basically stop moving after about 2 feet. I had to keep the pedals turning.
My plan was to get to the park entrance with 2 empty water bottles, then refill them using fresh water along with more of the energy drink powder mix that I had brought along. I also planned to pick up a few of their brochures to put inside my jersey for insulation on the way back down.
As I climbed through switchback after switchback, gaining altitude, the air was getting thinner and colder. 5,000 feet. 5,500 feet, 6,000 feet, 6,500 feet. I saw tour after tour heading down the other side of the road.
You could hear their brakes squealing and see some of the bikes wobbling. I hoped that their bikes were in good condition. At that very instant, I looked down at my bikes’ front brake to check out how much of the brake pads were remaining.
I could still see the grooves so I was in great shape. At the same time, I checked the direction of the brake shoe housing. I had remembered reading that there are quite a few people that do brake maintenance themselves and every once in awhile there is a story of a crash occurring due to the brake shoes being installed backwards.
The pads should always be inserted (with respect to the bicycle) from the back to the front, then locked down. When installed correctly, the harder you brake, the more pressure there is keeping the pads in the holders. If you install your holders backwards, during hard braking, the pads will shoot out the front. You will have holders but no pads – not a good thing, especially coming down this steep hill.
More “downhillers,” all wearing differently colored rain parkas. At times, especially if I looked way up the road, it looked like bags of Skittles coming my way. Group after group riding by, all looking at me with that strange facial expression that asked, “why is that guy going the wrong way?”
CRASH – Three or so switchbacks from the park entrance, I saw 5 people sitting in the dirt. Three were from a tour company, their van parked 50 feet up the road. They were attending to 2 young girls in their early 20’s that look like they skidded out and crashed on this hairpin turn.
It appeared that one had broken her collarbone, and the other had broken her wrist. Going uphill at 10MPH, there is no concern of skidding out, but, coming down the road at 40MPH+, you need to be careful, especially those that are inexperienced as these two obviously were. It wasn’t even raining yet and there were cashes. I will have to tell my wife and daughter to again be careful on this ride!
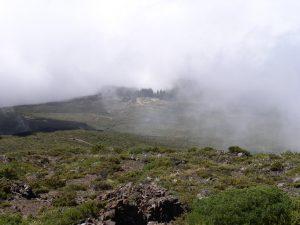
Shortly after, I passed Hosmer Grove, a camp ground and picnic area just outside of the park. A number of bicycle touring vans were parked along-side the road offloading bicycles. This looked like it was the staging/starting area for these “downhillers.” According to my map, I was almost to the visitor center. As I looked up, the volcano was still getting bigger and bigger.
I breathed in a sigh of relief when I saw that just around the next corner was the actual Park Entrance. I reached into my back pocket, pulled up to the park ranger and handed her a sweaty $5 bill to enter the park. Yes, they even charge cyclists and hikers!!!
I looked at the sign to the right of me – 7,000 feet. According to my map, I had only 3,000 feet and about 10 more miles to the top. After a quick 1 mile ride, I stopped to take a quick restroom break and filled my water bottles from the hose spigot.
My plan now was to use these two bottles to the top, then fill it them up with water – having 2 full bottles for the 37 mile descent back to the beach. From here on out, the road is at its steepest and narrowest with still quite a few switchbacks.
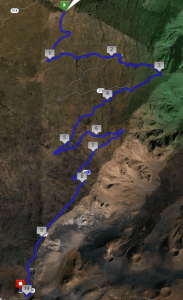
Map courtesy Google Maps and Map My Ride
Note: Once you have arrived at the park entrance, pay your $5 to enter the park. They will let you use the hose bib on the back of the booth to refill your bottles. This is a go-no go decision point for the rest of the ride. Turn around if you are not feeling 100%.
The first two parts of this ride (27 miles),were the easy parts… It only gets more difficult as you continue heading upward. Believe me, the ride gets tougher and tougher, the air thinner and thinner and more and more difficult to breathe with each mile.
If you want to wait, it is only about 1 mile further to the actual Park Headquarters and Visitor Center where you can refill and use the “facilities”. The elevation here is about 7,000 feet. Make sure that you get hydrated here since no more water will be available until you get to the top – approximately 10 miles up the road.
For the remainder of the ride, two things to watch are your heart rate and breathing. Since the atmosphere gets thinner and thinner, it is harder and harder to regain your heart rate and breathing if you push it too hard.
When at sea level, you can push hard to elevate your heart rate and breathing, and after you back off, your heart rate and breathing return to normal pretty quickly. At altitudes above 8,500 feet, this is not the case. You can’t seem to pull in enough air to get you breathing back down to a normal level.
At the Park Headquarters, I was pouring sweat as I stood outside and marveled at how COLD and WINDY it actually was. Even though the sun was up and there were only a few clouds, it was really COLD!!!
When I left Paia at 6am, it was about 80ºF, now it was about 55ºF with a 20 MPH wind. I zipped up my vest and put on a second vest over the first. It was the best I could do with what I had brought along.
The only downside to this ride is that it was impossible to dress correctly for this ride. I thought to myself, “at the top it’s going to be even COLDER and WINDIER!!! I sort of wished I had brought arm warmers along.
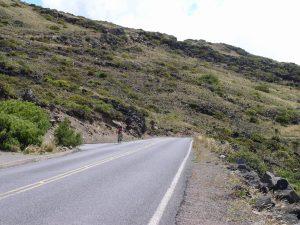
I pulled out onto the road. Just seven more switchbacks and ten miles remained before I would reach the top. The road seemed a little steeper. I did a quick mental calculation… 10 miles = 52,800 feet, about 3,000 feet to the top.
Slope is rise over run… Therefore (3,000/52,800)*100 = 5.7% average grade. Note the word “average”. Some portions of the road were 5%, others were almost 10%.
I was also not surprised to later find out (on MapMyRide) that most of this ride is categorized as HC (Fr. Hors categorie. Beyond categorization).
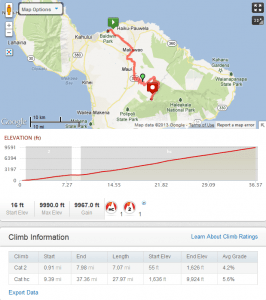
Map courtesy of MapMyRide
Now on the upper slope, the first thing I had noticed was the small softball sized to basketball sized volcanic rocks at the edge of parts of the dirt shoulder used as a delineation between the small shoulder and a 3,000 foot drop-off. I told myself… don’t look down, don’t look down.
There was an eerie feeling riding up that road. I drifted closer to the middle of the road, continuing to look over my left shoulder for cars. I was lucky there were only a few bicycle tour vans still heading to the top. They do this all day long. It’s a beautiful view, but it can be eerie.
Each of the 6 segments between the remaining 7 switchbacks are about 1 mile long. The curve at each of the switchbacks was steeper than the road. I would guess that the road is about 6% grade and the switchback itself is closer to 8%. No problem. I still had legs enough to stand up at the switchbacks.
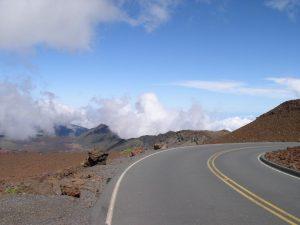
Switchback #3 put me 1,000 feet higher into the atmosphere. At 8,000 feet, there was a sign that says Halemau’u Trailhead. Not too many hikers today.
The main road that I was on had little turns in it that follow the topology of the volcano. A weird phenomena, when looking straight up the road, I did not see a horizon, instead, I saw the road intersecting with the sky. It looked as if the road went right off the end of the world.
After two more switchbacks I had gained another 880 feet. Now I was at the Leleiwi Overlook. It was deserted; the tourists must be at the top or at the beach by now. A car and another tour van going uphill passed me. I noticed that the cars were pretty careful going around me.
I figured since they were tourists, they must not know the roads well so they drove slowly. On the other hand, the bicycle vans don’t move over much. They tow great big wide trailers stuffed with bicycles. Not much room for them to maneuver on this narrow road and they drive like you are not even there. So if you hear them coming, give them plenty of room.
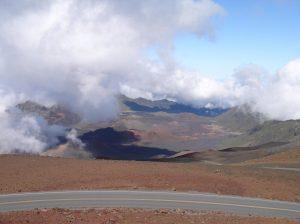
Two more switchbacks and a little over one mile took me to 9300 feet and the Kalahaku Overlook. Only about 2 miles on a fairly straight road, with 700 feet left to climb. That gave me a 6.6% grade and my legs were starting to cramp.
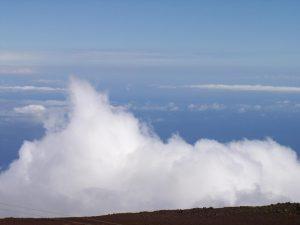
It was now very cold and windy. Looking over my shoulder, I started to see a massive cloud formation to the North. It was sunny here, but a white blanket was starting to cover the road that I would be heading back down shortly.
The last two miles were beautiful. But for those that are susceptible to vertigo, this stretch of road might seem the most daunting of the entire ride. Parts of it felt as if you were riding along the top of a ridge with huge cliffs on either side. I was at 9,500-plus feet and almost there. It was a lot harder to breath.
I passed the Visitors Center and filled up both bottles since I didn’t want to stop on the descent. I still had some water but not much.
There was a final kick to the upper parking lot, I am guessing it was a 14% grade.
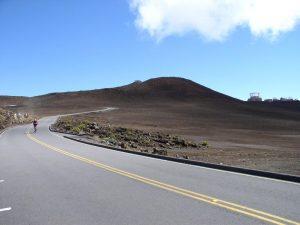
Note: The last water and restroom facilities are available at the Haleakala Visitor Center (9,740 feet). There is only about ¾ mile remaining to the summit, and gets steep right at the end.
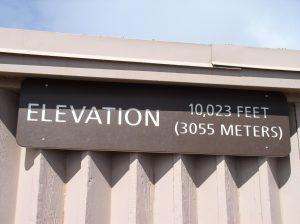
There is no water or facilities at the top. The ride actually ends at the 10,000 feet mark, but at the end of the parking lot, there is a pedestrian path that you can ride on to make the full 10,023 feet. Be careful riding on this path because it is for pedestrians and there are plenty of hikers that will be in your way.
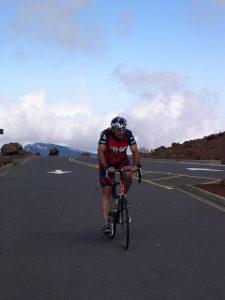
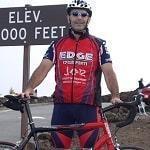
I had finally reached the 10,000 foot elevation. I stopped for a few photos, then climbed the final few feet to the actual top. My legs were burning and cramping a lot more now. I got off the bike and laid down on the sidewalk. What a ride! What a beautiful, beautiful ride!
As I got off the bike, a family ran over to me and said that they had seen me riding. “Can we get a picture with you?” they asked. Wow, instant celebrity.
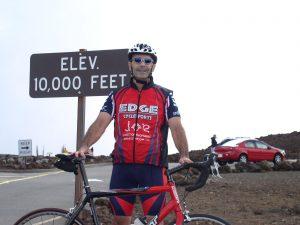
Ten minutes later the tour group arrived with my wife and daughter on board. We spend about 20 minutes or so looking through the visitors center and at the amazing view. A great photo op.

THE DESCENT
The park’s rule is simple, if you ride up by yourself; you are allowed to ride down from the top. If you are with a tour group and get shuttled to the top, you are not allowed to ride down from the top. Since I rode up, I could ride down.
As I started the descent, visibility was being limited by the forming clouds and the coming rain. At the 9,000 foot mark, it started drizzling. By 8,000 feet it was raining pretty hard in spots. By the time I got to the park entrance, it was back to a light drizzle again. I was soaked. I can see now why the tour groups wear those waterproof parkas.
I met up with my wife, daughter and the tour van just outside the park entrance at the Hosmer Grove turnout. It was still drizzling. As their bikes were unloaded, the tour guide gave a safety briefing. I told my wife and daughter to try and stay directly behind the guide.
There was one guide in front and another that brought up the rear. I told them that this would be the safest place and if someone crashed, it would be behind them. I added, if the guide started braking, match his actions exactly.
Our group of 10 was made up of the guide, my daughter, my wife, me, 2 small girls, their 2 parents, their 2 grandparents and the rear guide. The entire group put on their thick rubber-like parkas since it was back to raining again. They even offered me one. Motorcycle-style crash helmets also were used. I wore my regular helmet that I brought with me from home.
We started down the road and almost immediately there was a crash. One of the two small girls behind me went down in a turn, taking out her sister and her mom. Since the tour van was following, they asked the group to stop so the guides could provide First Aid care to the 3 that hit the road. I looked at my daughter and I said “See? Dad was right.”
The little girl that crashed was pretty banged up with serious road rash on her knees and legs. Her sister and mom had some road rash as well. The three “survivors” plus the dad sat in the van as it sped away down the road. The rest of us got back onto the bikes and continued down the road.
Wet roads caused by the clouds that form in the late morning can make the road at the middle elevations damp and slippery. We kept at a slow pace through the rain, and at about 4,000 feet, we finally broke through the clouds. It was bright and sunny below. We rode down, down, and down, until we made the right-hand turn onto Highway 377. It was getting warm so it was time to remove the rain gear.
Almost the entire ride back was downhill. There were only 2 or 3 places where you had to pedal. After we made it back to the bicycle shop and we turned in the rented bikes, it was time for a lunch! I was hungry.
After we got back home, my friends asked me “where did you go, what did you do?” I told my riding buddies that I did a 35 mile bike ride and that it took me over 4 hours!!! You should have seen the expression they gave me when they asked “WHAT???” Then I told them “Oh, did I forget to mention that it starts at sea level and in 35 miles, it ends at over 10,000 feet!!!”
End Notes:
1) If you are ever in Maui late June, you might want to consider the annual race to the top – cycletothesun.com – Be sure to check it out.
2) The winner of the 2012 race did it in 2:54:32, still far from Ryder Hesjedal’s record of 2:32:51 on Jan 6, 2009. Ryder besting me by 1 hour 42 minutes. Still, I did pretty good for my age group and it was one of the most beautiful rides I have ever done.
3) Donnie Arnoult owns a bike shop called Maui Cyclery. He’s located at 99 Hana Hwy, Paia, HI 96779, right on the road to Haleakala. He rents bikes and, if you are interested, he even has fully sagged tours for this ride.
4) Ryder and Donnie host an annual training camp as well – see mauicyclingcamps.com usually Nov/Dec time frame.
I have always enjoyed bicycling and, through a series of coincidences, became a Bicycle Industry Consultant and Product Tester. I test prototype products for companies and have published only off the shelf production products on biketestreviews.com.

