Cycling isn’t always about riding bikes. Being a cyclist also comes with learning some basic bike maintenance skills too. A common problem many cyclists face is a loose crank, and it’s not very nice to ride a bike with this issue.
Tightening up a bike crank is an easy task, and once you know how it’s a great skill to share with other fellow cyclists.
In this article, we will discuss what a bike crank is, the different types, and how to tighten them up. We will be speaking about:
- What Is A Bike Crank?
- Bike Crank Attachment
- Why Is My Bike Crank Loose?
- How To Fix A Loose Bike Crank.
What Is A Bike Crank?
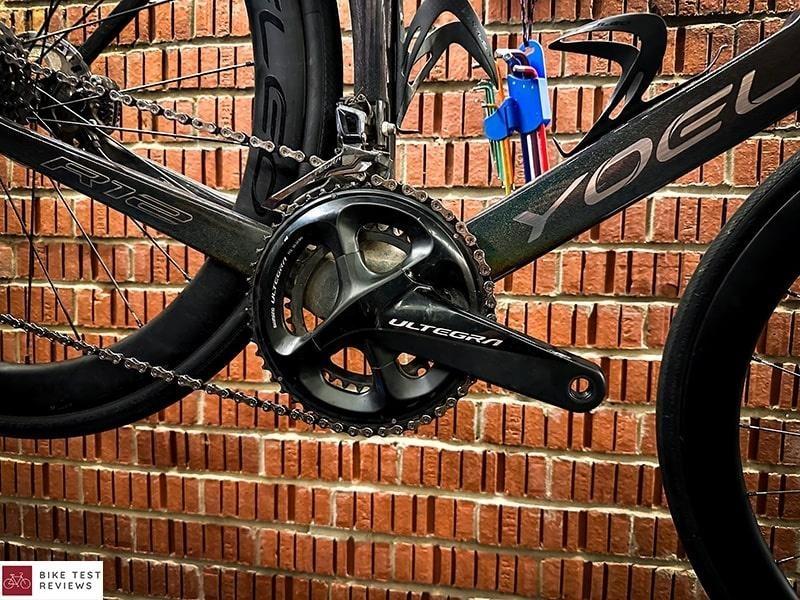
A bike crank is a component of the drivetrain which sits in the center of the bike and connects the bike’s frame to the pedals. What’s special about a bike crank is in combination with a bottom bracket, it gives you the ability to push the pedals around, dragging the chain with it.
Different Types Of Cranks
Bike cranks come in all different shapes and sizes. On budget bikes, you get basic looking versions that tend to be on the heavy side.
On performance bikes, you get space age looking cranks that weigh next to nothing. Where they so become very different is how they attach.
Bike Crank Attachment
It’s important to mention before we get started that bike cranks do attach in different ways. Modern bike cracks use a hollow axle with pinch bolts on the left-hand crank arm.
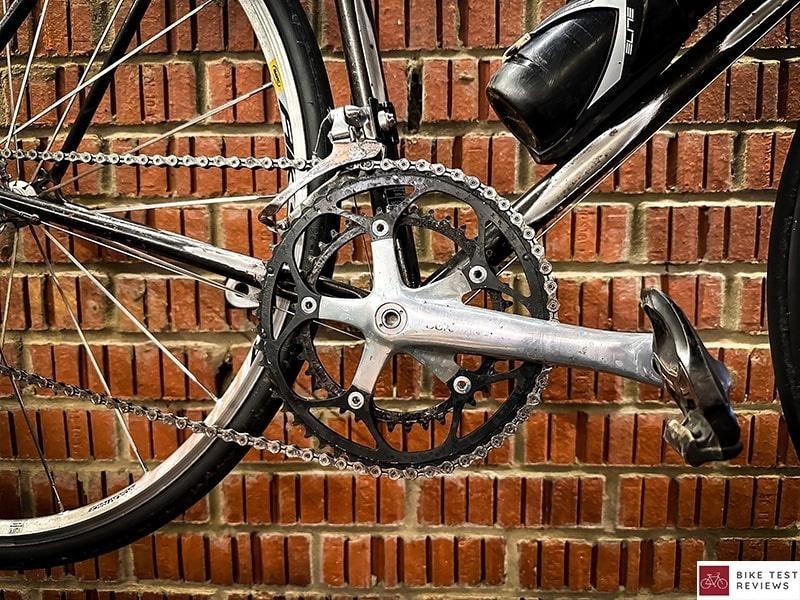
Classic bikes typically use a square taper bottom bracket which each arm attaches with bolts on each arm.
When it comes to loose bike cranks, it’s not often that you see modern bike cranks loose unless there’s a problem with the bottom bracket. Where the problem is most common is on older bike cranks.
In this article, we are going to explain how to tighten both.
Why Is My Bike Crank Loose?
You might find yourself with a loose bike crank for many reasons. Here’s where we find loose cranks most commonly come from:
- Worn-out bottom bracket
- It wasn’t tight enough to start with
- Wear and tear over many miles
- The bottom bracket requires Servicing
If you are unsure why it’s loose, you will find out in the process of fixing it next.
How To Fix A Loose Crank
Now for the exciting part, here’s how to fix a loose bike crank. We highly recommend taking your time and going through the process, following each step closely. Here’s what you’re going to need depending on what bike cranks you have.
Modern Bike Crank
- Allen Keys
- Crank Star
- Modern Bottom Bracket Tool (Optional if bottom bracket is loose)
Classic Bike Crank
- Allen Keys Or Socket
- Bottom Bracket Puller
- Bottom Bracket Tool (Optional if bottom bracket is loose)
Using a bike stand will make this job much easier, and we highly recommend having a good think about changing the bottom bracket here if required instead of just tightening it.
Step One: Find A Safe Place To Work
The first thing you need to do is find a safe place to work. Try not to be in anyone’s way, and ensure you have all your tools by your side, ready to start working on the bike in the stand if you’re using one.
If you want a better experience, consider cleaning the bike to start with.
Step Two: Remove The Crank
The best way to approach the issue of having a loose bottom bracket is to completely remove it, investigate and put it all back together. The process is very different depending on modern or classic cranks, so let’s break them down.
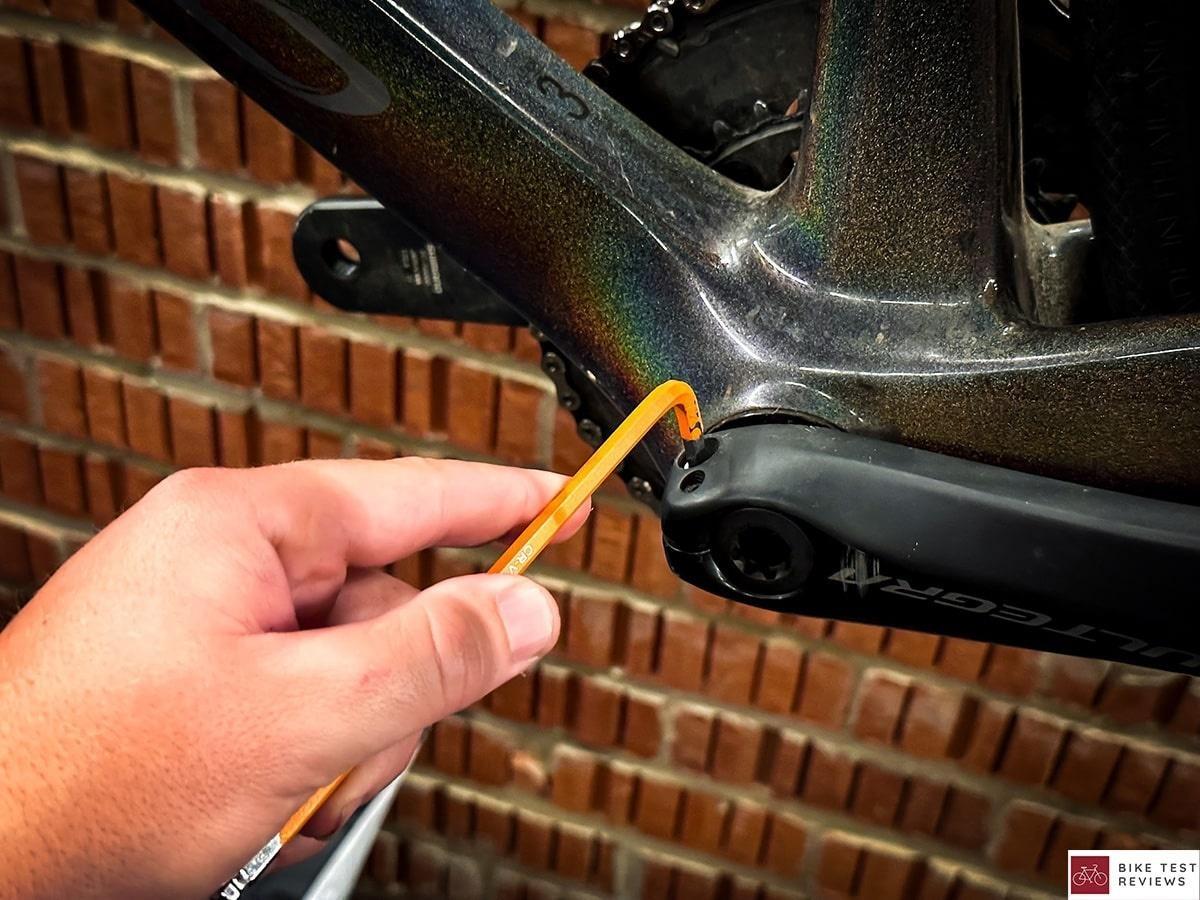
Modern Crank Removal
When removing a modern crank, the first thing to do is take the Allen keys and undo the two bolts on either side of the left-hand crank arm until they are loose. Once loose, take the crank star tool and fully remove it. Finally, you will need to unclip the small safety clip.
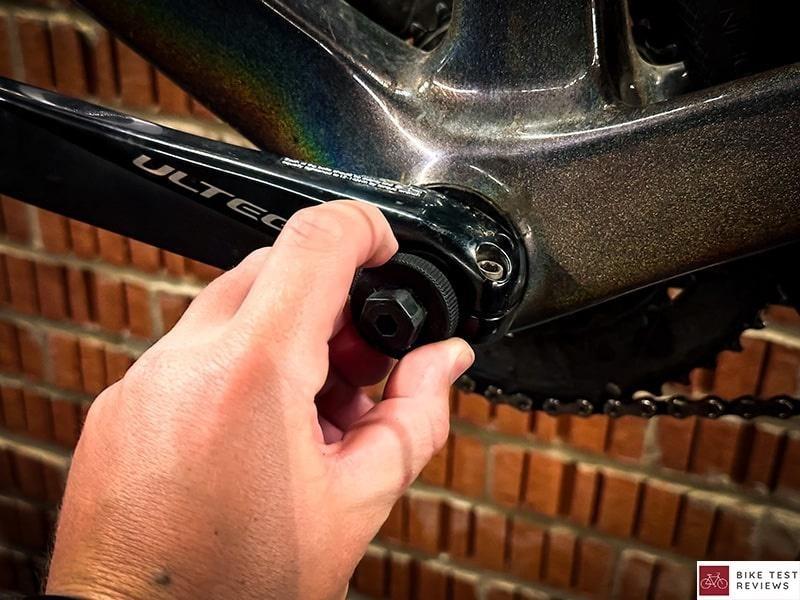
At this point, the crank should be loose, and you will be able to pull the arm off and pull the right-hand side crank out too. Make sure to put this somewhere safe out of the way.
Classic Crank Removal
When it comes to classic cranks, the first thing you need to do is remove the bolt on either side of the crank. Although you might expect it to fall apart, it shouldn’t because of how a square taper bottom bracket works.
You will then need to take the bottom bracket removal tool and insert it into the crank and then tighten it up and use the bolt on the end to push it off the bottom bracket. You need to do this on both sides.
Step Three: Check The Bottom Bracket
Now it’s time to check the bottom bracket. The first thing you need to do is check if it moves smoothly. If it feels gritty inside or has play, then that’s more than likely the reason you have a loose crank.
If the bottom bracket feels gritty or you find it’s got play, it will either need servicing or swap the bottom bracket out for a new one if required.
Step Four: Install The Crank
Now it’s time to install the crank again properly to ensure it’s on properly and not loose. The process is very different depending on modern or classic.
Modern Crank Install
To install a modern crank, you just need to insert it into the bottom bracket. Use the crank star to tighten it up just with hand force. Then tighten each Allen key bolt to 14nm, being cautious that when one tightens, the other slightly loosens.
Classic Crank Install
When it comes to installing a classic crank, you will need to put it on to the square taper and screw in the Allen key or socket. Then tighten up to about 40nm, although it may seem tight, it needs to be able to grip properly.
Finally, you are complete! You should now have a tight crank that is working properly!
A Final Note
Having a loose crank on a bike can ruin the cycling experience when it’s an easy fix. We hope you enjoyed our article and are now ready to tighten that crank and get out on the bike.
From all of us here at Bike Test Reviews, thanks for reading.

Robbie Ferri has spent years working in a bike shop, has worked with industry leading brands on product creation, has been a semi pro athlete, and is a fully qualified strength and conditioning coach. He has broken World Records, bikepacked all over the World and raced ultra distance at a top-level.

