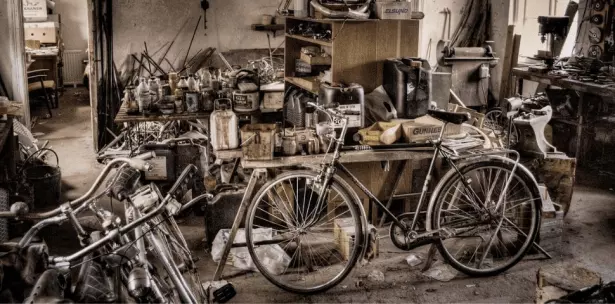
The popularity of cycling has rocketed recently. The reason for this is that fewer people are using public transport, due to the fears associated with the Coronavirus. Also, the reduced availability of group activities is attracting people to bikes as a way of exercising.
However, this increased interest in cycling is a double-edged sword for the cycling industry. Bike shops and manufacturers are quickly selling out of their entry-level bikes, often used for commuting and exercising, which is good news for them, but they can’t always keep up with the demand.
Therefore, people are looking into building their own bikes from scratch. So in this post, you will learn how to build a bike without breaking the bank.
Advantages and Disadvantages Of Building Your Own Bike
Building your own bike from scratch may be your ideal project, but before you start to source your components, you need to think about what building your bike entails.
You will enjoy certain benefits of building your own bike. One of these advantages is that you will learn every single part of it, which comes in handy when something breaks or wears out.
Building your own bike gives you the ultimate in flexibility to make it your own.
By this, I mean you can choose your perfect specification and customize it how you want to. These things lead to ultimate satisfaction, and you know that nobody else rides the same bike as you.
However, don’t think that it will be all plain sailing. You will need to buy the right tools for the job, and these are often expensive, and you will only use some of them once.
Also, the components you buy for your bike need to be compatible. Therefore, you will need to do extensive research to make sure everything works together.
The main disadvantage of building a bike is that an assembled bike will be cheaper. The reason for this is that bike manufacturers have massive buying power when it comes to their components.
Therefore, this is reflected in the prices of their bikes. To buy the same components separately, it would cost you way more than buying a ready assembled bike.
The Tools You Will Need
There are several tools you need to build your own bike, some are very simple, and you will use them often, while others will have a specific use that you will only use during your build or when servicing.
Here is a list of some of the tools you will need:
Hex Wrenches (Allen keys) – These are essential for your build, regular maintenance, and many other fixes. Ideally, get an extra-long ball-end nine-piece set 1.5mm to10mm.
Tire Levers – Simple but essential tools that you will need more than you want. Keep them in a backpack or strapped to your bike.

Screwdrivers – You will need these to set up your derailleur and some types of brakes. A small set will do, as long as it includes a Phillips PH-2, PH-0, and a couple of flatheads.
Torx Keys – These are the star-shaped bits that are becoming more commonplace on modern bikes. The most commonly needed sizes are T10, T20, T25, and T30.
Pedal Wrench – Often you will be able to use a 6mm or 8mm wrench, but a proper pedal wrench will give you the leverage you need to get the pedals on tight enough, and crucially to get them off again.
Chain Tool – A chain tool is much easier to use to break a chain than trying to force it with a multi-tool.
Tape Measure and Steel Ruler – These are essential for measuring your steerer tube, bottom bracket diameters, saddle height, and other dimensions during your build.
Torque Wrench – It is easy to over tighten bolts or not tighten them up enough. Getting the correct torque of some bolts is essential.
Open-Ended Wrenches – These are not essential for most modern bikes, but if you are working on a bike that has basic or older components, you will need a set ranging from 6mm to 17mm.
Side Cutters – Side cutters are great for cutting things scissors can’t. If you can get some bike-specific ones with a crimping tool for cable ends. Although a pair of scissors is needed for trimming bar tape.
Cassette Lockring Tool and Chain Whip – When it comes to removing your cassette, you will need both of these. But make sure you get the right ones for the cassette on your bike.

Bottom Bracket Tool – There are many different standards of bottom bracket, so make sure you get one that corresponds to your bike.
Adjustable Wrench – You will probably need one of these to turn your cassette and bottom bracket tools. Usually, a 12in adjustable wrench will do the trick.
Needle Nose Pliers – To get the correct tension on cables and to get to hard to reach places, these are essential.
Spoke Wrench – If you are building your own wheels, you will need one of these. But it will come in handy if you need to true a wheel later on.
See also: Top 7 Essential Bike Maintenance tools
The components you need to build your own bike
When it comes to building your own bike on a budget, you need to be realistic about what you can do on it. I am going to concentrate on keeping the spend as close to $1,000 as possible.
To build your own bike on a budget, you are better off having a road bike or a commuter as your project. If you want to build a mountain bike, you may need a higher budget.
However, you can buy a decent entry-level hardtail, such as the Trek Marlin for $549.
Before you start building your bike or sourcing components, you may want to check out How to Build a Bike: A Simple Guide to Making Your Own Ride.
The Frame – From $500
The frame you choose for your new bike is probably the most important part. As we are trying to keep the costs down, there is no point in considering carbon or titanium frames.
Instead, it is best to look at aluminum or steel frames. You may even want to look at a used bike frame to reduce the costs or get a higher specced one.
Steel frames are heavier than aluminum, but they are more rugged and durable. If you can afford to go for an aluminum frame, do so unless you are riding pretty tough roads and don’t mind the extra weight.
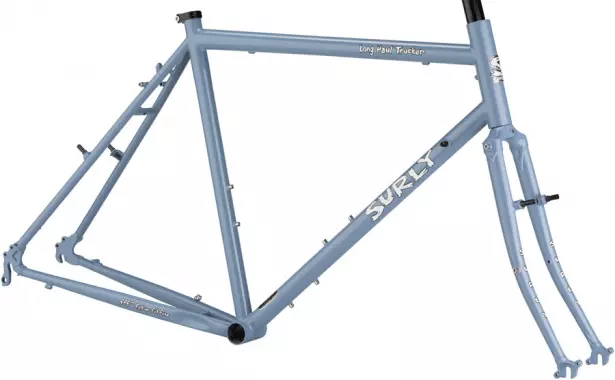
A good example of a lower cost road bike frame is the Surly Long Haul Trucker. This is suitable for 26” wheels, which is an older mountain bike standard, but it gives the bike nimble handling characteristics and is more durable than larger wheel sizes.
One of the things to note about this bike is that it comes with a fork, meaning you don’t have to find one that fits and all the relevant components to make it fit.
Aluminum bike frames do have a shelf-life, therefore you need to have a proper look at it before you hand over your cash.
You need to check for neglect and damage, so if you see dents or cracks, do not buy the frame. Also, carefully look at the welds on all the tubes to see if there are any cracks.
Frame Components
Fork – From $130
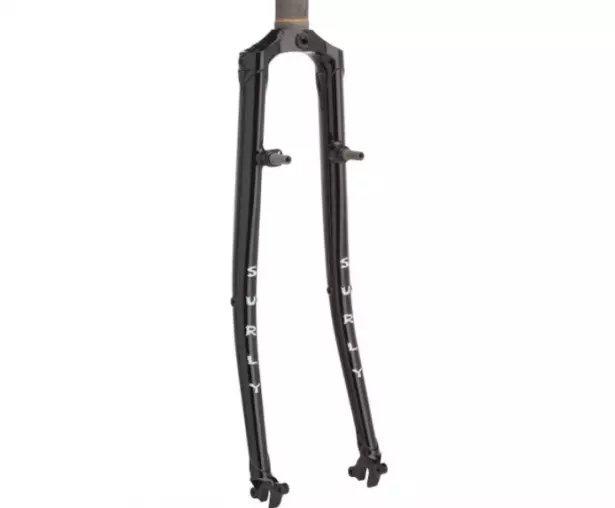
If you choose a frame that does not come with a fork, you need to buy a fork that matches the bike. You need to know what material is best and make sure it has the right clearance for the types of tires you want to use.
Some manufacturers are now doing offset or tapered headsets in which the top race (headtube race) is smaller in outside diameter than the bottom race (crown race). You must find a compatible fork.
Aluminum is light, stiff cheaper than carbon fiber, but it can magnify bumps in the road. Steel forks are heavier but more supple than aluminum and carbon. It is also less expensive and often used for touring, fat tire mountain bikes, and older road bikes.
If you need to mount a rack or a mudguard, you can get forks with the provisions in the form of eyelets. If you want to run a quill stem, make sure you get a threaded fork and headset.
When buying a fork for your bike, you will need to take note of the head tube length. This is so you can make sure the steerer tube is the right length (you will have to cut it to size). The head tube length is the distance from the bottom to the top of the head tube.
Bikes with a long head tube have a higher front end giving the rider in a more upright position. Shorter head tube lowers the front end of the bike, giving a more racy riding position.
You will also need to work out what your headtube diameter is as it will determine your fork’s steerer tube diameter.
The traditional standard is 1. 1/8” but some modern bikes feature larger 1.5” head tubes or tapered versions, where the diameter of the tube at the bottom (1.5”) is larger than at the top (1 1/8”), so you’ll need a fork with a tapered steerer tube to match.
Headset – From $25
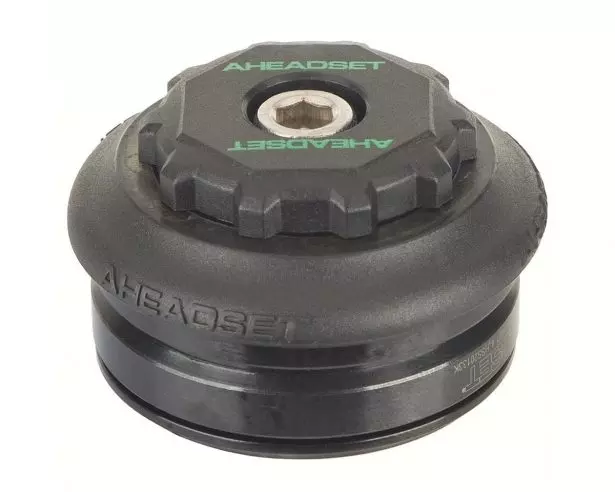
The headset is made up of bearings, cups, and races connecting the fork to the frame. It is what allows you to turn your front wheel to change direction. Most modern bikes have sealed headset bearings, which are often better quality than unsealed bearings.
The only disadvantage of sealed bearings is that they are tricky to work on and maintain.
However, non-sealed bearings usually last longer as they are easy to regrease.
Stem – From $50
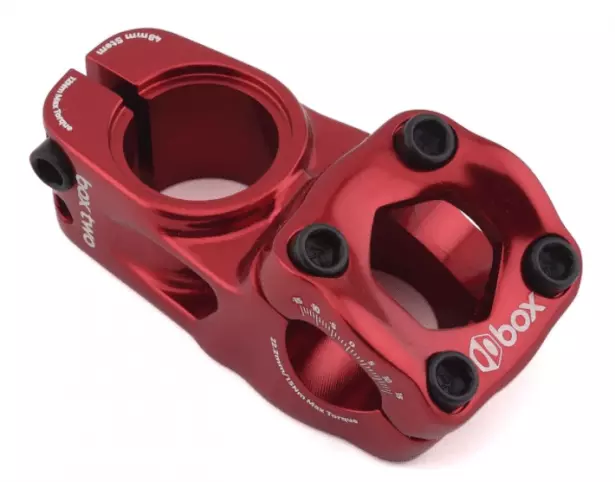
Your stem is what attaches your handlebars to your headset, and you need to make sure your stem fits around your steer tube. Modern stems fit over the steer tube and tighten into place.
You can fit spacers on top of the headset to raise the height of the stem to change your riding position. The steerer tube is cut, fitted with a star nut, and the headset cap is bolted to the top of the stem.
The stem needs to accommodate the size and type of handlebars you want to use. There are lots of stems on the market, so you should easily find something to suit you that is compatible with your bike.
Handlebars – From $45
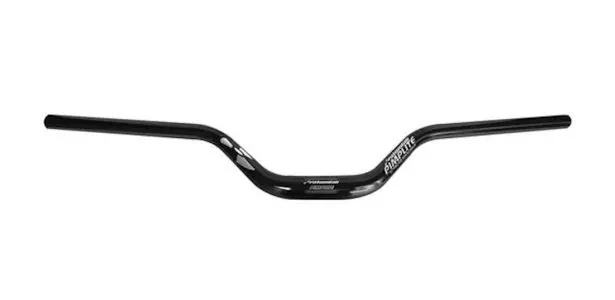
Your choice of handlebars is important as they a point of contact with your bike. They are not only used for controlling your bike, but they also give you valuable feedback from the surface you are riding on.
Road bikes traditionally have rounded drop bars, mountain bikes, touring bikes and hybrids use flat bars.
The type of handlebars will dictate the type of shifters and brake levers you fit. Flat bars usually use trigger shifters and traditional style brake lever, while road bike drop handlebars, will use integrated or bar-end shifters and road brakes with the hoods for hand placement.
Seatpost – From $20
The seatpost is something you may not think that is a big deal, but there are a few things to consider to make sure you get the right one.
Diameter: The diameter of your seatpost must correspond to the internal diameter of your seat tube. Most modern road and mountain bike frames take a seatpost of either 27.2mm in diameter (standard), 30.9 or 31.6mm (oversize).
Oversize posts are stiffer and stronger giving optimum power transfer as well as durability. Narrower seatposts are more comfortable over rough surfaces, as it reduces vibrations.
It is possible to shim a 27.2mm seatpost fit into a frame taking the larger standard if needed.
Length: Longer seatposts offer more comfort, but the amount of post exposed above the frame will be dependent on your frame size, geometry, and your inside leg length.
Most seatposts will have a ‘minimum insertion’ line etched on the shaft, which is essential that you pay attention to for safety. You can cut down your seatpost to get the perfect length if necessary.
Materials: Seatposts are mostly made from aluminum and carbon fiber. Aluminum will be the cheaper choice, but carbon is more comfortable thanks to its vibration-absorbing characteristics. It is also lighter, so it is used by riders wanting to shave a few grams of their bike weight.
Clamp type: Most seatposts use a clamp designed to accommodate twin-rail saddles. These have one or more bolts to secure the top part of the clamp to the forged bottom. You can adjust the position of the saddle by loosening the bolts to fine-tune it for comfort.
Some saddle/seatpost manufacturers use their own clamp design, which requires you to use a specific saddle. So make sure you know what you have, especially if you think you may want to try different saddles that may be more comfortable for you.
Layback: A seatpost shaft can be straight or have a shallow-angled bend towards the top of the shaft. This positions the saddle slightly farther back for riders who cannot achieve their perfect saddle position with a straight post.
Groupset – From approximately $200
The groupset is the term used for the collection of components that make up the drivetrain and brakes of a bike. So basically, it is everything that makes you go and stop.
Groupsets for road bikes are different from mountain bikes, as they are required to do different things. These differences include weight, strength, and gear ratios.
The prices of groupsets vary enormously and it shows in their quality. Higher-end groupsets have more features, are lighter, and made from better materials. It is best to buy a whole groupset as a package, rather than paying for each individual component separately.
This will make it more cost-effective, and you know everything is compatible. You can always upgrade components later on to suit your needs.
The main players in bike drivetrains are Shimano and SRAM, and you will find advocates of each.
Shimano makes parts for every kind of bike, from entry-level and very high-end bikes. Riders with a low budget should look into the Shimano Alivio M4000 Groupset.

This groupset would be a good choice for a mountain bike or a flat bar hybrid bike.
There is a 9 x 2 and a 9 x 3 version for people that ride in more hilly areas, so make sure you choose the right one for you, and it is compatible with your choice of frame. This is a full groupset which includes all your drivetrain and brake components.
If you’re building a road bike look into Shimano Sora, Claris or Tiagra groupsets.
Chainset/Crankset
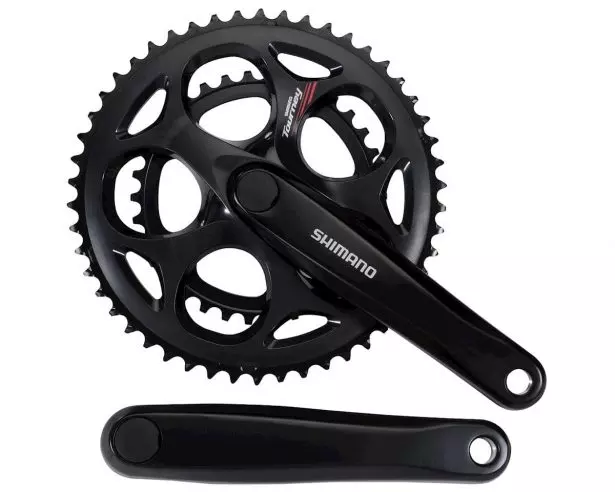
The chainset is also known as the crankset and is made up of two cranks, and either one, two, or three chainrings.
You can get chainsets with the cranks attached to the axle bearing, which is part of the bottom bracket. Other chainsets have the axle fixed to the drive side crank.
When it comes to the crank arms, they are right and left specific, as the right crank arm holds the chainrings. They are connected to each other via the bottom bracket.
The length of the crank arm makes a difference to performance and comfort, and are 165mm, 170mm, 172.5mm, 175mm or 180mm.
The crank length depends on your leg length. If you have very short legs, you would be better off using 165mm cranks. 170mm is pretty standard on bikes up to medium then 172.5 and 175 on large frames.
Bottom Bracket
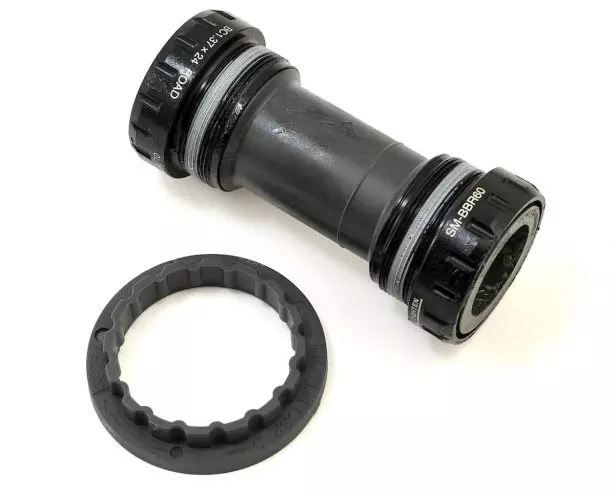
The bottom bracket attaches the chainset to the bike frame. It is located inside the frame, and its bearings allow the chainset to spin.
The bottom bracket is normally threaded or pressed into a frame’s bottom bracket shell, which is the sleeve that connects the tubes to the frame’s front triangle.
Bottom brackets use bearings to allow for rotation and need to be serviced from time to time. Some can be adjusted or rebuilt, but modern designs are more frequently designed to be replaced rather than repaired.
When a bottom bracket begins to fail, its bearings start to creak and develop the play. Replacing a bottom bracket is a relatively quick and inexpensive job for someone who is mechanically minded enough to build their own bike.
When selecting a bottom bracket for your bike, you need to make sure that you get the correct model. This isn’t that simple, as there are a number of different bottom bracket standards:
- Conventional/BSA threaded
- BB90 and BB95
- PF86 and PF92
- BB30
- OSBB (road)
- BB30A and BB30-83 Ai
- PF30
- OSBB (mountain)
- PF30A and PF30-83 Ai
- BBRight
- BB386 EVO
- T47
- Threadfit 82.5
- SRAM DUB
Threaded Bottom Brackets
There are several different versions of the threaded bottom bracket. Older and less expensive designs use bearings that sit inside the frame with a fixed axle that the crank arms are tightened onto.
There are several possible standards for a captive axle. The most common and cheapest is a square taper, but there is a multi splined interface from Shimano and the ISIS standard. The last two are not widely used these days, as other designs are now more popular.
Most modern threaded bottom brackets use a three-piece design that has a pair of larger diameter bearings that sit outside of the shell. These bottom brackets see the axle fixed to one of the crank arms.
This type is much more hard-wearing, and the axle can be made thinner and lighter. For this design, look out for Shimano Hollowtech II and SRAM GXP. But note that these two systems are not compatible.
To find out the size of the bottom bracket that you need, you have to measure the inside of the bottom bracket shell in your frame. It will be 73mm, 70mm, or 68mm. Some older bike frames may have Italian threaded bottom brackets, which is a different standard again.
Pressfit Bottom Brackets
Press-fit bottom brackets are becoming more popular, as bike frames can be made that don’t need tough inserts for the bearings to sit in.
Shimano’s Press-Fit 92 uses the same spacing as the external, threaded Hollowtech II system and is compatible with those cranks, as long as you use the correct 24mm spindle. Another standard is BB30, which uses even larger diameter bearings. This gives you a stronger, stiffer, and lighter axle.
The bearings are very important, as their quality determines how much energy is lost as friction and how durable they are. For this reason, fully sealed cartridge bearings are preferable but more expensive.
For more information on bottom brackets, I recommend checking out this guide from Bike Radar.
Brakes
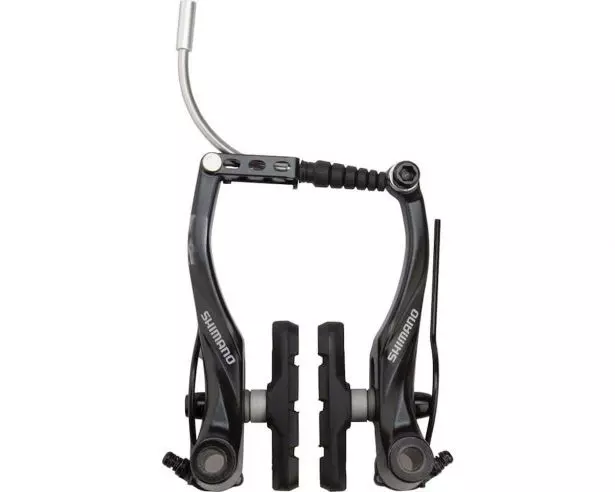
Most mountain bikes use disc brakes, that works via a caliper that grabs onto a brake disc, fitted to the center of the wheels.
There are road bikes with disc brakes but most still have rim brakes. This type of brake uses cables to squeeze the arms together, pushing the brake pads on to the rim of the wheel.
Disc brakes give you more stopping power and control, (especially hydraulic ones) but they are more pricy than rim brakes. Rim brakes still work well, for commuting and road biking.
A good tip when it comes to brakes is to make sure that you buy quality brake pads. This can make a cheap braking system much better and safer.
Brake Levers And Gear Shifters
Road bike brake levers have the gear shifters integrated into them, but different levers operate the brakes and gears independently.
The left shifter will change the front derailleur, and the right will change the rear derailleur. Mountain bikes use trigger shifters to change gears and are separate from the brake levers.
Derailleurs
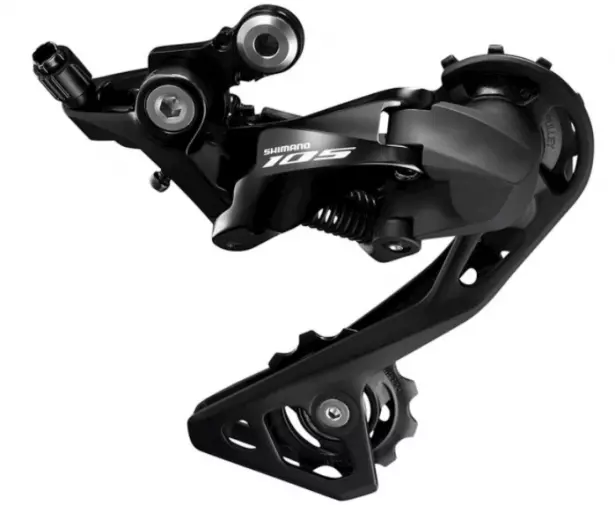
The derailleurs are what the shifters are moving to change gears. Often, you will find that bikes have two derailleurs, one in the front and one in the rear.
The front derailleur changes the front gears while the rear derailleur changes the rear gears on the cassette. Front derailleurs are becoming less common on mountain bikes, as they can easily drop the chain on bumpy terrain, and the technology of the rear derailleurs has improved.
Chain
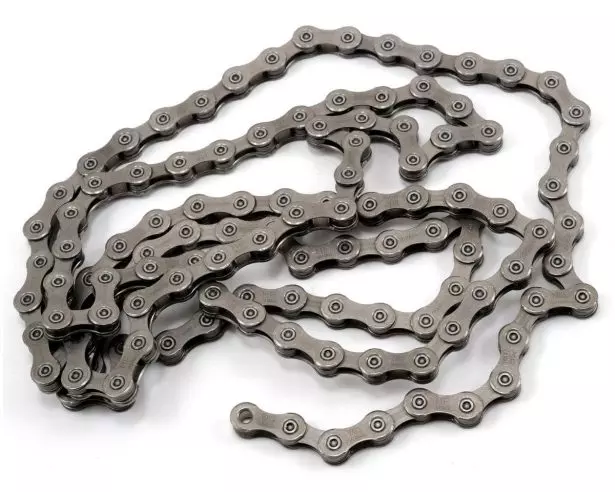
The chain connects the chainset to the cassette on the rear wheel. It threads through the derailleurs and transfers your energy to the wheel.
Chains are specific to how many speeds are in the drivetrain. So, an 11-speed chain will only work with an 11-speed cassette, etc.
Cassette
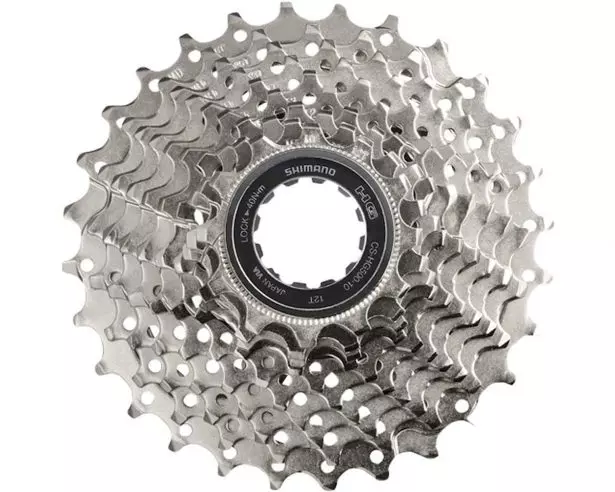
The cassette has several gears attached to each other sitting on the center of your rear wheel. The teeth correlate to the different ratios of difficulties of the gears.
The bigger the gear, the easier it is to pedal, while smaller gears increase the resistance.
Mixing Groupsets
It is entirely possible that you are considering building a bike and you have certain components of a groupset, but need to buy others. Therefore, you may be wondering if you can mix groupset components.
The answer lies with the compatibility of the parts, and how tuned in or fussy you are about your bike’s performance. Some components will work exceptionally well together, while others won’t work at all.
However, there are other components that will work satisfactorily together but won’t be perfect. In this case, you may experience lazy shifting, extra chain noise, and/or reduced braking power.
The compatibility of components is an in-depth subject, therefore I recommend that you check out this article.
Wheels – From $45
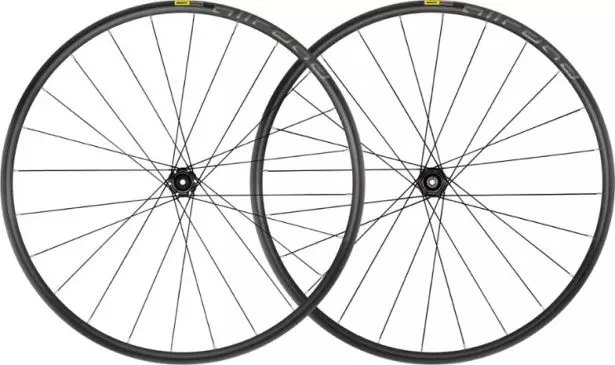
It would be great to buy some handmade wheels, as you will feel the extra smoothness and improved ride quality. However, we are trying to keep the price down here, and these posh wheels can be $400 each.
Bike wheels consist of a hub, a rim, spokes, and nipples. How well the wheel rolls and its weight, is down to its hub. The hub has a set of bearings inside that sit over your axle. Higher quality hubs will make your wheel spin better.
You can buy brand new fully built wheels from REI. But don’t expect budget wheels to be particularly tough or have quality components. Also, don’t forget that you will also need to budget for a set of decent tires that will suit the type of cycling you are doing.
Often you will see second-hand wheels for sale on Craigslist that have barely been used. This is because riders will upgrade their bikes as soon as they get them for lighter versions or ones with better hubs.
These will be fully built and ready to go. However, make sure that your frame has the clearance, and the wheel has the correct axial for the frame.
When choosing wheels, adults need to pick between three wheel sizes. The first consideration is 26” wheels. These are an older mountain bike size, and they have their own advantages and disadvantages. The main issue you will have with a 26” wheel, is finding decent tires for them, as they are slowly being phased out by manufacturers.
Their top speed is not as high as larger wheels, but they do make you accelerate quickly from a standstill. They are still often used for slopestyle and dirt jumping, as 26” wheels can be made to be very strong to cope with hard landings.
But the main advantage of 26” wheels, is that they give a bike very agile handling, as it is easier to change direction. This is handy when weaving around trees, or pedestrians.
At the other end of the scale is the 29” wheel. These are also known as 700c wheels. Their big advantage is that their increased diameter gives them a better ability to roll over bumps providing a smoother and faster ride, although they are harder to get rolling.
The main drawback of 29” wheels, is that they make the handling less agile, which is noticeable in tighter turns. However, this is something most riders get used to quickly, especially if you are taller.
In the middle of these two wheel sizes, is 27.5”. 27.5” is also known as 650b and strikes a happy medium between 26” and 29” wheels. Most hybrids or commuter bikes with this wheel size have a bias towards off-road riding, which makes them more versatile as they are suitable for different types of terrain.
Your Contact Points
The components I have mentioned so far will give you a bike, but you won’t want to ride it. This is because you need a few more essential parts that you are personally in contact with when on the bike.
You will need to buy handlebar grips or tape, pedals, and a saddle. But which ones you get are all down to your personal preference.
The most important of these is your saddle because if you get the wrong one for you, your rides will not be pleasant.
How To Build a Bike Videos
If you want to learn more check out these two great videos on building your own bike.
Are You Going To Build Your Own Bike?
Now you know what it takes to build your own bike, you have some options ahead of you. The first option is to get prepared, source all the parts, and build your bike from scratch.
The second option is to find a used bike or frame and customize it with new parts. Or you can just wait for the pre-assembled bike to become available.

Tom Fortune has been reviewing cycling products for several years from his home in the French Alps. As the owner of mtb-threads.com, he mainly reviews mountain bike products but also reviews road cycling products independently.

