Introduction
All mountain bikers enjoy documenting their rides. Capturing exhilarating moments of navigating through rock gardens, climbs, and descents can provide unforgettable memories.
However, you may have noticed that the footage doesn’t always capture the grandeur of your ride. The video might come across as dull, shaky, and generally unwatchable.
This phenomenon, often referred to as the GoPro effect, ironically makes any mountain bike ride seem like a leisurely walk in the park, even when you’re sure you’ve had a thrilling adventure. The influence of GoPro’s extensive marketing campaigns, showcasing their most polished content to sell their action cameras, can be partially blamed for this disparity.
We’ll solve this by going beyond the usual chest mounts and listing the top GoPro MTB mount alternatives. Not only are these options budget-friendly and easy to operate, but they also enhance the appeal of your mountain biking photos and videos.
These mounts are designed to capture more dynamic, engaging POV shots, making your footage as memorable and awe-inspiring as the clips on GoPro’s Channel.
Additionally, we’ll revisit GoPro Chest Mounts and suggest three superior chest mount options for those first-person POV shots. We’ll provide tips for quick recording setting adjustments to improve your footage quality further.
Regardless of your GoPro model, these bike mounts will adapt and provide better compatibility, stabilization, and recording safety when riding in the most technical MTB terrains you can imagine.
Watch The Video
The 6 Best GoPro Mounts
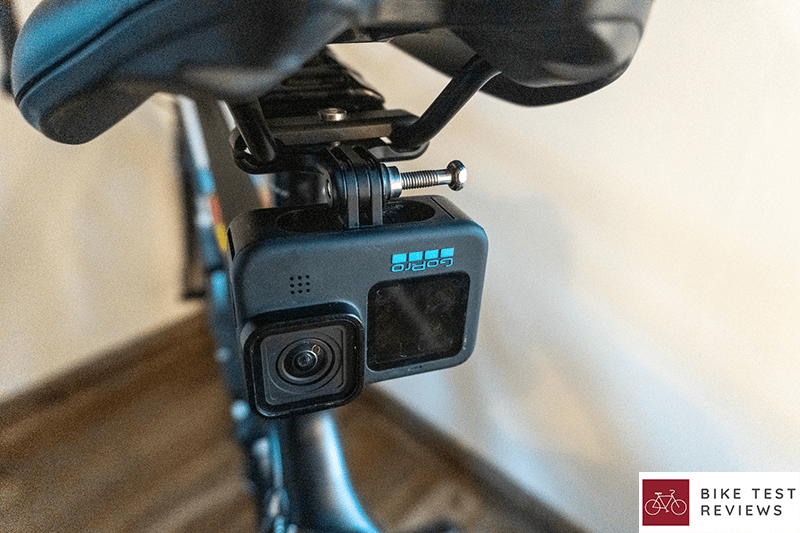
GoPro Pro Seat Rail Mount
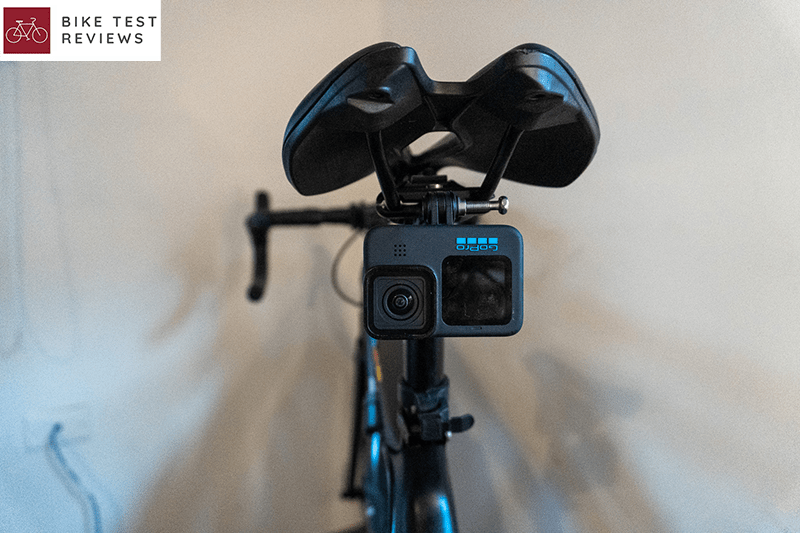
This is a rear view mount that clamps onto the seat rail. This bike mount is ideal if you want a third-person smooth rear POV shot you can “set and forget“.
The installation is straightforward, involving two aluminum mounts and a screw that binds them together, offering optimal stability and a broad rear POV angle. The included Allen key helps tighten the aluminum parts. Once done, mount your GoPro and you’re set to record!
From this mount, you can capture low-angle rear POV shots that include the terrain and your riding buddies trailing behind you. Noted for its exceptional stability, this aluminum, off-road bike mount performs admirably, even on the roughest terrains.
You can capture immersive footage of debris scattering and your buddies riding chasing you without the fear of producing dark, shaky, or distorted MTB footage that can make your content irrelevant.
Be sure to set your GoPro the way you want it before you mount it since the mounting process can limit you from using it with your hands, and it blocks you from viewing the screen. Using the GoPro App can help you remotely adjust it.
Please note, this mount can interfere with the placement of a saddle bag and rear lights if not correctly positioned. Dropper seat posts may also make the GoPro touch the rear wheel.
A star key is required to install and remove the GoPro, so you better ensure that you have a compatible multitool. As a workaround, any GoPro thumb screw can replace it without using a specific tool.
This bike seat mount also works on the front side of the seat rail to get a top tube POV shot which can be more engaging since you can show what’s happening in the front.
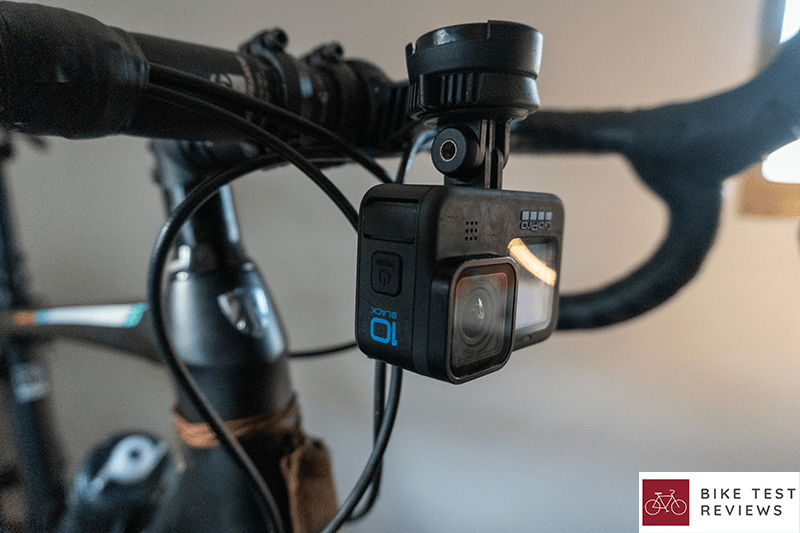
Out Front Mount
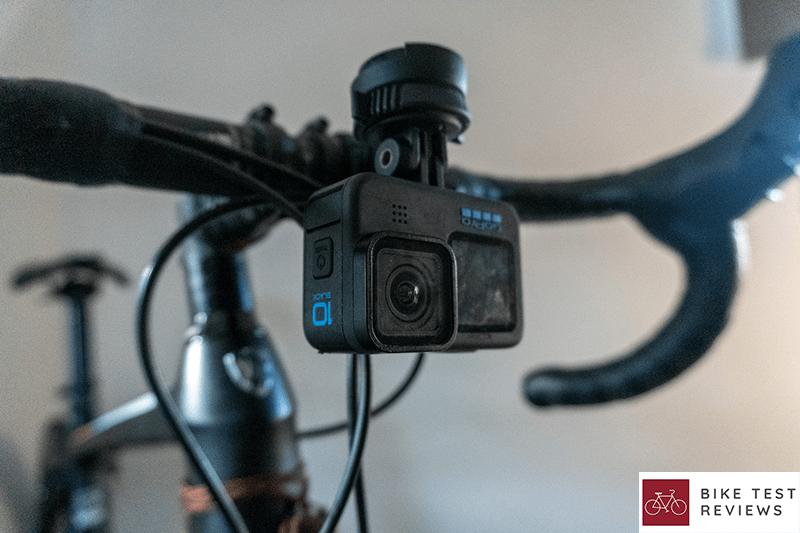
This alternative to a GoPro handlebar bike mount has no specific brand that sells it and may depend on the head unit of your preference. Whether you use a Garmin or Wahoo mount, you must buy the headlight and action camera-compatible model before you buy the standard handlebar mount that doesn’t include the adapter installed underneath it.
This off-road bike front mount offers the most impressive and user-friendly setup. Unlike the seat rail mount, this mount keeps the bike components like the handlebar or the cables out of the frame, resulting in a cleaner, smoother, and more immersive angle.
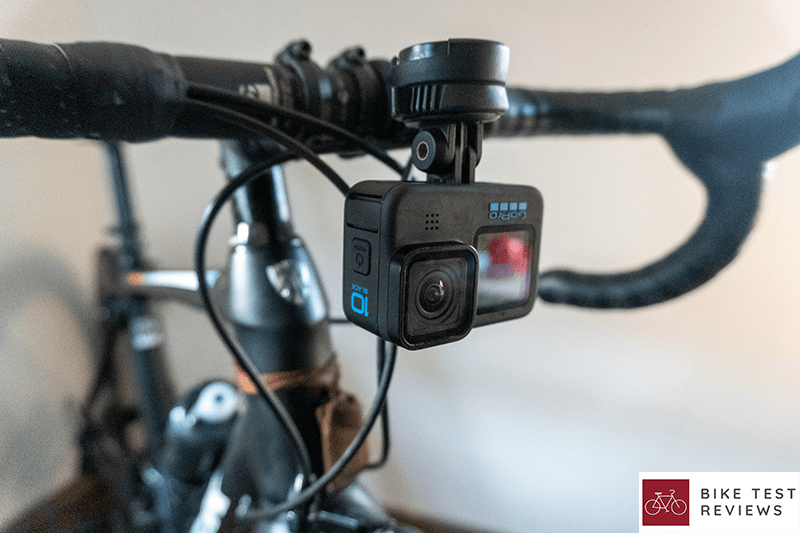
It’s less intrusive since you can manually adjust the GoPro’s angle and recording settings. This setup lets you pause or resume the recording without fumbling it from behind, and you can capture the front side where most of the action shots happen.
The stabilization from plastic mounts like the Garmin mount might be compromised depending on the terrain, and it can shift the GoPro’s position depending on how technical the trail can get. Third-party brands like K-Edge offer Wahoo and Garmin-compatible models made from plastic, aluminum, and carbon to stabilize the GoPro, with the plastic mount being the least stable mount and the carbon mount being the lightest and most stable mount.
The mount adapter can damage itself and the GoPro if it’s unaligned with the holes and the gaps. The mount’s screws don’t work well with the plastic from the base and can weaken the mount base and make even bigger holes each time you screw the bolt. My impatience and lack of proper installation have made my out-front mount base unstable, and I need to get a replacement since the adapter is no longer fitting well.
Of course, the mount’s bolt screws are easy to lose if not taken care of. I’ve already lost two and replaced them with the GoPro’s thumbscrews.
Unlike the seat rail mount, this front mount’s angle may be too low and may not have the best front angle to record things like the rider’s passing in front. There are other solutions, like a handlebar mount that puts the GoPro directly on top of the handlebar, which can add more clutter to the handlebar setup.
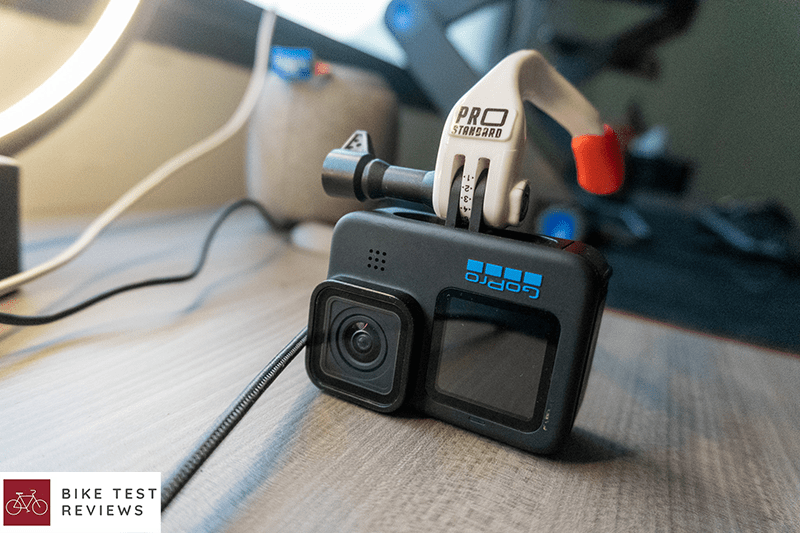
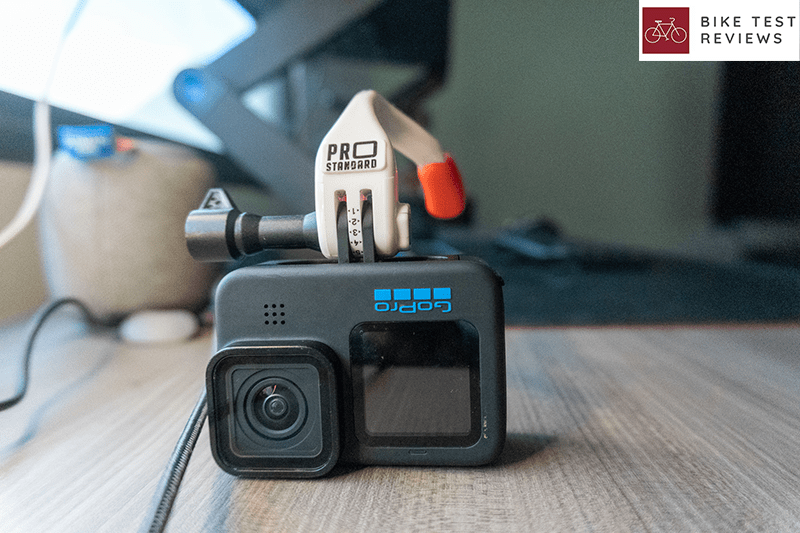
Pro Standard Grill Mount
The Pro Standard has created a unique mounting solution with their bite mount that, unlike the other GoPro bike mounts, requires no direct installation to your mountain bike.
This bike mount mainly works by biting the mouthpiece, resulting in a first-person POV shot that shows you riding from the handlebars. Its modularity makes it unique since you can quickly use it in three main ways: a first-person POV shot that resembles the full-face helmet cam, a tripod, and handheld mode.
The rail and front MTB mounts are an ideal one-off solution; but inconvenient when switching to different angles since they require an Allen Key to remove your GoPro.
With the Grill Mount, you can always move the GoPro with your arms at whichever angle you want for recording without requiring a specific tool. You’ll realize that the selfies look much better since the Grill Mount make them look more natural.
The plastic body of the grill mount can easily break if you excessively tighten the thumbscrew; fortunately, the warranty policy can send you a new Grill mount for free. The biting can also numb your teeth if you’re riding on rough terrains, so be mindful of how long you use this mouthpiece.
It’s the bulkiest mount of the three that can be a hassle to store while riding, be careful when putting it away.
For those who like vertical shots, we recommend getting the Sky FFJ vertical mount rig that attaches to the Grill Mount for a lower and vertical field of view of your handlebars and the terrain.
Revisiting The Classic Chest Mount & Top 3 GoPro Chest Mounts
GoPro Chest Mount Harness
 - Official GoPro Mount")
The GoPro Chesty Mountain Bike Mount is the most frequented mounting option for mountain bikers. It is the most immersive and hands-free mount to show how rough and rocky your mountain biking ride was.
However, most people realize their chest mount shots look too shaky and leave their mountain bikes out of frame. It is frustrating, but once you know how to get the baseline video resolution adjustments for the chest mount and set your GoPro angle, you’ll capture very stable and engaging first-person POV photos and videos from behind your handlebars.
The first iteration of the GoPro Chest Mount was the most budget-friendly but distrustful mountain bike mount option. It had an inconvenient strap that would stretch and weaken the fabric faster than you think. In addition, you had to secure it with the backpack clips to keep the chesty mount firm to your torso to avoid shaky footage, and it had no internal padding that would feel uncomfortable when pressed against your chest.
If you didn’t have a J-Hook that would get you a 45-degree GoPro mounting angle, the GoPro wouldn’t mount well, leaving you with only an obsolete shot pointing to the top tube.
The renewed Chesty mount overhauled the mounting system, making it a more stretch-resistant and decluttered chest mount. Place your GoPro at a 45-degree angle to get stable to get the ideal footage, a simple solution.
Unlike the previous chest mount that includes a closing clip, this version is slid on top of your head and then to your chest to avoid stretching it. It’s the go-to chest mount that’s well-padded and properly ventilated that GoPro urged renewing.
As a pro tip, you can mount the chest piece to your back instead for a high-angle rear shot. Use the GoPro App to get the right angle and do your best to remain in the same riding position.
Stuntman Chest Mount

The Stuntman Chest Harness is a more secure and technical mountain bike chest mount for professional filmmaking. The manufacturer focuses on developing body mounts for the heaviest action cameras.
Their chest mount avoids the constant flapping from the GoPro’s weight pulling the chest piece away from the chest.
It features the most stretch-resistant fabric, and the chest piece’s concave shape stays distant from the chest to avoid sweating. It can be overkill since most GoPro these days are light, and it works better with a three-axis gimbal at the expense of a cluttered and, at times, excessively tight strap that’d put a toll on your upper body, but records the smoothest shots you can imagine.
USWE Action Camera Harness

USWE Action Camera Harness mounts directly to their backpacks to have a more streamlined mounting system. This brand is renowned for bounce-free mountain biking bags and avoids the chesty layering process required when using separate brands.
They’re well-padded and easily connect with the backpack to ensure comfort when pressed against your body. Our only concern is that it only works with their mountain biking backpacks.
Troubleshooting The Footage Resolution
Regardless of the mountain bike mount of preference, your video settings can make or break your footage quality. When it comes to the GoPro position and angle, always put your GoPro at a 45-degree angle to ensure consistent framing, and consider using a J-Hook to mount the camera.
Assuming you have a GoPro Hero 10 or 11, set your resolution to 1080p or 4K at 24 FPS with the Hyperboost set to Boost. For the field of view, set at Wide 16-34mm and the Lens set to Super View.
Set the Bit Rate at High and ISO Minimum and Maximum at their lowest and highest, respectively. You’ll get Super Smooth and cinematic footage.
Regarding the Photos, set your Lens to Wide, OutPut to Super Photo, and Sharpness to Low.
Conclusion
Regardless of the mountain bike mount you choose, your photos and videos are guaranteed to become more immersive. These off-road specific mounts offer dynamic angles for your footage, elevating your edits to a whole new level.
With an investment of less than $50 each, these mounts can withstand various riding conditions, providing the smoothest hands-free footage. It’s essential to remember that removing your hands from the handlebars to record yourself can be dangerous while on a mountain bike trail.
If we could only choose one mountain bike mount, we’d certainly go for The Pro Standard Grill Mount for its versatility and ease of use. It’s the least complicated mount to install that replicates the majority of the mentioned mountain bike mounts, and I rarely remove it from my GoPro since it does everything I need when I’m on and off my bike.
I cannot emphasize enough the importance of adjusting video settings appropriately before mounting your camera. Even with the perfect mount, if your video settings are incorrect, your shots could turn out poorly.
Record as much as you can from various bike angles and combine these shots. This method will yield a dynamic video, capturing the action from your ride in a more immersive and visually appealing way.

Armando is an avid cyclist who enjoys the freedom of exploring and documenting his experiences on his bike. Whether it’s through photography, videography, or writing, he’s always looking for ways to share his experiences. In his free time, you can find him watching mountain bike videos to reiterate his love for cycling!

