Introduction
Whether you’re a mountain biker or a road biker, it’s fundamental to understand what is good tire pressure. A poorly adjusted tire pressure inadequate tire pressure can compromise your safety, leading to low traction, inconsistent tire rotation, and non-existent rolling resistance. Moreover, it can result in an unresponsive tire that is prone to pinching or causing unexpected tumbles from your bike.
In this article we’ll list a set of bike tire tips to learn to check the pressure so you can tap into the tire’s true potential.
We’ll focus primarily on how you can perform a tire “pulse-check” so you don’t rely on a bike tire pressure gauge to dictate your perception of how flat or firm the tires are. Sometimes the simple solutions may involve only using what you currently have.
By keeping these tips in mind, you’ll become a way savvier cyclist, no matter if you’re tearing up the tarmac or cruising down a backwoods trail, and regardless of the time of year.
The Visual Tire Assessment Approach
This is a straightforward method to understand the ideal bike tire pressure and to discern which tire is more firmly in contact with the ground. Various factors such as the pressure you exert, temperature, and even the condition of the valve can cause your tires to appear somewhat uneven.
The optimal strategy usually involves keeping the front tire of a mountain bike slightly less inflated than the rear tire, with the reverse being true for road bikes.
It’s crucial to check the pressure of your tires if they have been unchecked for a considerable length of time. Observing the pressure at a later stage can give you a clearer insight into their current state and can even guide you towards a more effective tire pressure setup.
Personal experiences often highlight these points. For instance, I once overinflated my tires, left them for a week, and then noticed the diminished ride quality, as the bike felt unnervingly rigid.
This led to trail rides where my bike felt detached from the terrain and road bike rides where my brakes struggled to grip the road on descents, due to the tires being so hard that they merely skidded along the pavement.
The Human Pressure Pressure Gauge Approach
It’s the bike tire pressure method that’s incorrectly done the most. Most riders tend to wing it by applying uneven pressure to the side walls with their fingers and get a vague idea of how plush it feels.
The main issue with this method is the air pressure point shifts as soon as the rider gets on the bike. We can improve this in two different ways.
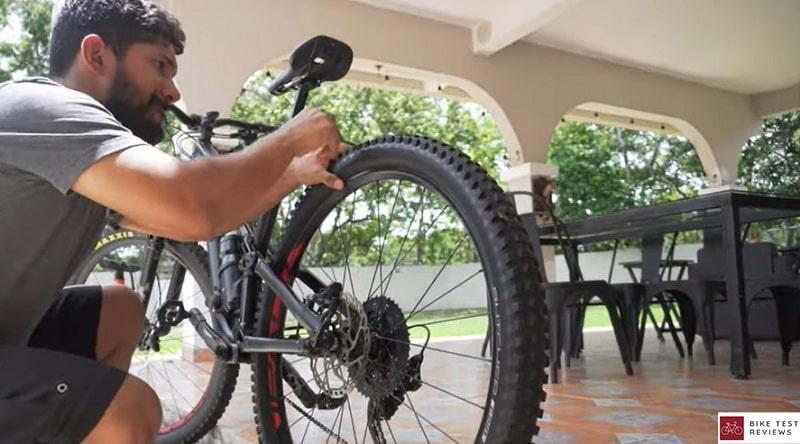
Place your four fingers on one side of the tire and put your two thumbs on the other tire side to know where to find the bike tire pressure points.[2]
Additionally, test the pressure from your thumbs in the different parts they can reach within the same area to get a better feel of the air distribution to the sides of the walls. You can repeat the same process as you rotate the bike tire.
Use a flat object, like a bike tire lever or your index finger, place it on top of the tire, and with the opposite hand, push the tire downwards. The object will let you know how deep a specific area of your tire goes, and it translates to the debris or rocks that pin an exact part of the tire each time it rotates.
The tire should feel plush enough to let objects through with enough tire resistance to avoid pinching it.
The Bike Frame Approach
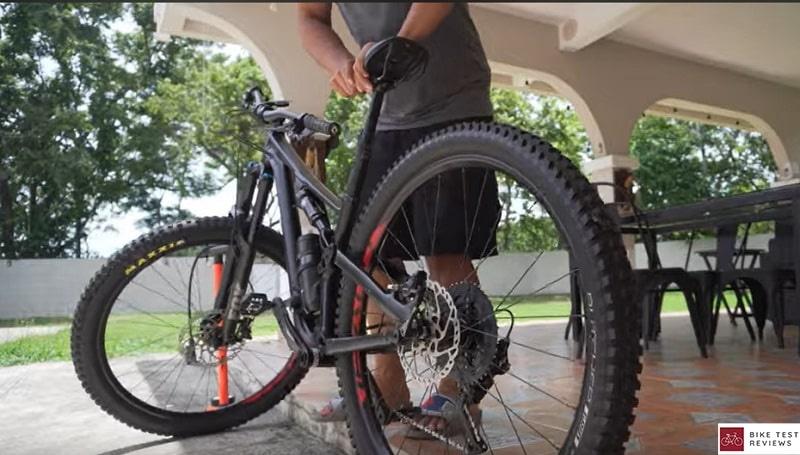
This testing method only requires the bike frame. Regardless if your bike has a suspension or if it’s a rigid road bike, test each bike tire by pressing down by the closest bike part and examine the tire rebound to see how it molds each time you push down and how it returns to its original shape once you release it.
It gives you an idea of how to check the bike tire pressure received from the bike’s contact points. Mountain bikers may realize that the tire compression allows the tire knobs to make complete ground contact when climbing or descending better. Road cyclists may need a higher tire pressure to roll faster without compromising the lack of a suspension.
Understanding what bike tire pressure works best allows us to adapt to the constant tire rotation that affects the bike’s rolling resistance. The ever-changing forward motion can reshape the tires, the bike frame, and position, and it should reposition to its original shape regardless of the conditions.
Baseline Measurements and Alternative Tools
If you’re more comfortable working with ballpark figures, there are some standard tire pressure values that could serve as starting points.
For mountain bikes, you might start with a tire pressure around 28 to 30 PSI, typically lower in the front tire to maximize grip and shock absorption, and slightly higher in the rear to better support weight distribution and reduce the risk of pinch flats.
However, these are merely starting points, and the optimal pressure can vary based on factors such as rider weight, tire type, and trail conditions.
For road bikes, a general guideline suggests a tire pressure range of 85 to 90 PSI, typically higher in the rear tire to support the majority of a rider’s weight. This helps maintain stability, particularly when braking, and can prevent scenarios where an uneven distribution of pressure might lead to tipping over the handlebars. Remember, these figures are starting points, and the ideal pressure can vary based on factors such as rider weight, tire type, and road conditions.
If you like to set your baseline measure, here’s a bike tire pressure calculator to know your PSI levels by weight.
Tools like the TOPEAK Smart Gauge D2 attaches to the valve and provide an exact F that you can use before any ride. It’s an upgrade you can get once you know by experience your ideal bike tire pressure.[3]
Conclusion
Dialing the optimal tire pressure is a long-term endeavor. We’ll provide a body weight scale to have a rough estimate of where to start. It’s a free upgrade that can bring any bike back to life.[1]
Your bike and your body will thank you as it’ll be plush enough to move faster and overcome any obstacle exhausting you, and you’ll become a highly aware rider under any conditions.
References
- Body Weight Scale For Tire Pressure Video Explainer (https://youtu.be/2R-UevODgYI?t=109)
- Hand Pressure Gauge For Bikes (https://youtu.be/AK_ezW16aTM?t=62)
- Topeak SmartGauge D2 (https://www.topeak.com/global/en/product/351-SMARTGAUGE-D2)

Armando is an avid cyclist who enjoys the freedom of exploring and documenting his experiences on his bike. Whether it’s through photography, videography, or writing, he’s always looking for ways to share his experiences. In his free time, you can find him watching mountain bike videos to reiterate his love for cycling!

